This text effect tutorial will take you through the process of creating a transparent text using Photoshop. I will use the Horizontal type tool and Free Transform command that comes with Photoshop. Let's get started!
1. Open an Image File
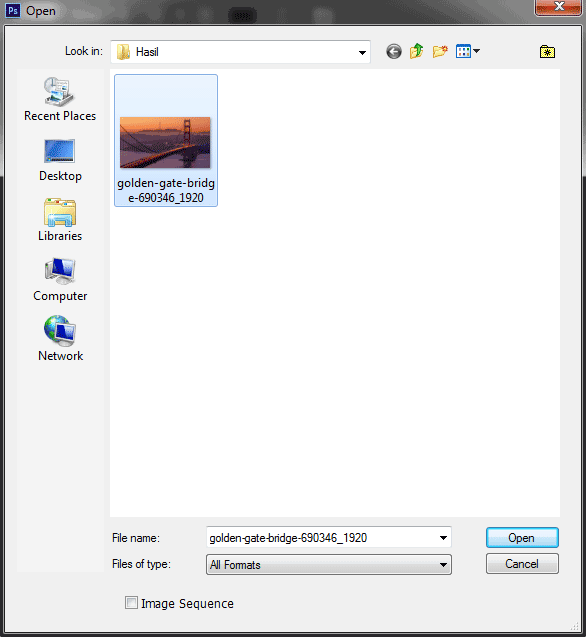
Choose File>Open (or Ctrl+O) to Open up your base image in Adobe Photoshop.
In the standard Open dialog box, navigate to the folder that contains your file then select the name of the file you want to open.
Click Open.
In the standard Open dialog box, navigate to the folder that contains your file then select the name of the file you want to open.
Click Open.
For this Photoshop Tutorial, I'll use this image, golden-gate-bridge-690346_1920, downloaded from Pixabay.
2. Create a New Layer
Create a new layer for our transparent text by choosing Layer>New>Layer (or Shift+Ctrl+N).
In the New Layer dialog box, leave the default settings and click OK.
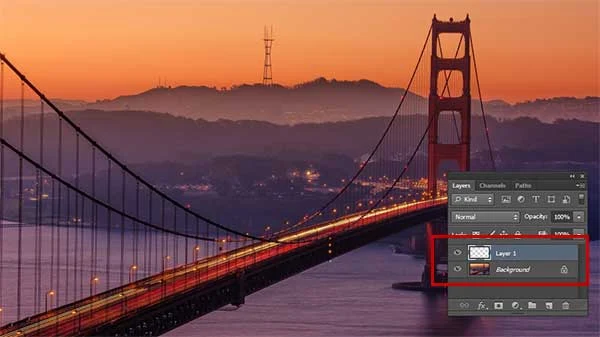
In the Layers panel, a layer with the default name of Layer 1 appears above the Background layer.
In the New Layer dialog box, leave the default settings and click OK.
In the Layers panel, a layer with the default name of Layer 1 appears above the Background layer.
3. Fill The New Layer with a Color
We will fill the entire new layer with a color.
Select Layer 1 in the Layers panel.
Choose a foreground or background color by clicking on the foreground/background box.
In the Color Picker dialog, choose a color you like then click OK.
Select Layer 1 in the Layers panel.
Choose a foreground or background color by clicking on the foreground/background box.
In the Color Picker dialog, choose a color you like then click OK.
Choose Edit>Fill (or Shift+F5).
In the Fill dialog box, under Contents, you can select whether to fill with the foreground or the background color.
Click OK.
Now, the color that you choose fills the layer.
In the Fill dialog box, under Contents, you can select whether to fill with the foreground or the background color.
Click OK.
Now, the color that you choose fills the layer.
4. Change Layer Size Using Free Transform
Make sure Layer 1 is selected. Choose Edit>Free Transform (or Ctrl+T).
A bounding box surrounds the contents of your layer.
It has four control points on corners, four control points on sides and the rotation center at the middle.
You can now edit the layer as follows:
A bounding box surrounds the contents of your layer.
It has four control points on corners, four control points on sides and the rotation center at the middle.
You can now edit the layer as follows:
- To move layer: Drag inside the rectangle.
- To rotate layer: Drag outside the rectangle's corner.
- To change layer's size: Drag its corners.
- To Scale horizontally or vertically: Drag its sides.
- When finished, click the Commit button on the Options bar or you can just press Ctrl+Enter.
5. Choose the Horizontal Type Tool
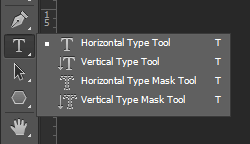
Select the Horizontal Type tool from the Tools panel (or press T).
Press Shift+T to cycle through the four available type tools until the one you want is active.
Your cursor will look like an I-beam, similar to the one you see in a word processing program.
Select type Options, such as font, style, size, and color, in the tool Options bar.
Press Shift+T to cycle through the four available type tools until the one you want is active.
Your cursor will look like an I-beam, similar to the one you see in a word processing program.
Select type Options, such as font, style, size, and color, in the tool Options bar.
6. Type text on Document
Click on the part of your image where you want to add text in Photoshop. Enter your text.
To start a new paragraph, press Enter.
When finished, click the Commit button on the Options bar or you can just press Ctrl+Enter.
Photoshop creates a new type layer.
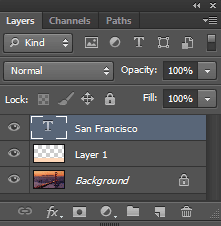
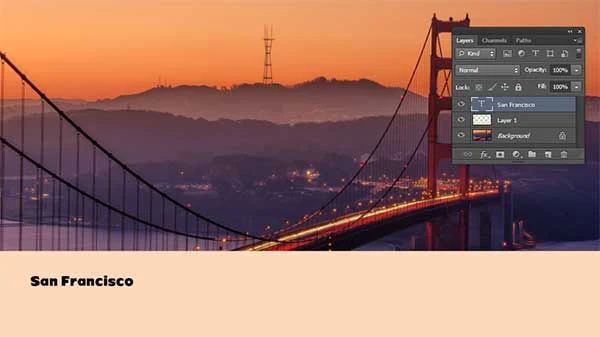
Now we have three layers, Background, Layer 1 and the type layer.
To start a new paragraph, press Enter.
When finished, click the Commit button on the Options bar or you can just press Ctrl+Enter.
Photoshop creates a new type layer.
Now we have three layers, Background, Layer 1 and the type layer.
7. Adjust Text Size Using Free Transform
Make sure the type layer is selected. Choose Edit>Free Transform (or Ctrl+T).
A bounding box surrounds the contents of your text.
It has four control points on corners, four control points on sides and the rotation center at the middle.
You can now edit the text as follows:
A bounding box surrounds the contents of your text.
It has four control points on corners, four control points on sides and the rotation center at the middle.
You can now edit the text as follows:
- To move text: Drag inside the rectangle.
- To rotate text: Drag outside the rectangle's corner.
- To change text's size: Drag its corners.
- To Scale horizontally or vertically: Drag its sides.
- When finished, click the Commit button on the Options bar or you can just press Ctrl+Enter.
8. Make a Selection Around the Text
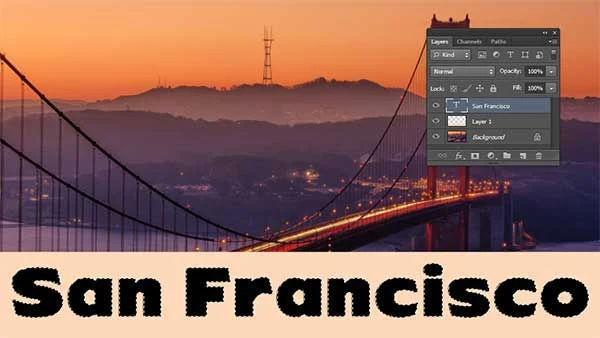
Make a selection around the text by simply hold the Ctrl key and click on the icon of the Type layer in the Layers panel.
You'll see marching ants around your type.
Photoshop loads selection outlines that correspond to the shape of your type.
You'll see marching ants around your type.
Photoshop loads selection outlines that correspond to the shape of your type.
9. Delete The Text
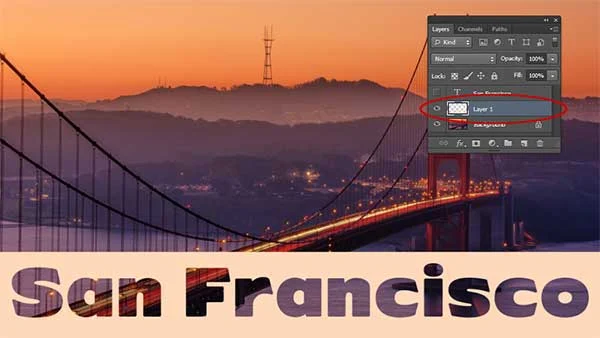
Now you can hide the Type layer by clicking on the eye icon.
Select Layer 1 and press Delete Button.
There you have it! Transparent text using Photoshop.
Remove the selection by choosing Select>Deselect (or Ctrl+D).
Select Layer 1 and press Delete Button.
There you have it! Transparent text using Photoshop.
Remove the selection by choosing Select>Deselect (or Ctrl+D).
10. Save Document
Choose File>Save (or Ctrl+S) to save your project file.
In the Save As dialog box, navigate to the folder where you want to store the file.
Type a name in the File Name text box and leave the default Photoshop (*.PSD;*.PDD) format.
Click Save to store the image.
In the Save As dialog box, navigate to the folder where you want to store the file.
Type a name in the File Name text box and leave the default Photoshop (*.PSD;*.PDD) format.
Click Save to store the image.
Once you have finished, you will probably also want to use File>Save As (Shift+Ctrl+S) to export the image in a more widely used format, such as JPEG, PNG, TIFF, etc.
And here is the result:
Creating Transparent text in Photoshop.









No comments:
Post a Comment