Photoshop is a picture editing application available in Windows operating system and MacOS. Photoshop was developed in 1987 by two brothers Thomas Knoll and Jhon Knoll. Later, they sold Photoshop licenses to the Adobe Systems Incorporate company in 1988.
Photoshop is able to create and edit raster images with multiple layers and supports mask, alpha compositing, and several color models such as RGB, CMYK, CIELAB, spot color, and duotone. Photoshop also support many other graphic formats.
You can download the trial version of Photoshop CC on the Adobe Photoshop site.
Here is a list of Photoshop tutorials, a picture editing application available for MacOS and Windows operating system.
If you liked my tutorials, please subscribe to my YouTube channel - JTSGraph.
Page 1 2 3 4 5 6
In this tutorial, we will be creating a stunning Multiple Frames Photoshop Collage Template (PSD) with 20 squares.
A triptych collage is a collage art that is divided into three sections. In this tutorial you’ll learn how to make a vertical Triptych photo collage template in Photoshop using Rounded Rectangle Tool.
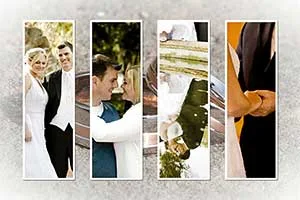
Learn how to make a Wedding Photo Collage Template in Photoshop with a four-panel shape. First, create a new document as a template so that we can reuse this document over and over, then display a grid to make it easier to create panel shapes. Next is to make a shape using four rounded rectangle tool. Finally, copy your photo just above the shape layer then create a clipping mask.
Learn How to Create a Silhouette Poster in Photoshop. Here's a tutorial on how to make a silhouette poster in Photoshop. The first step to do is make a selection on the main photo, give it a refine edge, then give it a mask. Next place the photos into the selection area using the File>Place command. Then merge all the photos into a layer so we can easily manage them. Give a clipping mask on the merged layer. The next step is quite easy, namely adding a texture photo, adding text, and finally adding a shadow or outer glow style both on the main photo and on the text.
Learn how to make a Photo Collage with Polaroid Effect in Photoshop. We will use the rectangle marquee tool selection tool. To form a photo frame, create a frame-shaped selection on a separate layer, then fill the border with white. Then give an emboss or drop shadow style. Adjust its position in the photo using Free Transform. Next we just need to duplicate the layers of the frame and adjust each position using Free Transform. As for the background, you can choose a table photo or just create an empty layer and fill it with black.
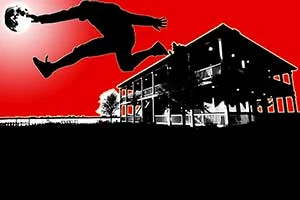
Here's a tutorial on how to create a silhouette in Photoshop. In this tutorial I will create a silhouette of a person jumping with a house and a full moon as the background. The trick is to select the photo and then fill it with black. If you want a silhouette that still has texture, then the option is to use the Image>Adjustments>Threshold command.
Learn How To Make Graffiti Text Effect in Photoshop. Here's a tutorial How to Make Graffiti With Photoshop. After writing text on the wall texture, you can style the text. For 3-dimensional effects can be created by using the Move Tool. By pressing the Alt key and arrow keys simultaneously and repeatedly, we will get a 3-dimensional writing effect. And finally, for the blending mode we will use the Style blending options so that the font color we choose does not change.
Learn How to Create Vexel Art Portraits in Photoshop using the Artistic Poster Edges filter. The Vexel art effect is a raster-based image that attempts to mimic vector-based graphics. The term vexel itself comes from the words "vector" and "pixel". We can turn a photo into vexel art using a selection tool like the Pen Tool. But the method is quite difficult because it requires expertise using the Pen Tool.
Learn How To make a Lightsaber Effect in Photoshop. The technique is simple, which is to hide the blade using masking then create a glow effect using the brush tool, and finally give it an outer glow style.
Learn How to Add Fireworks to a Photo in Photoshop. The method is the same as how to add a photo fire effect, which is to place the fireworks photo using the File>Place command, set it using Free Transform, change the blend mode to Lighten, and if needed, adjust the light level using Curves. In addition we can duplicate the fireworks layer to create a shadow effect of the fireworks in the water, flip vertical, give it a gaussian blur and motion blur, and finally adjust the lighting using Curves.
Learn How To make a Face in Typography using Photoshop. The method used here is to make a selection using the Select>Color Range command. Make a selection of Shadows, Midtones, and Hightlights using the Color Range, then make each a separate layer. The three are then copied to the text layer using a Mask in order to obtain a face shape based on the Color Range selection.
Learn how to make a Watercolor Effect in Photoshop using Blend Modes. We can create a watercolor effect by mixing watercolor texture files and blending them into our photos using their respective blending modes. To add a texture file can be done by copying and pasting or you can use the File>Place command. To adjust the position and size of the texture on the canvas, you can use the Free Transform command.
Learn how to make a Gel Text Effect In Photoshop. The first step is to create the text using the Horizontal Type Tool. We recommend choosing a bold / large font. Then set the Fill of the text layer to zero percent so that the text is transparent. Next we apply Bevel & Emboss, Color Overlay and Drop Shadow to the text. Because it will apply colored jelly, change the background that we use to RGB color mode.
Learn how to create a Chocolate Text Effect in Photoshop. Photoshop has many patterns that can be applied to text, one of which is the waffle pattern. By giving it a brown color, we can use the waffle pattern to give a touch of chocolate effect. To apply a pattern, you should choose a wide font so that the pattern in it can be seen clearly. Meanwhile, to style the text, we can use Bevel & Emboss, Texture and Stroke effects.
Learn How to Create an Underwater Text Effect in Photoshop. Give the text layer a hard light blend mode so that it looks like it blends with the water. Meanwhile, to create the effect of writing that ripples following the ripples of water, you can use the displacement filter. The way to apply displacement is by duplicating the water/background texture layer, desaturating it and adding a blur filter. Save this blur layer into a photoshop document file with the name displacement.PSD. Next apply this displacement file to the posts.
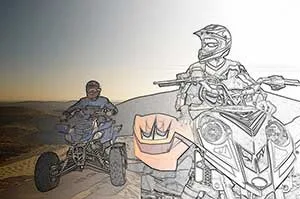
Learn How to Blend Effect with Background in Photoshop. The following will explain how to mix Photoshop sketch effects with backgrounds so that you get a transition effect from the original photo to the sketch. The simple way is to create a layer for transitions and a layer for sketches. And between the background which is the original photo with the transition layer, we create a new layer for applying the gradient.
Learn How to Make Realistic Dew in Photoshop. Dew effect in Photoshop can be done using the Elliptical Marquee Tool. Drop shadow and inner shadow styles were added to give a convex effect. So that the color of the dew looks clear, blending with the color of the leaves, you can use an overlay blend mode. The dew light reflection effect can be created using the brush tool. It's best if the dew and light reflection effects are created in separate layers.
Learn How To Create An X-Ray Image Effect In Photoshop. In medical science, x-rays are commonly used to see the condition of human bones without the need for surgery. People know it by the name of the X-ray photo. To do this, make a selection on the bone, separate the selection into separate layers, make the background of the X-ray photo black, inversion of the bone skeleton, desaturate the bone color and finally adjust the Hue, Saturation and lightness of the X-ray color (usually blue or green).
Learn how to make a Vintage Old Photo Effect in Photoshop. The trick is to give a sepia color to the photo using a gradient map. This way, the sepia color will be applied to a separate layer so it doesn't spoil your original photo. The last step is to change the gradient map's blend mode from normal to color.
Learn How to Make a Carve Wood Effect in Photoshop. Make a selection of our portrait photo then fill the selection using black with softlight blend mode so that the color blends with the wood color. As for the sculptural effect, Bevel & Emboss can be used. To make the selection of portraits easier, we will use a selection using channels. So we first change the portrait photo to black and white and apply a sketch> photocopy filter. This way it will be easy for the channel to read the black and white lines in the portrait to turn into a selection.
Learn How to Create a Realistic Cloud Text Effect in Photoshop. First of all we write the text on the canvas. We then change the text selection into a work path. The next step is to make the Brush Tool settings so that the brush shape resembles a cloud shape. The final step is to create a stroke path from our text work path using a Brush. We can copy and paste this cloud writing into the photo we want.
Learn How to Create a Silky Water Effect in Photoshop. To produce the Silky Water effect using Photoshop, the basic idea is to use a motion blur filter to blur the water flow. If the water flow is in the same direction, it will be easy to blur. But if the water flow has a different direction, then we have to make a selection on small parts of the water flow. So that we can provide motion blur filters more accurately.
Learn How to Create a Bokeh Effect in Photoshop. Here two layers are created for the bokeh effect. Each will be given a different gaussian blur filter. The goal is to get a bokeh effect with different light depths. Also given a Lightness setting, so that the photo background is not too bright. For the Brush Tool, there are settings for the brush panel, namely Shape Dynamic and Color Dynamic. With these settings the brush size and color will change dynamically. So we don't need to change it manually.
Learn How to Create a Pinhole Effect in Photoshop. Pinhole cameras do not have a lens, but only have a hole for light to enter. The photos from the pinhole camera are very distorted, blurry, only black and white with a vignette effect around the photo. In order to more freely adjust the vignette effect, we will create it manually by doing an ellipse-shaped selection, inversion of the selection, then giving it a black color and giving a blur filter.
Learn how to create a postage stamp in photoshop. As we know, the series of stamps issued by the Government always displays interesting pictures. Such as landscape photos, Hero photos, graphic designs or paintings. Stamps are a work of art that combines photography and text with a specific purpose. We will try to create a postage stamp design using Photoshop. Using only the Eraser Tool and a little extra Style we can create a Stamp Effect.
In this tutorial I will create a Rubber Stamp Effect with Photoshop. The key to the stamp effect is the use of circular paths to help us arrange circular text. The first step, we make a circular selection using the Elliptical Marquee Tool then we give it a stroke. The next step is to create a circular path inside the circle to help us in writing the text. The final step is to give the ink burst effect using filter brush strokes and an additional outer glow style.
Learn how to make a textured vintage polaroid photo collage in Photoshop. To form a photo frame, we can use the Rectangular Marquee Tool which we then fill with white. Additional effects such as stacks of polaroid photos can be done by duplicating the layer and adjusting it using Free Transform.
Here's a tutorial on the multiple exposure effect in Photoshop. Namely giving the effect of color and light differences in the shadows of our portrait photos. To adjust the color difference, we can use a gradient map or if you want it easier, you can use Hue/Saturation. Curves are used to adjust the brightness of the light. To apply hue/saturation and curves, we recommend using an adjustment layer so it doesn't damage our photo. The next step is to make the three layers into one group, then duplicate the group. Each group we set the value of hue / saturation respectively in order to obtain a different color.
Here's a tutorial on how to create a lightning effect in Photoshop. Create an irregular line shape using the gradient that we applied to the layer to which the cloud filter has been applied. Irregular lines will form following the shape of the filter clouds. After obtaining the shape of an irregular line, then just adjust it using adjustments. The next step, of course, is to add the lightning to the photo we want. The final step is to change the blend mode from normal to Screen and adjust the size and position on the photo using the Free Transform command.

Learn how to make a fire effect in Photoshop. How to use the command File>Place fire photos to the main photo. Next the size and position are set using the Free Transform command. So that the fire photo can look together, use the Lighten blend mode for the fire. And to make it easier to adjust this fire effect, it is necessary to prepare photos of variations in the shape of the flames and photos of variations in the shape of smoke. The final step is to give the effect of hot steam around the flames using a Glass Filter.
92. Wrap Text Around Any Image in Photoshop
Here's a tutorial on how to Wrap Text Around Any Image in Photoshop. It's not that hard to add text to photos in Photoshop. Just use the Horizontal Type Tool then type the text on the photo. But what if we want text to be able to "wrap" by not covering certain image areas like the text wrap feature in Microsoft Word's word processor? Photoshop does not have a text wrap feature. But we can outsmart it by using the Rectangle Tool combined with the Ellipse Tool. With the subtract from area function we can have a wrap feature on the text.

Here's a tutorial on how to Wrap Text Around Any Image in Photoshop. It's not that hard to add text to photos in Photoshop. Just use the Horizontal Type Tool then type the text on the photo. But what if we want text to be able to "wrap" by not covering certain image areas like the text wrap feature in Microsoft Word's word processor? Photoshop does not have a text wrap feature. But we can outsmart it by using the Rectangle Tool combined with the Ellipse Tool. With the subtract from area function we can have a wrap feature on the text.

Tutorial on how to make a Letter/Alphabet/Alphabet photo collage using Photoshop. We will create a template using the contact sheet and fill in the photo using the File>Place command.

In this Photoshop tutorial will show you how easy it is to create a photo painting effect by simply applying the right filters and color blending modes to each layer. For best results, you should choose photos that do not have fine image details because to create this painting effect, filters will be used that reduce image detail. Also make sure the photos you choose have good color contrast.

In today's tutorial we'll learn, steps by steps, on how to place multipe images in text in Photoshop. Let's get started!
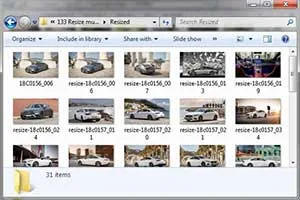
Learn how to use Batch Processing in Photoshop to resize multiple images at once. We will use an action to resize the image. We will start off with creating two folders to store the source and cropped images, copy images into the ‘SOURCE’ folder, recording an Action to resize the image, finally resizing images at once using File>Automate>Batch.

In today’s Photoshop tutorial we’ll learn how to make a photo collage number template in Photoshop fast and easy using Contact Sheet. We'll be using contact sheet to create a grid. Type a number, load selection and then create layer mask. You can insert images using File-Place, Clipping Mask and resize it using Free Transform.
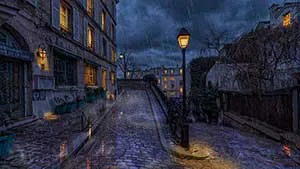
Learn how to turn a daytime into a rainy night in Photoshop from a given image. We'll use curves to create daytime scene, color lookup to create night scene, the Brush tool to create lights effect, noise and motion blur to create rain effect, and pastic wrap to create wet surfaces.
Learn how to create a Heart Collage in Photoshop from multiple images fast and easy.We'll
create an Actions to resize and crop image, Batch processing to resize
and crop images at once, create a Contact Sheet from multiple images,
and Custom Shape Tool to create a heart shaped.


