Paint.NET is a free photo editing software for desktop computers which running Windows operating systems. Originally, Paint.NET created as a replacement for the Microsoft Paint software which is default image processor app in Windows operating system. With an intuitive and innovative interface that supports Layers, unlimited undo, special effects, and many useful utilities, Paint.NET has evolved into a quality and powerful free photo editing tool.
You can download for free on the Paint.NET official site.
You can download for free on the Paint.NET official site.
Here is a list of Paint.NET tutorials, a free picture editing for windows operating system.
If you liked my tutorials, please subscribe to my YouTube channel - JTSGraph.

Learn how to make a Squares Grid photo collage in Paint.NET. We’ll be using the Shapes Tool to create the square shapes, the Move Selected Pixels to align the square in Canvas, and the Magic Wand Tool to create selection to help us inserting images.
14. Create a Kaleidoscope Effect in Paint.NET
In today's Paint.NET tutorial, I'll show you how to create a Kaleidoscope effect digitally from a given image. We'll start by drawing a rectangle selection, create a triangle image using the Rectangle Select Tool and the Delete key, duplicate, rotate and merging the image several times to form a kaleidoscope.
13. Add a Graphic Watermark to Images in Paint.NET
You can add a graphic watermark to your images using Layers>Import From Files.. command, resize the graphic using the Move Selected Pixels tool, adjust the position of the graphic using the Move Selected Pixels tool, and you can adjust its opacity in the Layers window. Here is a simple way to add a graphic watermark to an image in Paint.NET where the graphic remains editable.
12. Add a Text Watermark to Images in Paint NET
Adding a text watermark to images in Paint.net is very easy and quick. You can add a simple text watermark using the Text Tool, resize the text using the Move Selected Pixels tool, adjust the text position using the Move Selected Pixels tool, and you can alter its opacity on the Layers window.
11. Put An Image Inside Text in Paint.NET
This text effect tutorial will take you through the process of how to put an image inside text using Paint.NET. I will use the Text Tool to create the text on canvas, the Move Selected Pixels tool that comes with Paint.NET to move and resize the text, and the Magic Wand Tool to create a selection. Let’s get started!
The first step is to write text on the wall texture, give oil painting effect, give frosted glass effect that resemble handwriting spray paint, then doubled the text layer. We give the topmost text with Multiply blend mode and the bottom text with Overlay blend mode.
The Hair color is made on a separate layer with Overlay blending mode in order to blend with the photo on the background. Hair color changed by selecting color on the color palette then we brush the hair using Paintbrush.
Here is a tutorial how to make object reflection in Paint.NET. The trick is to duplicate layer, increase the size of the canvas, apply Flip Vertical on the reflection, applying a transparent gradient on the reflection and finally create a new layer for background.
To give reflection effect, we will use the Gradient Tool. To create text reflection, we can duplicate the text layer and then rotate it using Vertical Flip. We apply the gradient to the text reflection.
Only by adjusting adjustments Brightness / Contrast and then applying Photo Sharpen effect, photo quality problems can be solved or at least reduced.
The point is that we make the selection on the area that we want to remove using a selection tool, then we remove it using the Delete key keyboard, leaving a transparent background. Open a new background picture. Copy the main photo by choosing Edit> Select All then Edit> Paste Into New Layer.
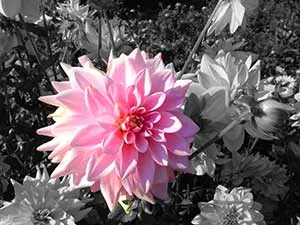
Although not as easy as using Photoshop, but the selection of a particular color using Paint.NET can be done with just a few steps, namely to duplicate layer, change the topmost layer to black and white and then remove the black and white on a particular object images using the Eraser Tool.
Over the following steps, I'll show you how to convert your picture into a sunset picture in Paint.NET. This technique will work with almost any day images. Even if you've never used Paint.NET, it will only take a few minutes to learn the basics and get started on your sunset.
An image produced by the tilt-shift lens will look like a miniature. In today's tutorial, I am going to take you through the process of creating a Tilt-Shift effect in Paint.NET. We will use built-in Paint.NET Gradient tool and Gaussian blur effect to produce a miniature effect.
We will begin by selecting our picture using Ellipse Select tool, invert the selection and then fill with black. Next, invert the selection once again and then go to Effects>Distort>Bulge. In the Bulge pop-up window, set the Bulge value to 100. Lastly, to get a nice fisheye effect, we must crop the picture to get a square picture.


