In this Text Effects tutorial, we're going to learn how to create a Neon text effect in Photoshop. We will use the Levels Adjustment layer to intensify the background image contrast, the Type Tool to type our text, Free Transform command to scale the type, Layer Style and Layer Mask that all comes with Photoshop.
1. Open a Background Image
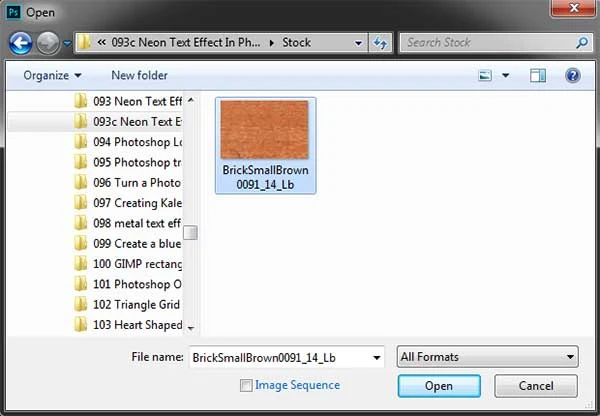
Choose File>Open (or press Ctrl+O) to open up your background image.
Navigate to the folder that contains your background image file then select the name of the file you want to open. Click Open.
For this Photoshop tutorial, I'll use this image, BrickSmallBrown0091_14, downloaded from CGtextures.
2. Duplicate Layer
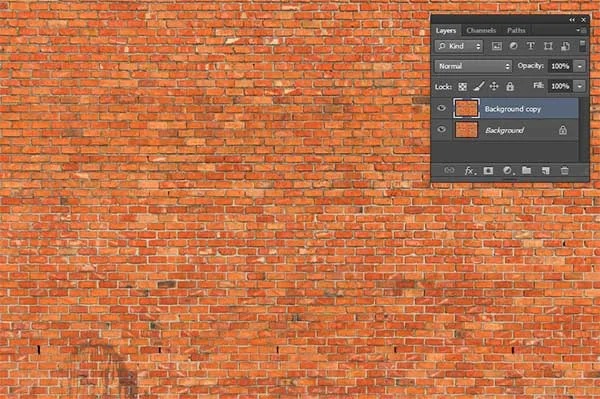
Duplicate the Background layer by going to Layer>Duplicate layer (or Ctrl+J).
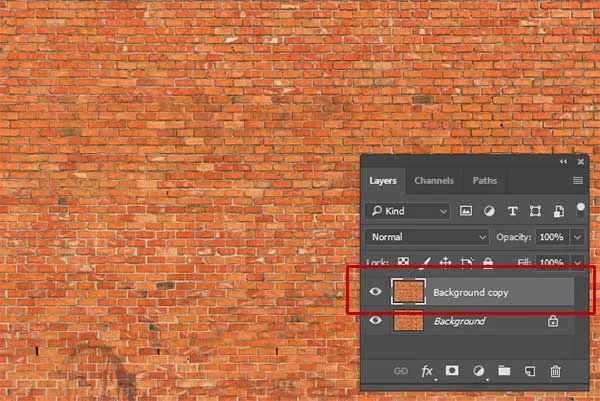
In the Layers panel, a duplicate layer with the default name of Background copy or Layer 1 appears above the Background layer.
3. Apply Levels Adjustment
Select the duplicate layer on the Layers panel (in this case the Background copy layer).
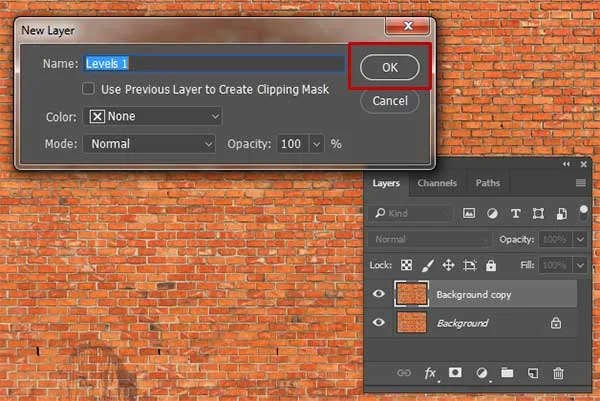
Go to Layer>New Adjustment Layer>Levels.
Click OK when the New Layer dialog box appears.
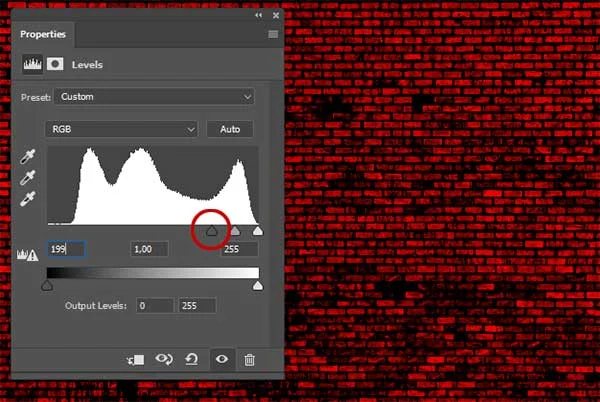
The Levels controls display on the Properties panel. Darken the shadows by moving the black input shadows slider (the left slider) to the right.
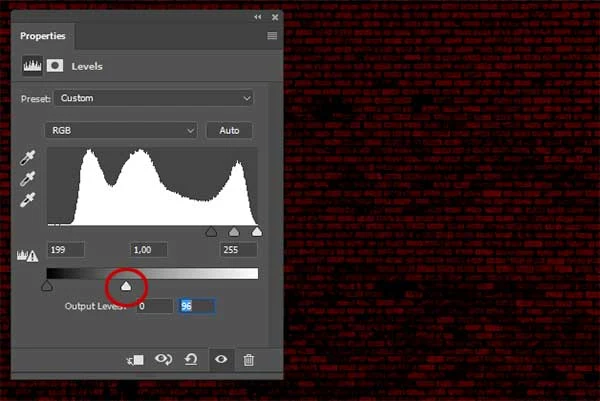
Darken the Output Highlights by moving the white output highlights slider (the right slider) to the left.
Click the clipping mask icon to clip the levels adjustment to the layer below it (not all layers below).
4. Type Your Desired Text
On the Options bar, choose a font family, choose a font style, choose or enter a font size.
Click the Text Color swatch then choose a color via the color picker or Swatches panel then click OK.
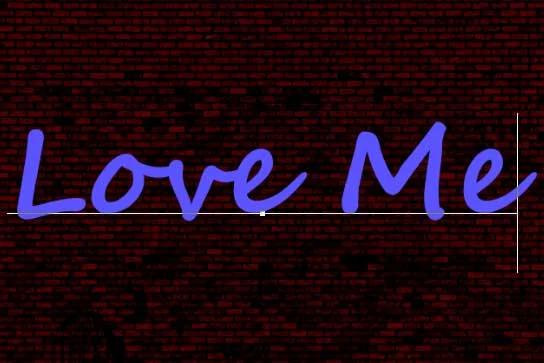
Click in the document to establish an insertion point, then type your desired text.
Type your desired text.
Type your desired text.
To accept the new text, press Ctrl+Enter or click the Commit button on the right end of the Options bar.
Click the Commit button when you’re done.
Each time you create a new type with the Horizontal Type tool, it will appear on a new layer.
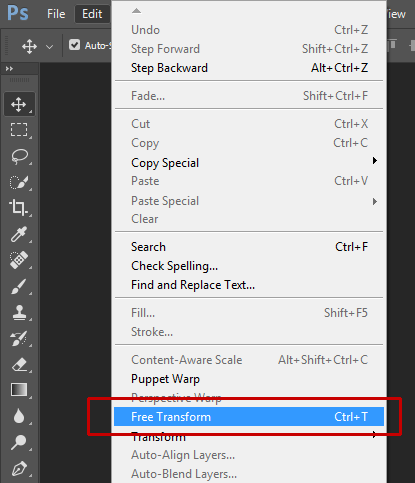
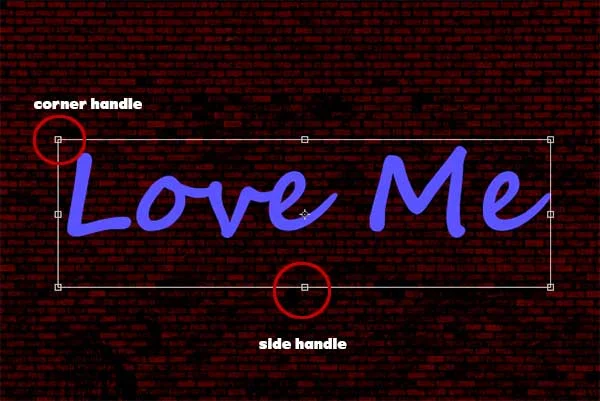
You can now scale your type as follows:
- Drag a side handle if you want to scale just the height or width of the type.
- Drag a corner handle if you want to scale both the height and the width of the type.
- Shift-drag a corner handle to preserve the original proportions of the characters while scaling them.
- Click the Commit button on the Options bar to accept the scale transformation.
5. Rasterize Text
Because we want to edit the type layer, we have to convert it to pixels first via the Rasterize Type command. Choose Layer>Rasterize>Type.
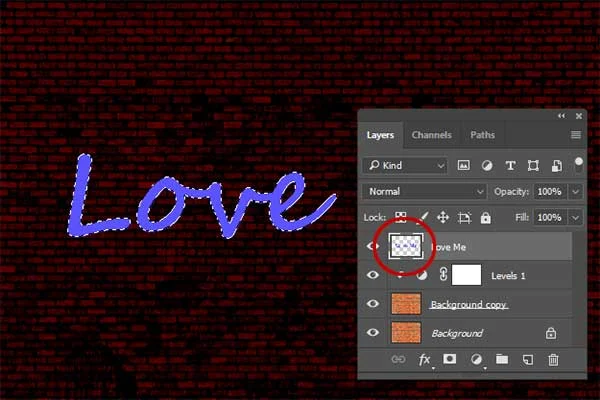
6. Load Pixels
Create a selection by selecting all the nontransparent areas on the type layer, Right-click on the type layer then choose Load Pixels or just Ctrl+click the type layer.
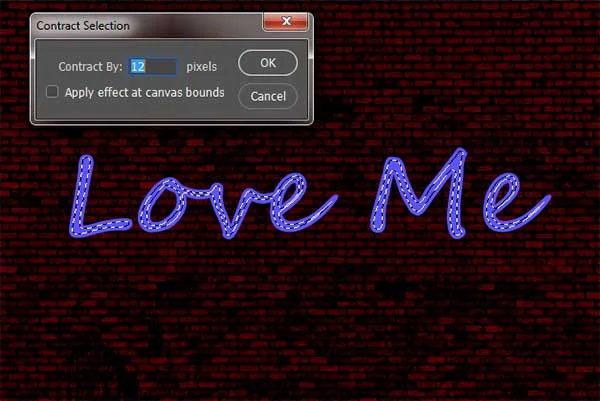
7. Contract Selection
In the Contract Selection dialog box, set the Contract value by 12 pixels. Click OK.
8. Clear Selection
To create a neon text, we will delete the selection. Go to Edit>Clear or just press the Delete key.
9. Add Layer Style
Make sure the Text layer on the Layers panel is selected. Go to Layer>Layer Style>Outer Glow to open the Outer Glow Layer Style dialog.
Layer>Layer Style>Outer Glow.
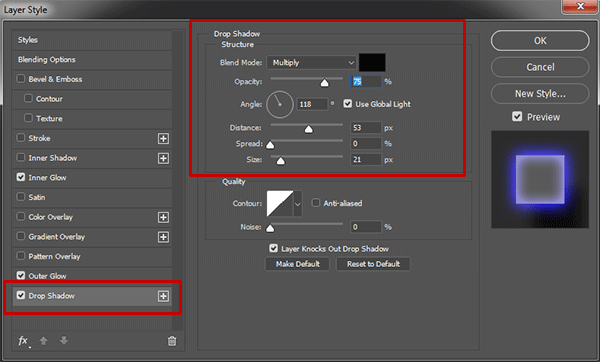
Apply the Inner Glow, Outer Glow and Drop Shadow effects, using the settings shown below:
The Outer Glow setting.
The Inner Glow setting.
The Drop Shadow setting.
Apply the Inner Glow, Outer Glow and Drop Shadow effects, using the settings shown below:
The Outer Glow setting.
The Inner Glow setting.
The Drop Shadow setting.
10. Load Pixels
Right-click on the type layer then choose Select Pixels or just Ctrl+click the type layer.
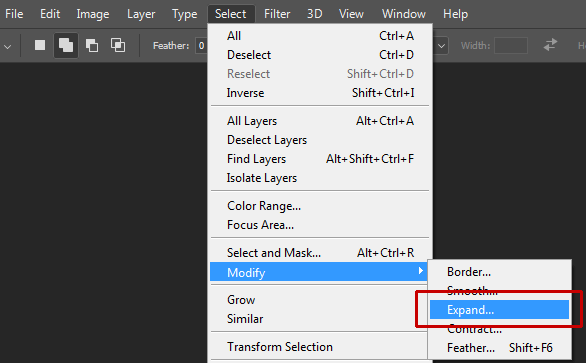
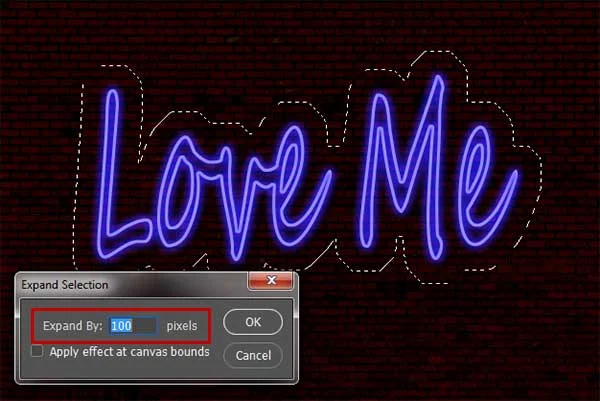
11. Expand Selection
In the Expand Selection dialog box, set the Expand value by 12 pixels. Click OK.
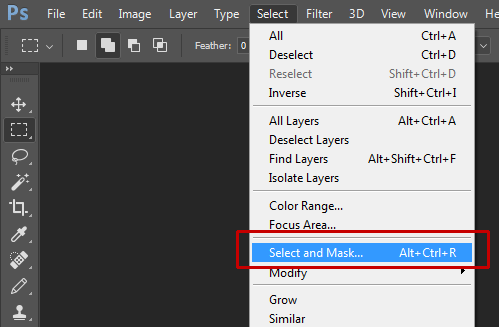
12. Refine Selection
In the Select and Mask dialog, Alter the Feather slider to the right. Choose Output to Selection. Click OK.
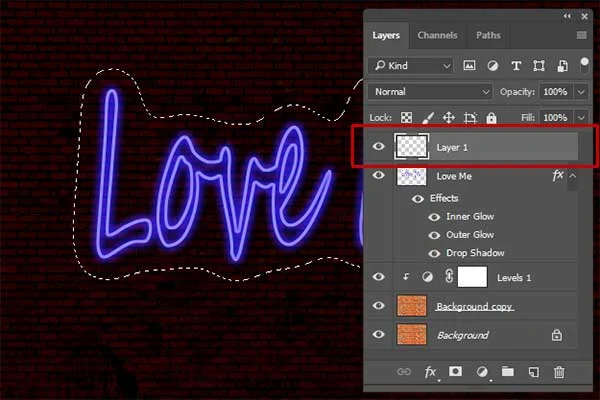
13. Create a New Layer
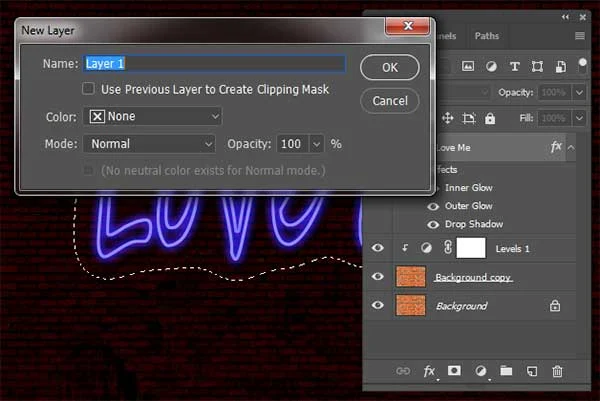
Create a new layer by choosing Layer>New>Layer (or Shift+Ctrl+N).
In the New Layer dialog box, leave the default settings and click OK.
A layer with the default name of Layer 1 appears on the Layers panel.
Drag the new layer right below the type layer.
14. Create Light Reflection on the Wall
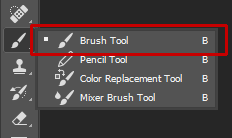
Select the new layer on the Layers panel. Now select the Brush Tool, or press B.
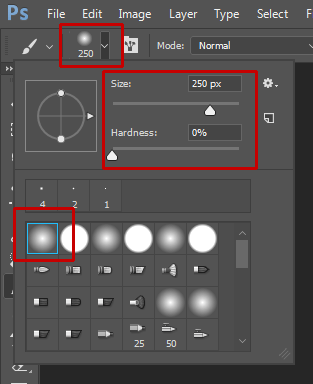
Choose a soft Brush on the Options bar.
Choose a Foreground color.
Apply brush strokes on the selection.
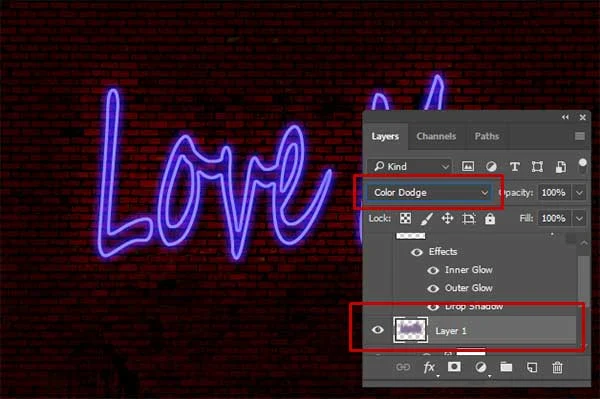
When you're done, you can remove the selection by going to Select>Deselect. Click the drop-down menu located at the top of the Layers panel and then change the layer's blending mode to Color Dodge.
15. Save Your Document
Choose File>Save (or press Ctrl+S) to save your project file.
In the Save As dialog box, navigate to the folder where you want to store the file.
Type a name in the File Name text box and leave the default Photoshop (*.PSD;*.PDD) format.
Click Save to store the image.
In the Save As dialog box, navigate to the folder where you want to store the file.
Type a name in the File Name text box and leave the default Photoshop (*.PSD;*.PDD) format.
Click Save to store the image.
Once you have finished, you will probably also want to use File>Save As (Shift+Ctrl+S) to export the image in a more widely used format, such as JPEG, PNG, TIFF, etc.
And here is the result:
How to create a neon text effect in Photoshop.



















this is lowkey kinda hard
ReplyDelete