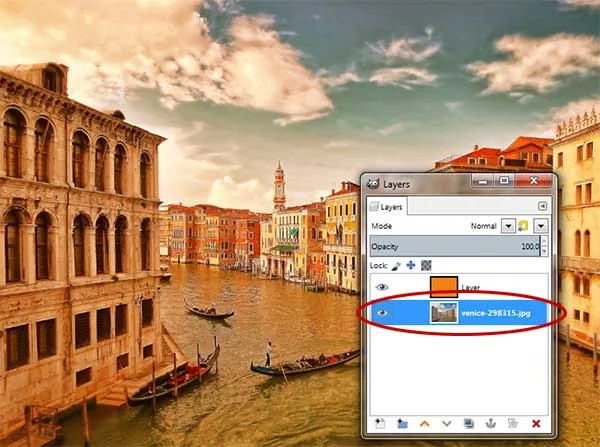
In this GIMP tutorial, I'll show you how to easily create a simple sunset scene from a given daytime image. We'll do it using nothing more than creating a new layer above the original image, fill the new layer with an orange color, and change its blend mode from Normal to Soft light. If you want a darker result, then duplicate the layer and change its blend mode to Multiply.
Steps to make a simple sunset scene in GIMP:
1. Open image
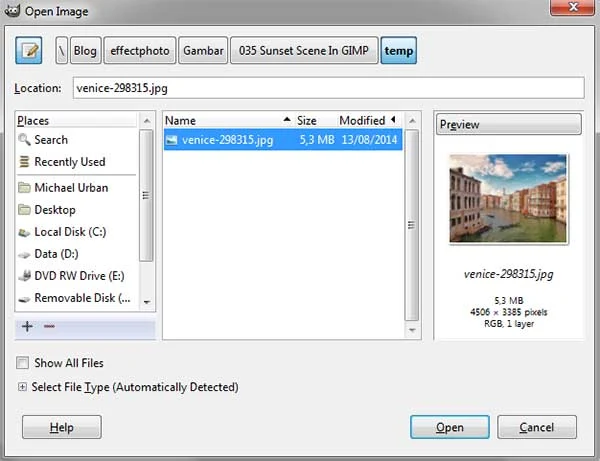
Launch GIMP, then use File>Open... command in the top menu or else just press Ctrl+O to open your image. The Open Image dialog box appears, allowing you to navigate to the file and click on its name. Navigate through your folders in the Places panel and the Name panel until your images' name appears in the Name panel. Click the image you want to open. When an image file is selected, we can view the preview of the image file at the right-hand side of the box, although it's not easy to find an image based on a thumbnail. Click Open.
2. Create new layer
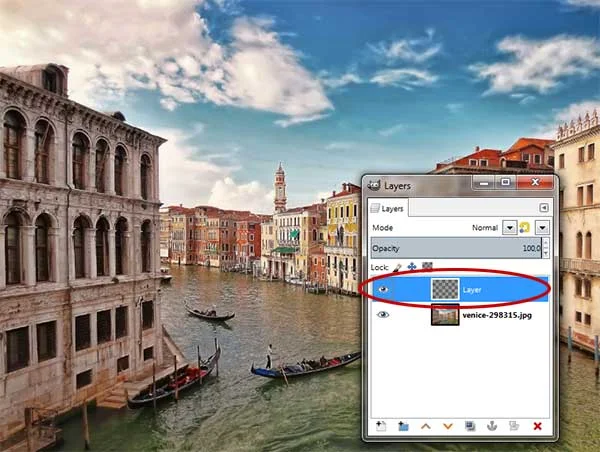
Use Layer> New Layer or press Shift+Ctrl+N to create a new layer. The New Layer window open. Type a name in the Layer Name text box (you can name it 'Sunset Effect') and choose Transparency in the Fill with drop-down menu. Click OK.
3. Choose orange color
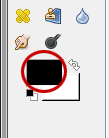
Click the foreground color box.
The Change Foreground Color dialog box appears. Choose a color and click OK. I would choose a color with code # f18113.
4. Fill layer with foreground color
Go to Edit> Fill with FG color (or by using the keyboard shortcut Ctrl+,). Now your chosen color fills the active layer.
5. Duplicate background if you want a darker result
If you want a darker result, You can duplicate the Background layer. Select the Background layer on the Layers dialog.
6. Save document
At last, use File>Save command in the top menu or else just press Ctrl+S to save your project file. The Save Image dialog box appears. Navigate to the folder where you want to store your project file. Type a name in the Name text box and leave the default GIMP (*.XCF) format. XCF is GIMP's native format and is useful because it stores everything about your image and will allow you to later edit your image in GIMP, in case you notice a problem. Click Save to store the project file. Once you have finished, you will probably also want to export the image in a more widely used format, such as JPEG, PNG, TIFF, etc.


Nice
ReplyDelete