Here is an easy way to achieve the mono infrared effect from a color image via a few steps in Photoshop. We'll use a black & white adjustment layer, gaussian blur filter, and smart filter. Even if you've never used Photoshop, it will only take a few minutes to learn the basics and get started on your infrared effect.
1. Open an Image File
Choose File>Open or else just press Ctrl+O to Open up your base image in Adobe Photoshop.
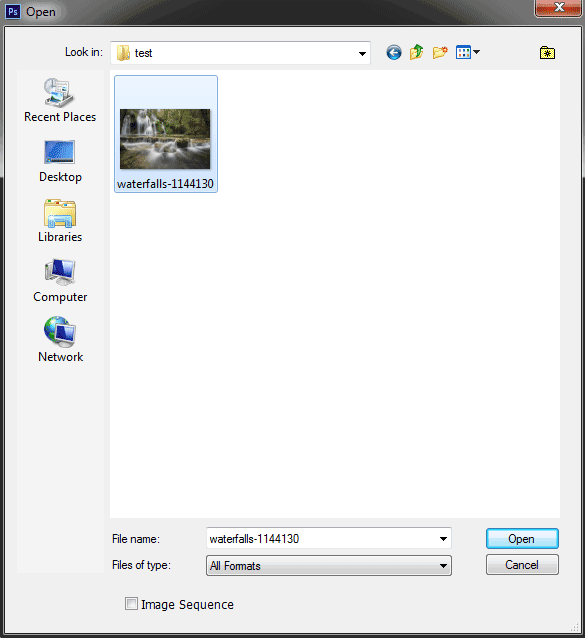
The standard Open dialog box appears.
Navigate to the folder that contains your file then select the name of the file you want to open.
If your file does not appear, try to view all files by selecting All Formats from the Files of type list.
Click the Open button.
The Open dialog box.
For this Photoshop tutorial, I'll use this image, waterfalls-1144130, that downloaded from Pixabay.
The standard Open dialog box appears.
Navigate to the folder that contains your file then select the name of the file you want to open.
If your file does not appear, try to view all files by selecting All Formats from the Files of type list.
Click the Open button.
For this Photoshop tutorial, I'll use this image, waterfalls-1144130, that downloaded from Pixabay.
2. Apply Black & White
Apply a Black & White Adjustment Layer by going to Layer>New Adjustment Layer>Black & White.
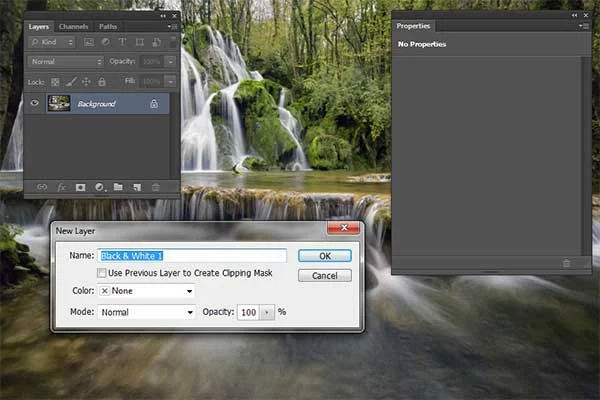
The New Layer dialog box appears.
In the New Layer dialog box, name the layer if you want, leave the other options at their defaults, and click OK.
The Black & White controls display on the Properties panel. If not, double-click on the thumbnail in the Layers panel.
The New Layer dialog box appears.
The New Layer dialog box appears.
In the New Layer dialog box, name the layer if you want, leave the other options at their defaults, and click OK.
The Black & White controls display on the Properties panel. If not, double-click on the thumbnail in the Layers panel.
3. Apply Infrared Preset
To create a mono infrared effect, now apply infrared preset by clicking on the Infrared preset located in a drop-down menu at the top of the black & white adjustment layer panel.
You can adjust color sliders slightly to improve the effect.
You can adjust color sliders slightly to improve the effect.
4. Merge Visible
Create a black & white version of our image by going to Layer>Merge Visible while holding down the Alt key or else just press Shift+Ctrl+Alt+E.
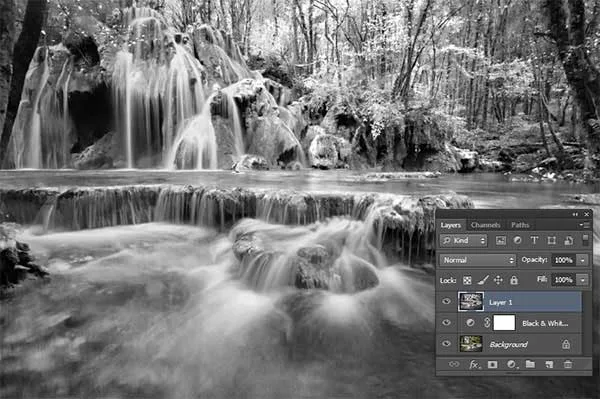
A new black&white layer created.
A new black&white layer created.
5. Convert to a smart filter
Convert this new black & white layer to a smart filter by going to Filter>Convert to Smart Filter.
By converting a layer to a smart filter, you can edit any filter you apply to this layer after you commit to it.
By converting a layer to a smart filter, you can edit any filter you apply to this layer after you commit to it.
6. Apply Blur
Apply the Gaussian Blur to get a slight glow on the whites.
With the smart filter layer selected, choose Filter>Blur>Gaussian Blur.
The Gaussian Blur dialog box appears.
Here, set a Radius of 25 Pixels. Click OK.
With the smart filter layer selected, choose Filter>Blur>Gaussian Blur.
The Gaussian Blur dialog box appears.
Here, set a Radius of 25 Pixels. Click OK.
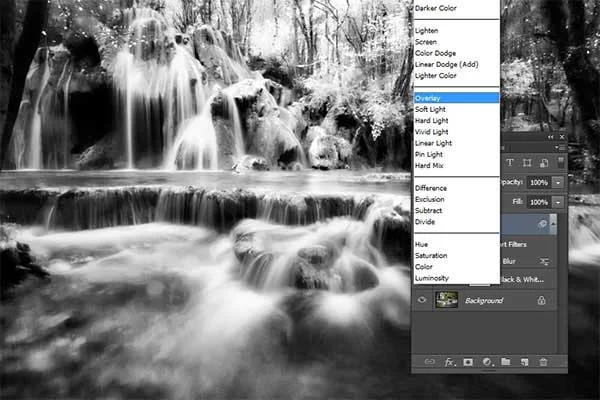
7. Change Blend Mode to Overlay
Click the drop-down menu located at the top of the Layers panel and then change the layer's blending mode to Overlay.
8. Save the Document
Choose File>Save or else just press Ctrl+S to save your project file.
The Save As dialog box appears.
Navigate to the folder where you want to store the file.
Type a name in the File Name text box and leave the default Photoshop (*.PSD;*.PDD) format.
Click Save to store the image.
Once you have finished, you will probably also want to use File>Save As (Shift+Ctrl+S) to export the image in a more widely used format, such as JPEG, PNG, TIFF, etc.
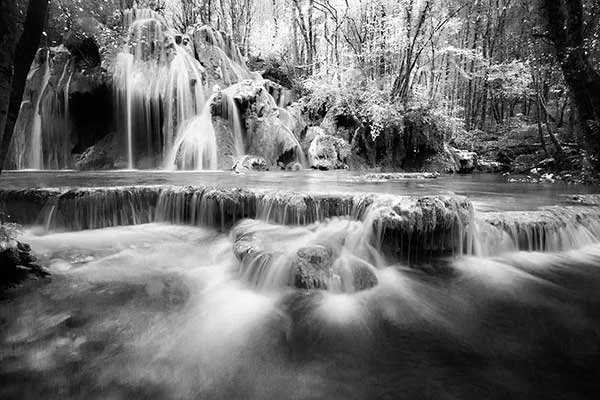
And here is the result:
How to create a mono infrared effect in Photoshop.






No comments:
Post a Comment