Learn how to create a fire effect in Photoshop using Gradient Map. Firebird effects can be created with Photoshop using gradient map. The first step is to separate the main object from the background using a selection tool. Next, make the background color you want. Create a gradient map using four colors: white, yellow, orange, and dark red. Adjust these color depend on effects you wanted. Next, place fire stock photo around your bird pictures. And the last, clean up using the Erase tool and smudge tool.
Step 1: Open Your Photo Bird And Separate The Bird from the Background
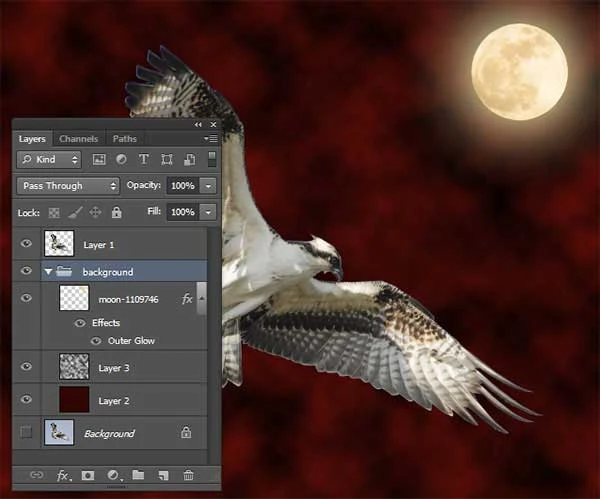
You can use the Pen tool or another selection tool to subtract the bird from the background, then duplicate the layer by choosing Layer> New> Layer via copy.
For this Photoshop tutorial, I'll use this image that I downloaded from Pixabay.
For this Photoshop tutorial, I'll use this image that I downloaded from Pixabay.
Step 2: Create Background
Create a new layer by choosing Layer> New Layer. Fill with a dark red color. Create a new layer then apply Filter> Render> Clouds. Change the blend mode to Overlay. Add moon if necessary.
Step 3: Duplicate Layer and Desaturate
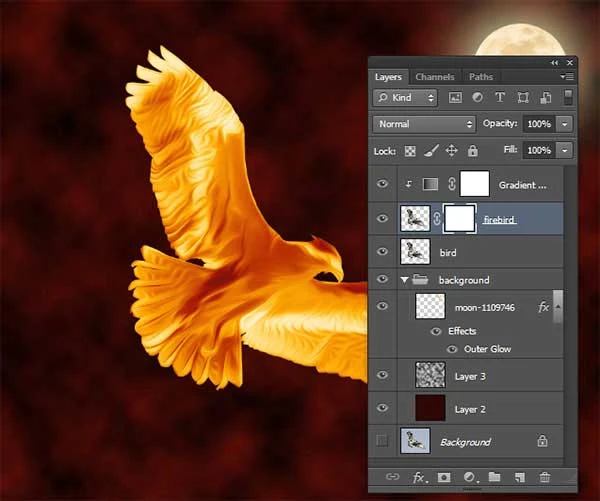
Duplicate the layer by choosing Layer> Duplicate Layer and then select Image> Adjustments> Desaturate.
Step 4: Apply Oil Paint Filter
Choose Filter> Oil Paint. Adjust slider Stylization, Cleanliness, Scale, Bristle Detail, Angular Direction, and Shine, depending on your picture.Step 5: Adjust Color Using Gradient Map
Choose Layer> New Adjustments Layer> Gradient Map. Select 4 color gradient (white, yellow, orange, dark red).
Step 6: Separate Head And Claws On Separate Layer
Create a mask by selecting Layer> Layer Mask> Reveal All. Set the foreground color to black. Use the brush to sweep the head. Press Ctrl + J to separate the heads into a separate layer. Create a gradient map as step number 4.
Do the same for the claws.
Step 7: Merge All Layers
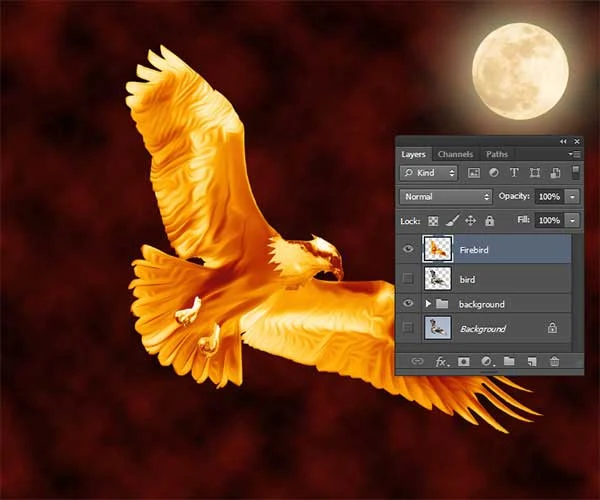
Highlight all the layers and then choose Layer> Merge Layers.
Step 8: Clean up Using the Smudge Tool
Click smudge tool then brush to the outskirts of the birds also to the head of birds.
Step 9: Add Fire Around The Bird
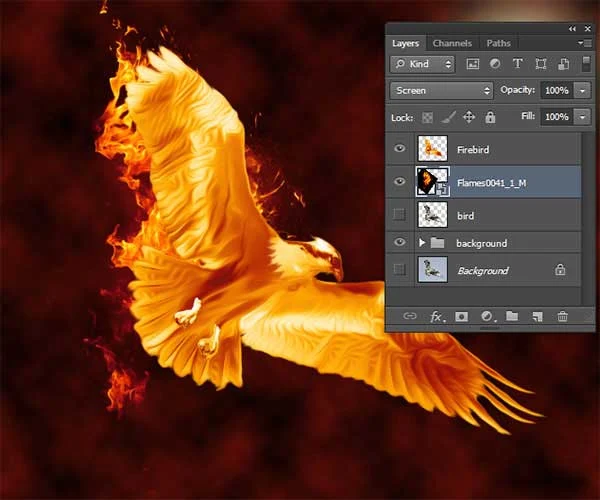
Fire stock images are taken from texture. Choose File> Place, select the image of fire, then click the place. Change the blend mode to screen and set its position using the mouse. Clean up your incorrect fire using erase tool and smudge tool.
There you have it! Firebird using Photoshop.
More on Photoshop Tutorials:


No comments:
Post a Comment