You make a contact sheet without Photoshop, using IrfanView. It is a fast and compact Graphics Viewer for Windows XP, Vista, 7, 8 and 10. You can dowload it for free for non-commercial use.
In today's tutorial, we are going to learn How to Create a Contact Sheet in IrfanView from several images. We'll use the Batch Conversion/Rename command to resize and crop images. Then we will create a Contact Sheet using IrvanView Thumbnails.
In today's tutorial, we are going to learn How to Create a Contact Sheet in IrfanView from several images. We'll use the Batch Conversion/Rename command to resize and crop images. Then we will create a Contact Sheet using IrvanView Thumbnails.
If you liked my tutorials, please subscribe to my YouTube channel - JTSGraph.
Step 1: Create Three Folders
Start the Windows Explorer then create a folder by clicking the New Folder button at the top.The new folder appears, with blue highlighted text. Type a new name for that folder then press Enter.
New folder created.
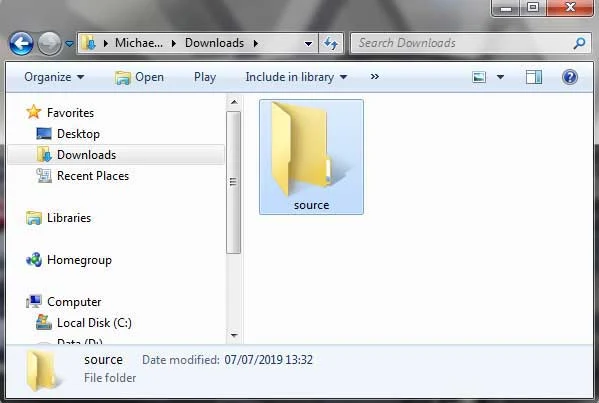
Repeat these steps to create three folders. One folder for the source images (you can name it “source”), one folder for the resized images (name it “resize”), and another one for the cropped images (name it “crop”).
Step 2: Copy Images Into the “Source” Folder
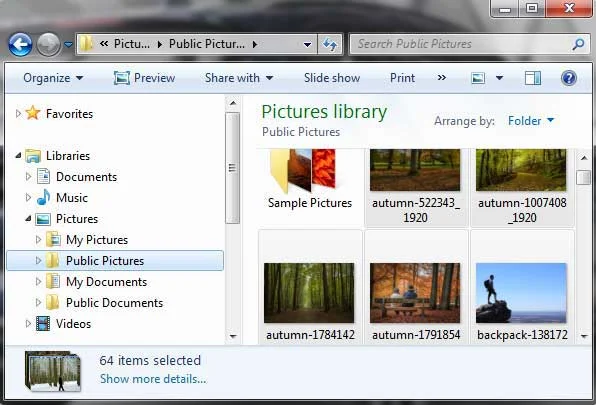
Now that you have three folders, you need to add some images to the “Source” folder. Use the Navigation pane on the left to navigate to a location on your computer where you have some images. Once you've found some images, select the ones you want to add to your “Source” folder. To select more than one image, hold down the left Ctrl key on your keyboard. With the Ctrl key held down, click each file you want to add.Once you have selected your images, right click on any of them. From the menu that appears select Copy.
Now navigate back to the “source” folder you've just created. Double click the “source” folder to move inside of it. You should see a message on the right saying "this folder is empty". Right-click anywhere inside of the big white area and from the menu, select Paste.
The images will be copied and pasted over to the “source” folder.
Step 3: Resize Your Images
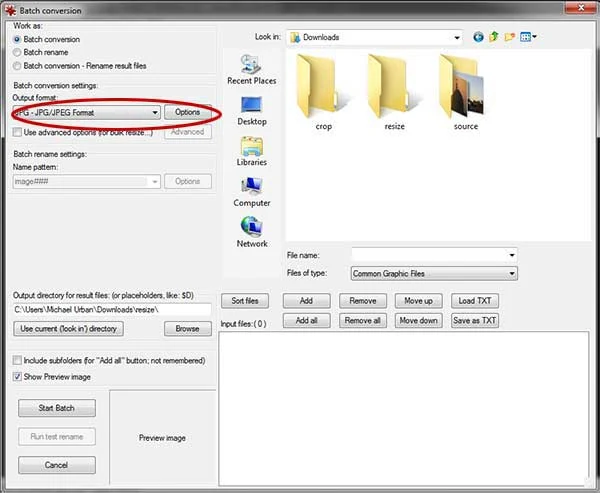
We'll resize our source images first. Open IrfanView then go to File>Batch Conversion/Rename. The Batch Conversion dialog box appears.Select JPEG as output format.
Click the Advanced button.
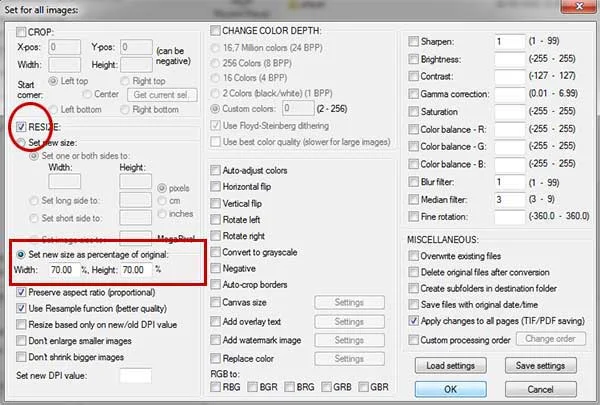
The Set for all images dialog box appears. Here you can tick the RESIZE checkbox, set width and height and then click OK.
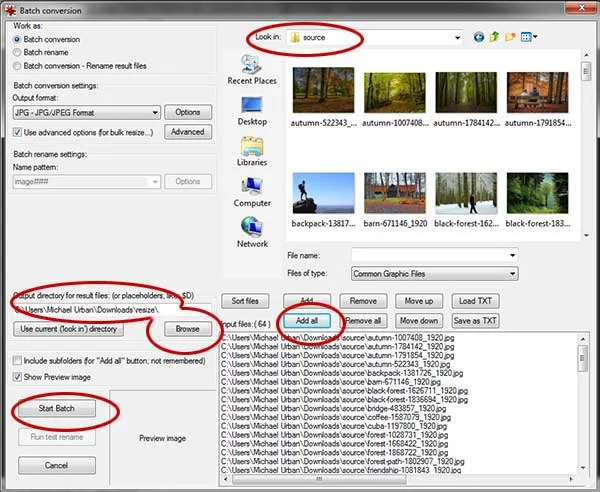
Click the Browse button. Choose the "Source" folder then click Add all button. Choose the "Resize" folder for the output directory. Click Start Batch.
Images get resized.
Step 4: Crop Your Resized Images
Now we'll crop our resized images. Go to File>Batch Conversion/Rename again. The Batch Conversion dialog box appears. Click the Advanced button.This time Tick the CROP checkbox, set width and height and then click OK.
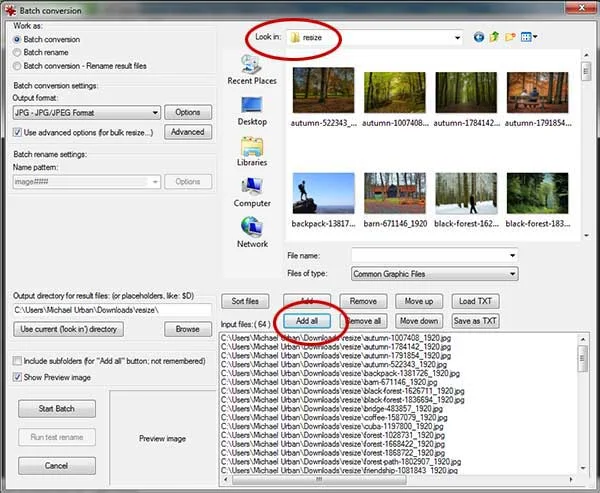
Choose the "Resize" folder then click Add all button.
Choose the "Crop" folder for the output directory then click Start Batch.
Images get cropped.
Step 5: Open IrfanView-Thumbnails Application
Now Open IrfanView-Thumbnails app.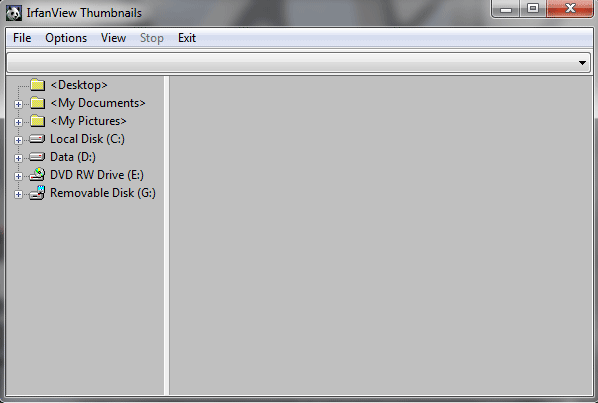
Navigate to the "Crop" folder.
Select all images by going to Options>Select All.
Begin to create the contact sheet by going to File>Create contact sheet from selected files.
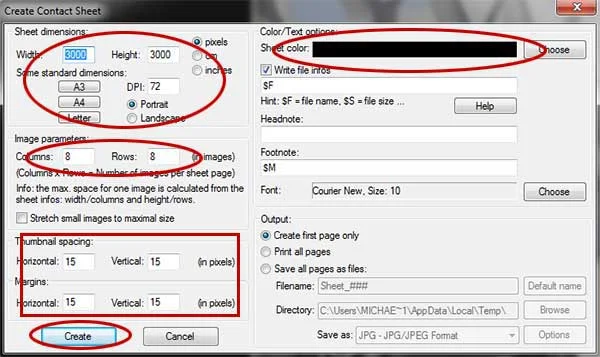
The Create Contact Sheet dialog box appears. In the dialog, set the contact sheet width and height, columns, rows, and spacing then click the Create button.
The Contact Sheet created.
Step 6: Save Your Contact Sheet
Choose File>Save As or else just press S to save your contact sheet image. The Save Picture As dialog box appears. Navigate to the folder where you want to store your project file. Type a name in the File Name text box and choose Save as type in a more widely used format, such as JPEG, PNG, TIF, etc. Click Save to store the file.











Thank you so much for the video tutorial. Creating contact sheet in irfan view is now so easy to me after watching your video.
ReplyDeleteThank you for your nice comment :)
DeleteI find this very useful thank you. FOR MORE EDITING TECHNIQUES CHECK THIS OUT NOW http://bit.ly/2WCmAVr
ReplyDeleteThank you for taking you time to do this I would have been lost with out it!!
ReplyDelete