In today’s tutorial, I’m going to take you through the process of creating a contact sheet in Photoshop. A contact sheet is an arrangement of image thumbnails that is a useful way to catalog images. With contact sheet, we can automatically place multiple images in a grid. One of the tasks Photoshop can perform is the ability to make contact sheets of multiple images and print them to your printer or save them as files that can be used later. Let's get started!
You can find others free Photoshop Collage Templates here.
Follow these steps to make a simple squares grid contact sheet from multiple images:
1. Create Folder
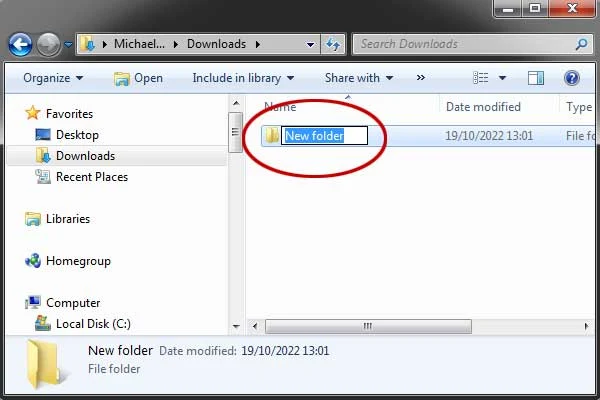
Start the Windows Explorer then create a folder by clicking the New Folder button at the top.
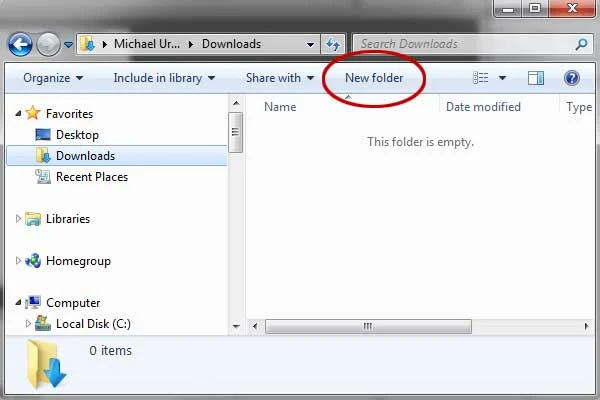
Start the Windows Explorer then create a folder by clicking the New Folder button at the top.

2. Copy and paste images into your images folder
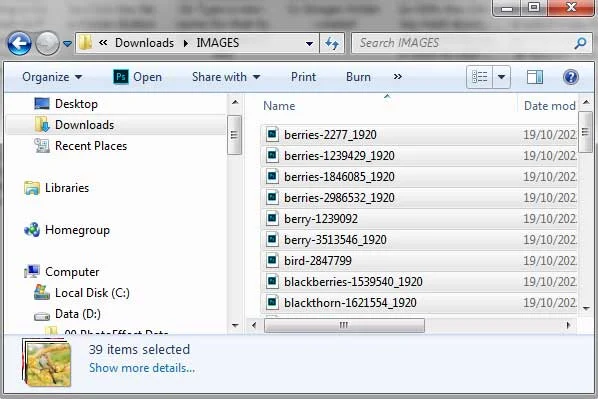
Now that you have a new folder, you need to add some images to it. Use the Navigation pane on the left to navigate to a location on your computer where you have some images. Once you've found some images, select the ones you want to add to your new folder. To select more than one image, hold down the left Ctrl key on your keyboard.
With the Ctrl key held down, click each file you want to add. Once you have selected your images, right click on any of them. From the menu that appears select Copy.
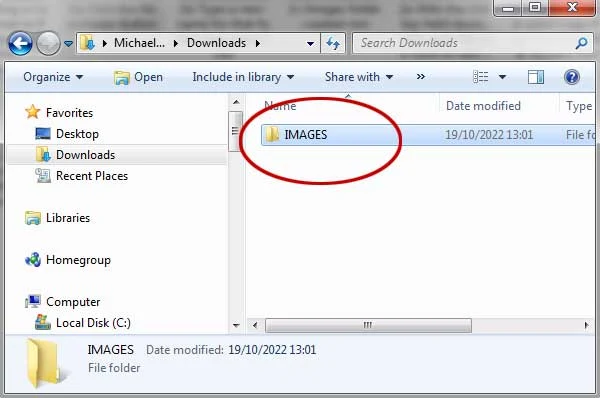
Now navigate back to the “images” folder you've just created. Double click the “images” folder to move inside of it. You should see a message on the right saying "this folder is empty". Right-click anywhere inside of the big white area and from the menu, select Paste.
3. Launch Photoshop then Choose File > Automate > Contact Sheet II
Choose File > Automate > Contact Sheet II in the top menu.
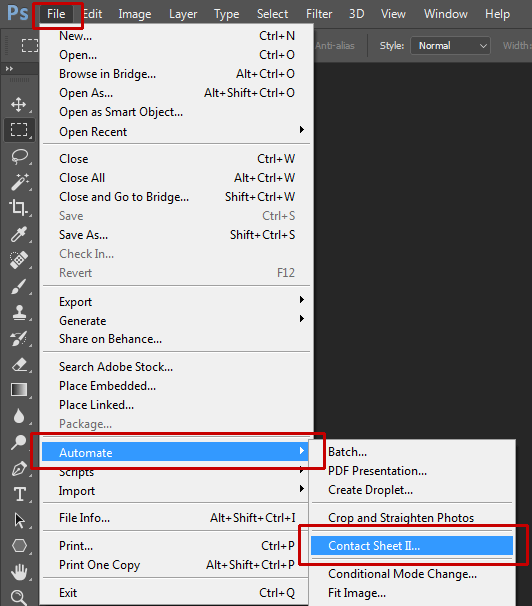
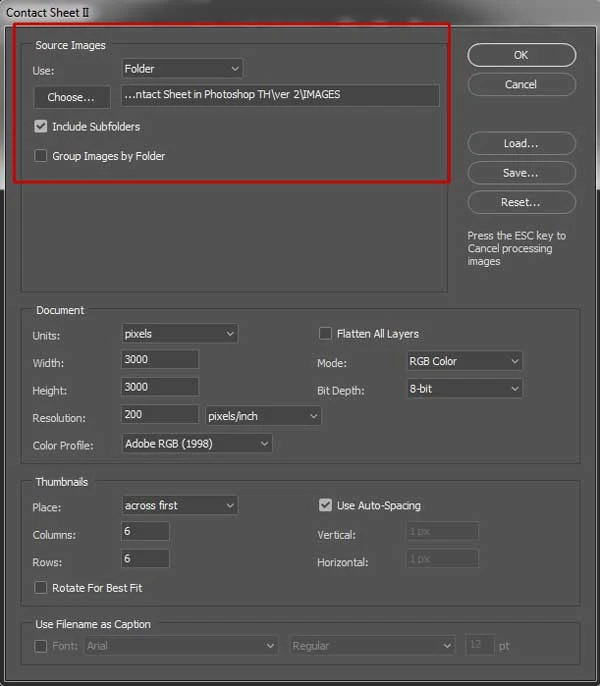
The Contact Sheet II dialog box appears. In the dialog, under Source Images, choose Use: Folder. Click Choose...
4. Document Settings
Under Document, choose Width, Height, and Resolution values for the contact sheet file, and also choose Mode, Bit Depth, and Color Profile settings.
Uncheck Flatten All Layers to have the command create a separate image layer (with a mask) for each image.
Under Document, choose Width, Height, and Resolution values for the contact sheet file, and also choose Mode, Bit Depth, and Color Profile settings.
Uncheck Flatten All Layers to have the command create a separate image layer (with a mask) for each image.
5. Thumbnails Settings
Under Thumbnails, choose a Place option for the order of thumbnails, and the desired number of Columns and Rows. Check Use Auto-Spacing to let Photoshop calculate the spacing between images. Uncheck Rotate for Best Fit to have the images keep their original orientation.
6. Caption Settings
Check Font if you want to have a caption containing the file name appear below each image. Click OK. Please wait for a moment, while Photoshop opens each image and creates the contact sheet.
If you don't have Photoshop, you can create a Contact Sheet in IrfanView.
There you have it! How to Make a Contact Sheet in Photoshop.
7. Save Your Document
Choose File>Save or else just press Ctrl+S to save your contact sheet project file. The Save As dialog box appears. Navigate to the folder where you want to store your project file. Type a name in the File Name text box and leave the default Photoshop (*.PSD;*.PDD) format.PSD is Photoshop's native format and is useful because it stores everything about your image and will allow you to later edit your image in Photoshop, in case you notice a problem.
Click Save to store the project file.
Once you have finished, you will probably also want to use File>Save As (Shift+Ctrl+S) to export the image in a more widely used format, such as JPEG, PNG, TIFF, etc.






No comments:
Post a Comment