In today’s tutorial, I’m going to take you through the process of creating a Lomo effect in Photoshop. I'll use the Noise filter, Gaussian Blur, Radial Blur, Gradient Map Adjustment Layer, Brightness & Contrast Adjustment Layer and Lens Correction filter that comes with Photoshop.
1. Open an Image File
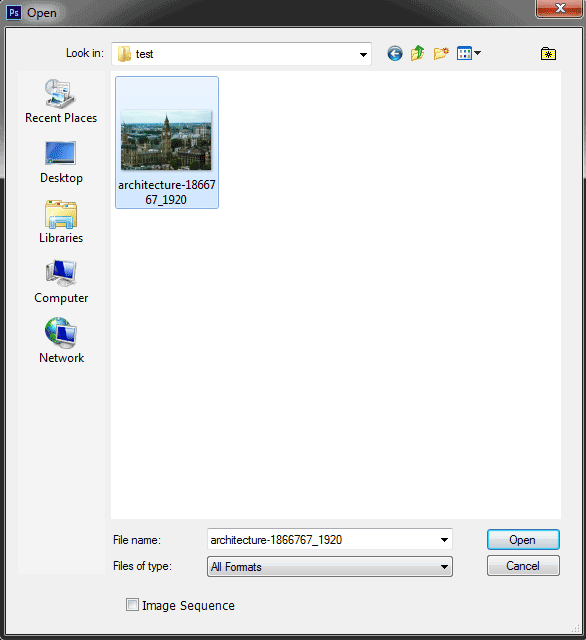
Choose File>Open or else just press Ctrl+O to Open up your base image in Adobe Photoshop.
The standard Open dialog box appears.
Navigate to the folder that contains your file then select the name of the file you want to open.
If your file does not appear, try to view all files by selecting All Formats from the Files of type list. Click the Open button.
The standard Open dialog box appears.
Navigate to the folder that contains your file then select the name of the file you want to open.
If your file does not appear, try to view all files by selecting All Formats from the Files of type list. Click the Open button.
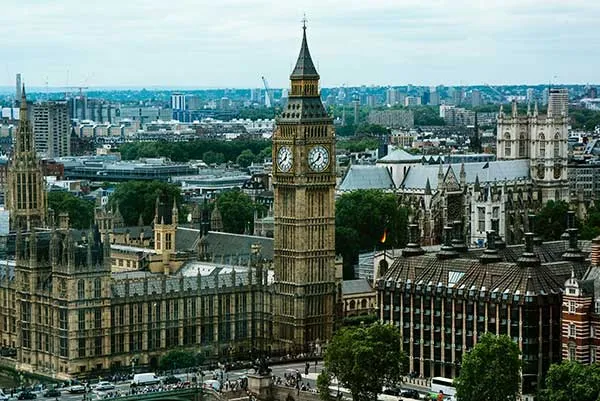
For this Photoshop tutorial, I'll use this image, architecture-1866767_1920, that downloaded from Pixabay.
2. Duplicate Layer
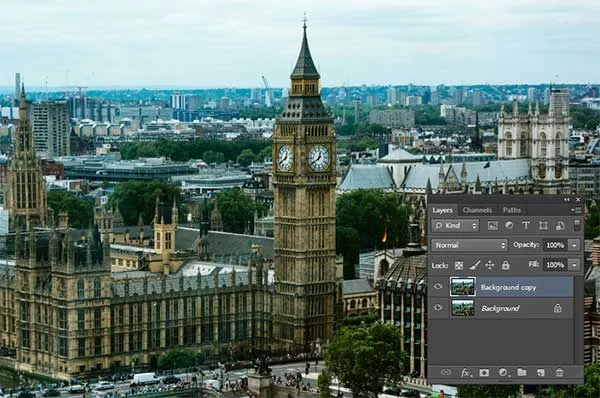
Duplicate the Background in this original image by going to the top menu and choose Layer>Duplicate layer or else just press Ctrl+J.
In the Layers panel, a duplicate layer with the default name of Background copy or Layer 1 appears above the Background layer.
In the Layers panel, a duplicate layer with the default name of Background copy or Layer 1 appears above the Background layer.
3. Add Noise
Now add noise to the duplicate layer.
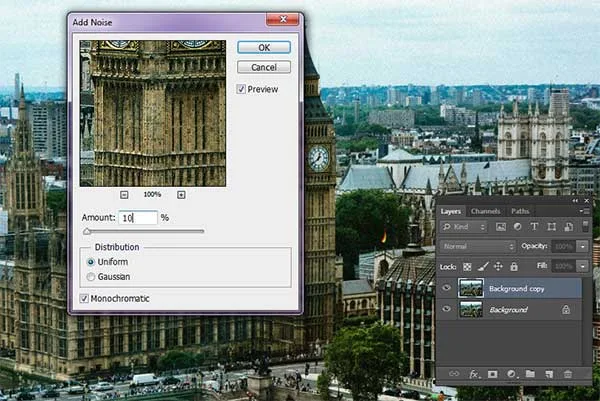
Choose Filter>Noise>Add Noise.
The Add Noise dialog box appears.
Adjust the Amount to 10% by typing in a number or just drag along the slider right below.
Next, set Distribution to Uniform.
It's a bit more sporadic when "Gaussian" is selected.
Tick "Monochromatic" at the bottom to make the photo just black and white.
You can zoom out using the minus sign on the left side below the image preview or zoom in with the plus sign on the right.
Click OK when you're done.
Click OK when you're done.
4. Apply Radial Blur
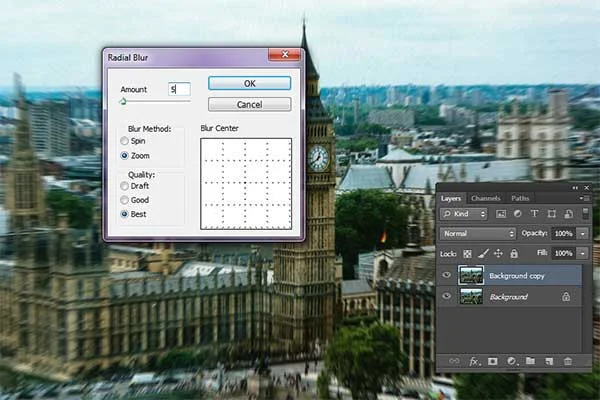
Now go to Filter>Blur>Radial Blur to give a moving and blurry effect.
The Radial Blur dialog box appears.
Set Amount to 5, Set Blur Method to Zoom to blur along radial lines and mimic the effect of zooming in to your image, specify Quality level to Best, and indicate where you want the center of your blur by clicking and dragging inside the Blur Center box.
Click OK when you're done.
5. Apply Gradient Map
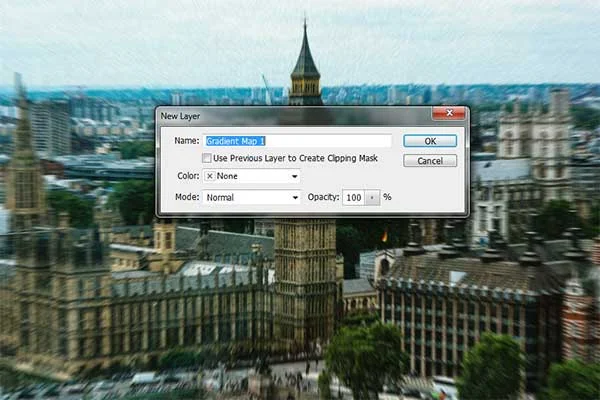
Go to Layer>New Adjustment Layer>Gradient Map.
The New Layer dialog box appears.
Just click OK.
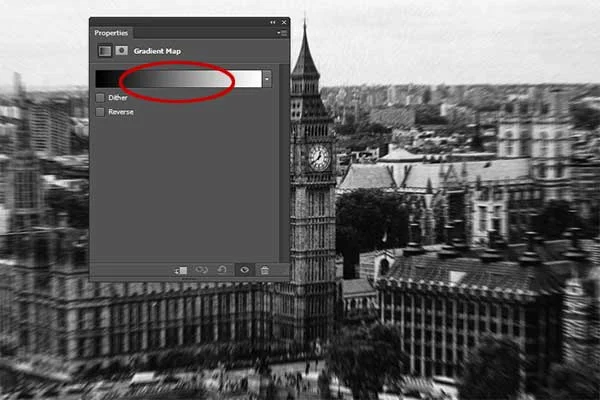
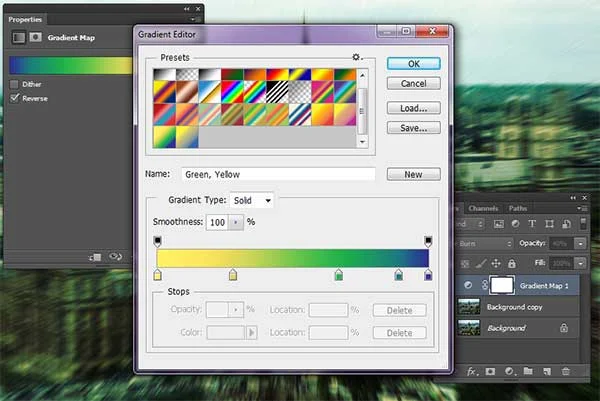
Click the Gradient to open the Gradient Editor.
From the Gradient list, click the small arrow at the top corner and load up the Harmonies 2 gradient set.
Select the Green-Yellow gradient then click OK.
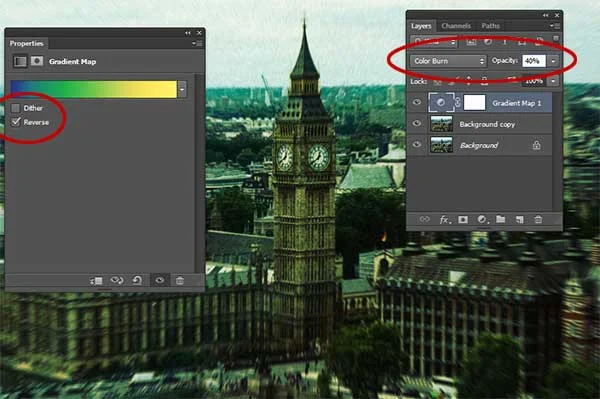
Check “Reverse” in the Gradient Map adjustment.
Change its blend mode to Color Burn and set its Opacity to 40%.
Check “Reverse” in the Gradient Map adjustment. Change its blend mode to Color Burn and set its Opacity to 40%.
6. Apply Brightness/Contrast
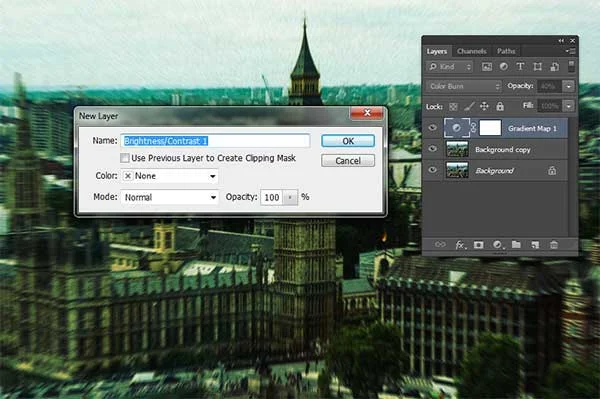
Now adjust brightness contrast using Brightness/Contrast adjustment layer.
Choose Layer>New Adjustment Layer>Brightness/Contrast.
The New Layer dialog box appears.
Just click OK.
Drag the Brightness slider to the right.
Choose Layer>New Adjustment Layer>Brightness/Contrast.
The New Layer dialog box appears.
Just click OK.
Drag the Brightness slider to the right.
7. Apply Vignette
Now apply vignette or a darkening in the corners, to the image.
Select the duplicate layer.
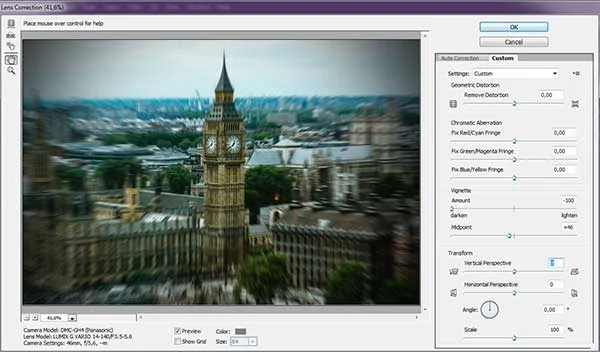
Go to Filter>Lens Correction or else just press Shift+Ctrl+R.
The Lens Correction dialog box appears.
Click the Custom tab.
Drag the Vignette Amount slider to the left and the Vignette Midpoint slider to the left or right.
Click OK when you're happy with the Lomo effect result.
8. Save the Document
Choose File>Save or else just press Ctrl+S to save your project file.
The Save As dialog box appears.
Navigate to the folder where you want to store the file.
Type a name in the File Name text box and leave the default Photoshop (*.PSD;*.PDD) format.
Click Save to store the image.
The Save As dialog box appears.
Navigate to the folder where you want to store the file.
Type a name in the File Name text box and leave the default Photoshop (*.PSD;*.PDD) format.
Click Save to store the image.
Once you have finished, you will probably also want to use File>Save As (Shift+Ctrl+S) to export the image in a more widely used format, such as JPEG, PNG, TIFF, etc.
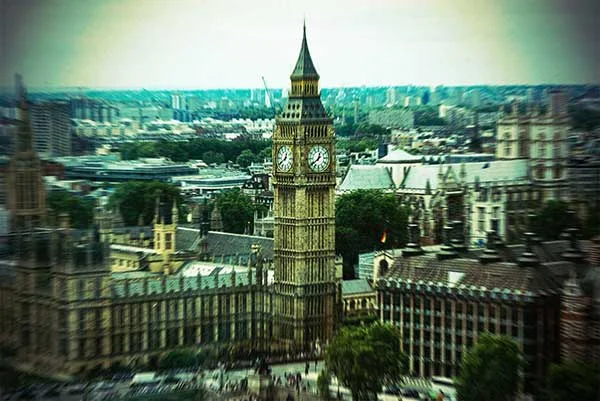
That's all there is to it! And here is the result:
How to create a Lomo Effect in Photoshop.



No comments:
Post a Comment