Learn how to create a Tilt-Shift Effect in GIMP. The Tilt-Shift effect is a popular Photographic style. In this tutorial, I'll show you how to create a real scene look like a miniature model using GIMP for any image you want using the Gradient tool, Gaussian Blur filter and adjusting Hue-Saturation. This works best on subjects taken from above such as busy traffic or cityscape, but it can be applied to any image you want.
Steps to make a tilt-shift effect in GIMP:
1. Open image.
Use File>Open. Navigate through your folders in the Places panel and the Name panel until your images' name appears in the Name panel. Click the image you want to open. Click Open.
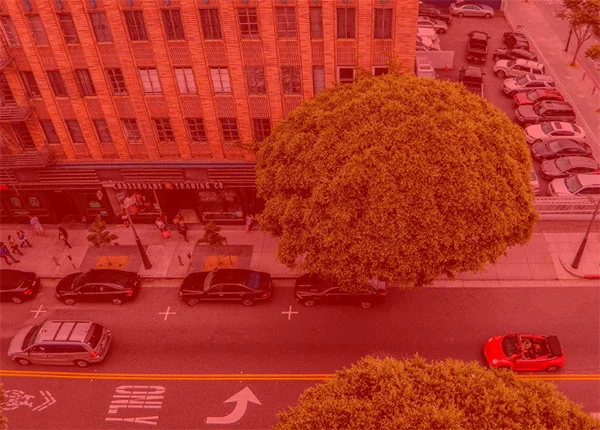
2. Activate Quick Mask mode.
Use Select>Toggle Quick Mask (Shift+Q). When you activate the Quick Mask, the current layer will get red overlay color.
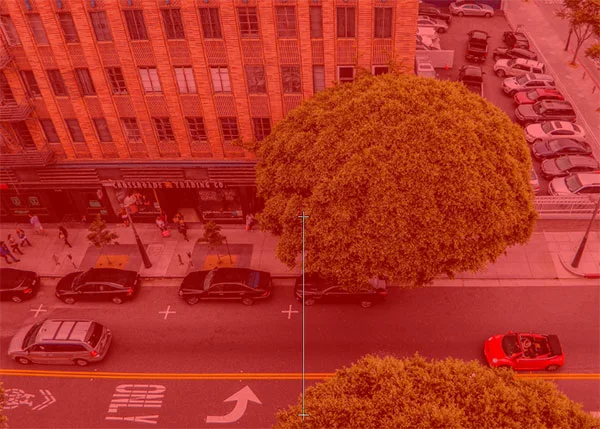
3. Apply the Blend Tool (Gradient).
Select the Gradient Tool from the Toolbox (use Tools>Paint Tools>Gradient).
Make sure your foreground and background color are in black and white by pressing keyboard key D.
In the Tool Options, select the FG and BG To Shape Bi-Linear.
Apply blend or gradient tool on the document. Click and drag the Gradient tool from the bottom of your image outwards while pressing the Ctrl key. Remove the Quick Mask by pressing Shift + Q.
4. Apply the Gaussian Blur filter.
Use Filters> Blur> Gaussian Blur. Here you can set the Blur Radius and choose RLE under the Blur Method. Click OK.
5. Adjust Hue / Saturation.
Use Colors> Hue-Saturation. Drag the saturation slider to the right. Click OK. To get more realistic miniature effect look, sharpen the color by adding saturation.
6. Save it.
Use File>Save (Ctrl+S) to save your project file. Navigate to the folder where you want to store your project file. Type a name in the Name text box and leave the default GIMP (*.XCF) format. XCF is GIMP's native format and is useful because it stores everything about your image and will allow you to later edit your image in GIMP, in case you notice a problem. Click Save.Once you have finished, you will probably also want to export the image in a more widely used format, such as JPEG, PNG, TIFF, etc.
There you have it! Tilt-Shift Lens Effect with GIMP.


No comments:
Post a Comment