Today's tutorial will take you through the process of creating a mosaic photo collage step-by-step using GIMP, the free picture editing software.
We will use guides to help us positioning images precisely, the Rectangle select tool, File>Export command to create pattern and the Bucket Fill tool to fill the layer with the mosaic pattern.
We will use guides to help us positioning images precisely, the Rectangle select tool, File>Export command to create pattern and the Bucket Fill tool to fill the layer with the mosaic pattern.
If you liked my tutorials, please subscribe to my YouTube channel - JTSGraph.
Steps to make a photo mosaic in GIMP:
1. Prepare images for the mosaic pattern.
Prepare or download images to be used for mosaic photo collage pattern, at least 20 different images. For this GIMP Collage tutorial, I'll use images that I downloaded from Pixabay.
2. Create new image.
Choose File>New. Here you can set the Width and Height of the new image. Enter a value for the initial width with 1500 px and height with 1500 px, then click OK.3. Create guides.
To create a mosaic, we need to place a lot of small images in our new image precisely. GIMP gives us Guides, a flexible type of positioning aid. Guides are horizontal or vertical lines we can temporarily display on an image while we are working on it. If you don't see the guidelines, use View> Show Guides.Snapping is a useful feature in GIMP that allows us to align images with guides. Choose View>Snap to Guides to enable snapping that will help you to align any images you want.
Create 9 horizontal guides. Use Image> Guide> New Guides (by percent) command. In the dialog box, select Horizontal direction, enter 10 Position and click OK. Repeat this step for position 20, 30, 40, 50, 60, 70, 80 and 90.
And now create 9 vertical guides. Use Image> Guide> New Guides (by percent) command. In the dialog box, select Vertical direction, enter 10 Position and click OK. Repeat this step for position 20, 30, 40, 50, 60, 70, 80 and 90.
4. Insert image.
Use File> Open As Layers. Click on the image, then click OK.You can now edit the image using the Move Tool and Scale Tool. as follows:
- Use Tools>Transform Tools>Scale command to resize the image. Click anywhere inside the image. In the Scale dialog box, click the chain to keep the image does not distort. Set the new values for the image's width and height. Press Scale button when you are done.
- Use Tools>Transform Tools>Move command to move the image. Click and hold anywhere inside the image and drag.
Position the image.
Use Tools>Selection Tools>Rectangle Select command.
To create a selection, drag your mouse over part of the image, go to Edit> Copy command, go to Edit>Paste command and then use Layer>To New Layer. Now you can delete the original image's layer.
5. Insert all images.
Repeat step 4 to open and manipulate each images you'd like to insert. The document now filled with the mosaic pattern. The result will be as shown below:6. Define mosaic pattern.
Use File>Save, name it, and then click Save. Next, use File> Export to export it into a pattern. On the drop-down menu select GIMP Pattern (.pat). Fill in the Name field Mosaics 10 x 10. Click the Export button. Now you can save and close your document Pattern.xcf.Then go to Edit> Preferences and click Folders> Patterns. You can see in there, the folder location for the pattern. Then copy the file mosaic pattern.pat export results earlier to that folder. Close GIMP, then reopen GIMP. This way, GIMP can read the pattern file we created earlier.
7. Open your main image.
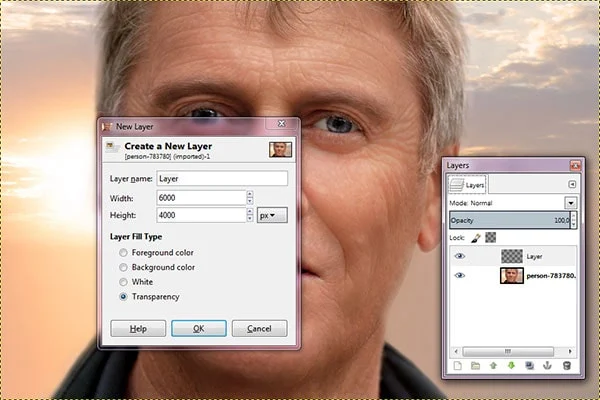
Use File> Open, then create a new layer by clicking the Create a new layer at the bottom of the panel or use Layer>New Layer. I recommend that you use a large resolution photo to get the best result.
8. Fill the new layer with mosaic pattern.
Use Tools>Paint Tools>Bucket Fill (Shift B).
Then, in the toolbox select the mosaic pattern we created earlier and select the radio button 'Fill whole selection'.
Click your mouse on the document to fill the document with the mosaic pattern.
9. Final adjustments.
Desaturate the layer, change the Blend Mode and Opacity.
Use Colors> Desaturate to desaturate layer. Change its mode to Overlay and set the opacity if needed.10. Save your document.
Use File>Save. Click OK when you are done.Once you have finished, you will probably also want to export the image in a more widely used format, such as JPEG, PNG, TIFF, etc, using File>Export As.
There you have it! How to Create A Mosaic Photo Collage in GIMP.
There you have it! How to Create A Mosaic Photo Collage in GIMP.


Thanks for share this tutorial.
ReplyDeleteGlad you liked it :)
Delete