Learn how to create stunning text effects by placing images inside text using GIMP, step by step using the Text Tool, Move Tool, and Scale Tool within GIMP to achieve this eye-catching effect. Enhance your design skills and make your text stand out with this easy-to-follow tutorial.
If you liked my tutorials, please subscribe to my YouTube channel - JTSGraph.
Steps to put an image inside a text in GIMP:
1. Open an image.
Use File>Open... (Ctrl+O). Navigate through your folders in the Places panel and the Name panel until your images' name appears in the Name panel. Click the image you want to open. Click Open.
For this GIMP tutorial, I'll use this image, 1869774, downloaded from Pixabay.
2. Create a new layer.
Use Layer> New Layer (Shift+Ctrl+N). Type a name in the Layer Name text box and choose White in the Fill with drop-down menu. Click OK.
3. Select the Text tool.
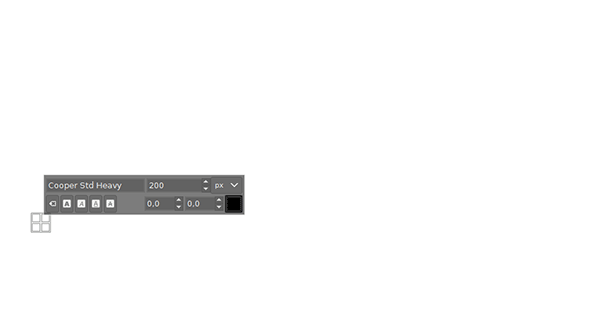
To places text into an image we need to use the Text tool. Select the Text Tool from the toolbox (Tools>Text).
4. Type the Text on document.
Click on any portion in the image, where you would like to create the text.
Then enter the text on the canvas. Your text will appears on the canvas in a rectangular frame. If you need to move the text on canvas, you have to select the Move tool and click on a character to drag the frame and its text.
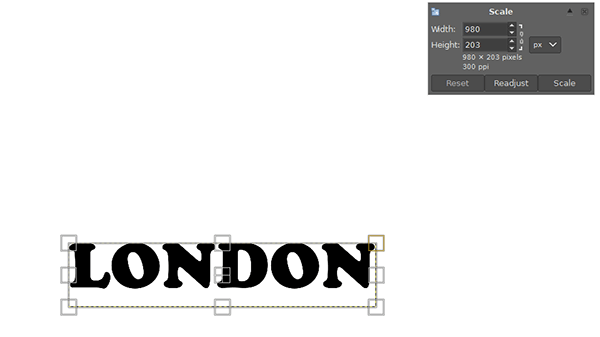
5. Resize the text.
We'll use the Scale Tool to adjust the size of the text. Select the Scale Tool from the toolbox (Tools>Transform Tools>Scale). Click on the Text. The Scale dialog box appears. Here, you can set Width and Height you want to give to the text or you can just drag handles in the text. Click the Scale button when you're done.
6. Add Alpha channel.
In case you want an image inside text with transparent background, select the image’s layer then add transparency (Layer>Transparency>Add Alpha Channel). An alpha channel represents the transparency of the image. This way, we can make the background transparent.
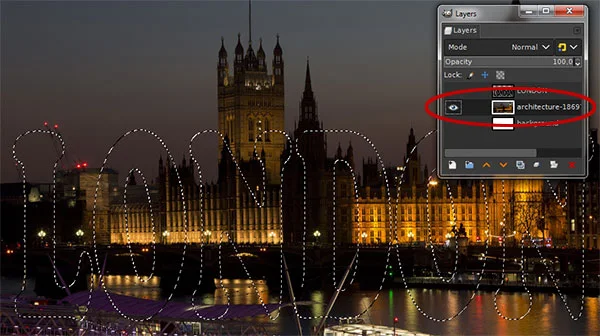
7. Load text selection then invert.
Select the Text layer then load selection by choosing Layer>Transparency>Alpha to Selection. You'll see marching ants around your text. GIMP loads selection outlines that correspond to the shape of your text.
Now you have the selection on the text. Use Select>Invert (Ctrl+I) to invert the selection. All of the layer contents which were previously outside of the selection are now inside it.
8. Delete everything in the current selection.
Select the image’s layer by clicking on it in the Layers dialog. Use Edit>Clear (or press the Delete key) to delete everything in the current selection.
Use Select>None to remove the selection.
9. Adjust the text.
Select the image’s layer on the Layers dialog. Select the Move Tool from the toolbox (Tools>Transform Tools>Move).
Just click-drag on any portion of the text. The image gets moved as you move the cursor.
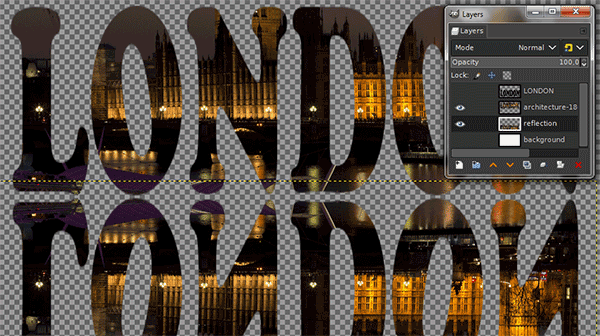
10. Duplicate the image’s layer for reflection.
Make sure the image’s layer is selected by clicking on it in the Layers dialog. Duplicate layer by going to Layer>Duplicate Layer (Shift+Ctrl+D). Rename the duplicate layer like “reflection”.
11. Add canvas size if you need to.
Use Image>Canvas Size. Enter a new value for the height then click Resize.
Click the Tool Options tab then choose vertical.
Make sure the reflection layer is selected.
Flip the image by clicking on it.
13. Move the reflection's layer below the original image.
Using the Move tool, click and drag to move the reflection layer below the original image.14. Add a Layer Mask to the reflection's layer.
Click on the reflection layer to make sure it's selected then click the Add layer mask button at the bottom of the Layers dialog (Layer>Mask>Add Layer Mask). Choose White (Full Opacity).
A white layer mask thumbnail appears on the reflection layer, revealing everything on that layer.
15. Apply Gradient on the reflection's layer.
Select the Gradient Tool (G). Choose FG to BG in the Tool options dialog. Make sure the layer mask thumbnail is selected by clicking on it. Reset Foreground/background color to default by pressing D.
Drag the mouse in the document window to create a reflection effect.
16. Apply Gaussian blur.
Use Filters>Blur>Gaussian Blur. Enter a value for the SizeX and SizeY through the up and down arrows.
If you're not happy with the result, you can quickly undo a step at any time by going to Edit>Undo or else just pressing Ctrl+Z.
Experiment with different values and discover values that work best for your image. Once you are satisfied with the result, click "OK" to apply it to the image.
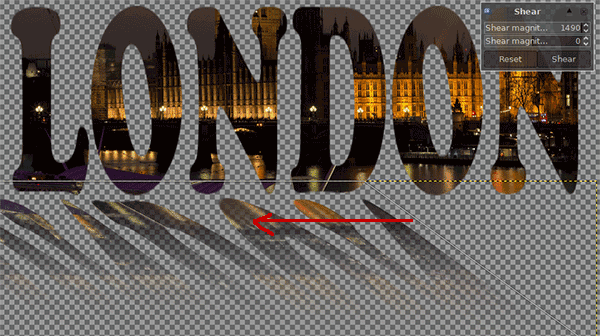
Drag the mouse on the image horizontally or vertically to distort the image. Click the Shear Button.
Move it using the Move Tool.
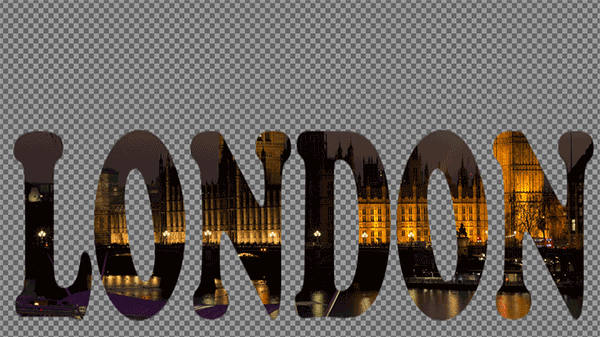
There you have it! Using GIMP To Put An Image Inside Text.
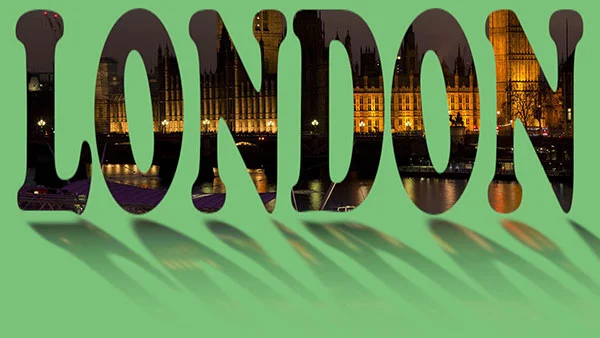
18. Save document.
Use File>Save (Ctrl+S). Navigate to the folder where you want to store your project file. Type a name in the Name text box and leave the default GIMP (*.XCF) format. XCF is GIMP's native format and is useful because it stores everything about your image and will allow you to later edit your image in GIMP, in case you notice a problem. Click Save to store the project file.
19. Export result to JPG.
Once you have finished, you will probably also want to export the image in a more widely used format, such as JPEG, PNG, TIFF, etc. Use File>Export As... Type a name and its extension like .jpg then click Export.












thnx
ReplyDeleteGlad you liked it! Thanks for visiting
DeleteThanks!
ReplyDeleteYou're welcome
Deletestep 5 to 6 dont make sense there is no choose layer. you need to explain it more
ReplyDeleteMake sure the Text layer is selected by clicking on it.
DeleteGreat help to me . I was literally spending my entire life trying to do this . Thank you so much for this blog.
ReplyDeleteGlad you liked it
DeleteThank you so so much
ReplyDeleteYou're welcome
DeleteHey there. Thanks so much for this. Would you now know how to give that text a transparent background without losing the image inside the text?
ReplyDeleteSee step 2. Create a new transparent layer instead of white layer. Fill With "Transparency"
DeleteThe part where I select the white color layer and press delete did NOT work for me!
ReplyDeleteSelect the white layer on the layers dialog.
DeleteHi, I messed up that part also. If you Delete or use trash can on Layers dock, it will delete whole layer. You want to use the menu bar Edit> Clear. That just takes off the ants letter area without removing entire layer. Cool
Delete