Watch the video for detailed instructions and use the written steps for quick reference.
If you liked my tutorials, please subscribe to my YouTube channel - JTSGraph.
Steps to do Sepia in Photoshop:
1. Open image.
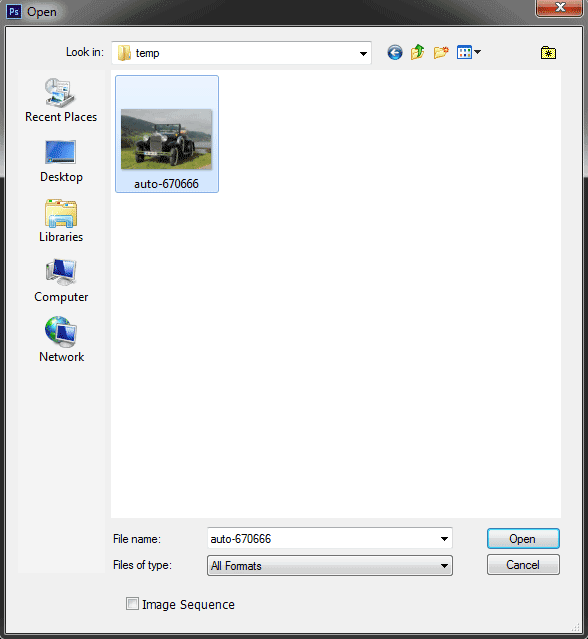
Choose File>Open (Ctrl+O). Navigate to the folder that contains your file then select the name of the file you want to open. Click Open.
For this Photoshop tutorial, I'll use this image, auto-670666, that downloaded from Pixabay.
For this Photoshop tutorial, I'll use this image, auto-670666, that downloaded from Pixabay.
2. Apply Black & White adjustment.
Choose Layer>New Adjustment Layer>Black & White. In the New Layer dialog box, name the layer if you want, leave the other options at their defaults, and click OK.
The Black & White controls display on the Properties panel. If not, double-click on the thumbnail in the Layers panel.
The Black & White controls display on the Properties panel. If not, double-click on the thumbnail in the Layers panel.
3. Apply Photo Filter adjustment.
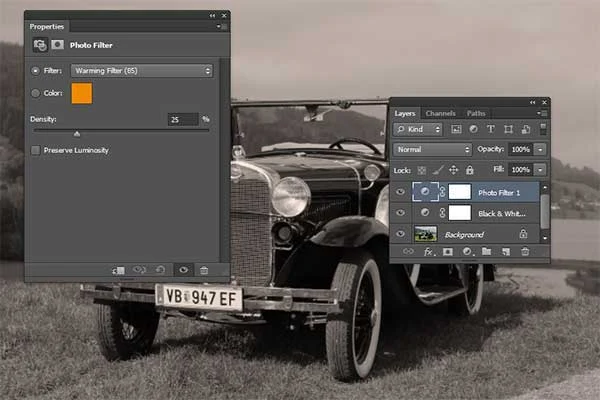
Choose Layer>New Adjustment Layer>Photo Filter. In the New Layer dialog box, name the layer if you want, leave the other options at their defaults, and click OK.
The Photo Filter controls display on the Properties panel. If not, double-click on the thumbnail in the Layers panel.
The Photo Filter controls display on the Properties panel. If not, double-click on the thumbnail in the Layers panel.
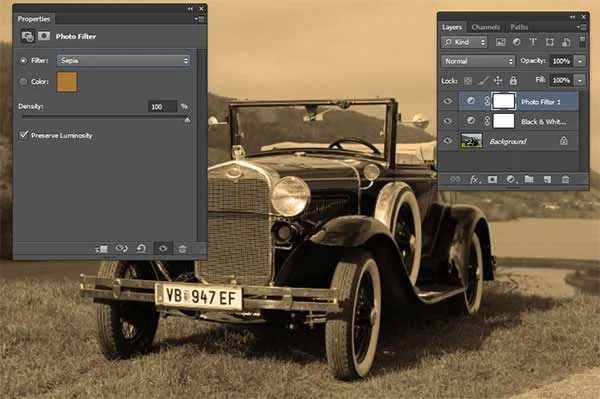
4. Choose Sepia Preset.
Click on the Sepia filter located in a drop-down menu at the top of the Photo Filter adjustment layer panel. You can adjust the Density slider to 100%.
5. Convert Background's layer into a Smart Object.
Select the Background layer on the Layers Panel and then click Layer> Smart Objects> Convert to Smart Object.
6. Add Vignette.
Select the Background layer. Go to Filter>Lens Correction (Shift+Ctrl+R). In the Lens Correction dialog box, click the Custom tab. Drag the Vignette Amount slider to the left and the Vignette Midpoint slider to the left or right. Click OK.
7. Save document.
Choose File>Save (Ctrl+S). Navigate to the folder where you want to store the file. Type a name in the File Name text box and leave the default Photoshop (*.PSD;*.PDD) format. Click Save to store the image.
Once you have finished, you will probably also want to use File>Save As (Shift+Ctrl+S) to export the image in a more widely used format, such as JPEG, PNG, TIFF, etc.
That's all there is to it! And here is the result: Create Sepia Image in Photoshop.


No comments:
Post a Comment