In today’s tutorial, I’m going to take you through the process of creating a reflection in Photoshop from a given image. We'll use the Quick Selection tool to create a selection, adding canvas height using Image>Canvas Size command, The Free Transform to flip the reflection, a Layer Mask and the Gradient tool to create the reflection, and the Gaussian Blur filter to make the reflection more realistic.
Step 1: Open an Image
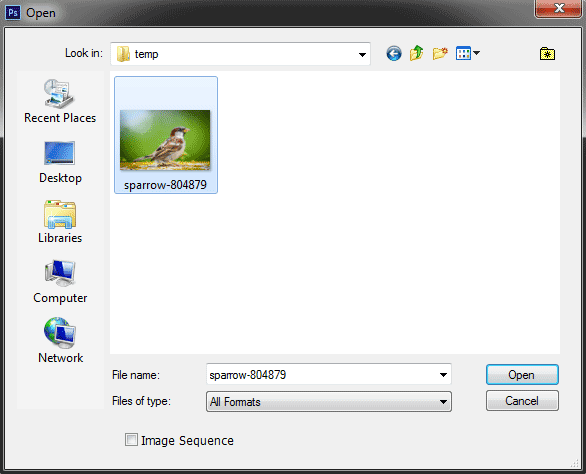
Choose File>Open or else just press Ctrl+O to Open up your base image in Photoshop. In the standard Open dialog box, navigate to the folder that contains your file then select the name of the file you want to open. If your file does not appear, try to view all files by selecting All Formats from the Files of type list. Click Open.
Step 2: Create a Selection
In the Tools panel, select the Quick Selection tool or else just press W. There are two available tools to choose from, the Quick Selection Tool and the Magic Wand Tool. Press Shift+W to cycle through the two available tools until the one you want is active.
Start making a selection by dragging the cursor in a part of the area you want to select. You will see a line of marching ants appear around the object. Keep adding to it by continuing to drag the cursor within the area. To deselect areas, hold the Alt key as you drag the cursor around the area you want to remove from the selection.
Use the Refine Edge to refine the selection by choosing Select> Refine Edge or else just press Ctrl+Alt+R. Tick Smart Radius checkbox and click refine radius icon and then adjust the slider tool radius. Click OK.
Step 3: Turn The Selection Into a Layer
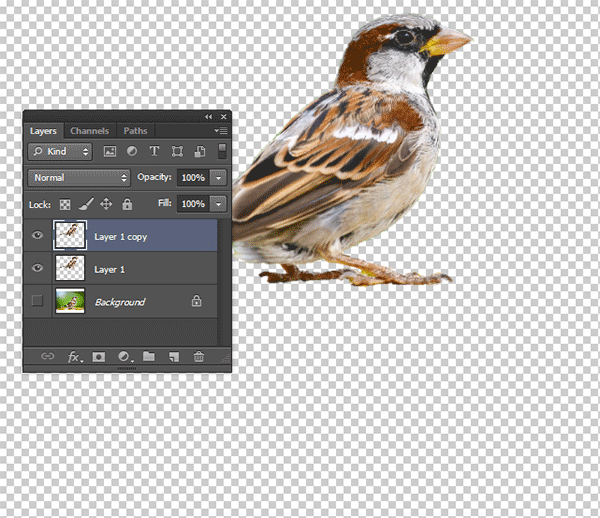
Now we'll transfer the selected pixels to a new layer while leaving the original layer unchanged. Choose Layer>New>Layer via copy or else just press Ctrl+J. In the Layers panel, a layer with the default name of Layer 1 appears above the Background layer.
Choose Image>Canvas Size or else just press Alt+Ctrl+C. In the Canvas Size dialog box, check Relative, then increase the Height values. Click the black dot in the center of the Anchor arrows that represent the existing image area.
Step 5: Duplicate Layer For The Reflection
Select Layer 1 in the Layers panel.Duplicate Layer 1 by going to the top menu and choose Layer>Duplicate layer or else just press Ctrl+J. In the Layers panel, a duplicate layer with the default name of Layer 1 copy appears above Layer 1. You can rename Layer 1 with a new name like “Reflection”.
Step 6: Flip Vertical The Reflection Layer
Select the reflection layer on the Layers panel.
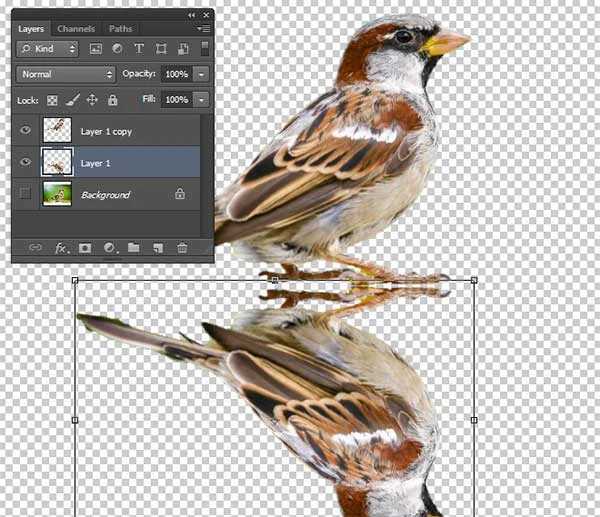
Choose Edit>Transform>Flip Vertical.
Choose Edit>Free Transform or else just press Ctrl+T to invoke the Free Transform command.
Move the reflection layer below the original image by using the down arrow or drag using your mouse. Press Enter when you're done to commit the transformation.
Step 7: Add a Layer Mask to the Reflection Layer
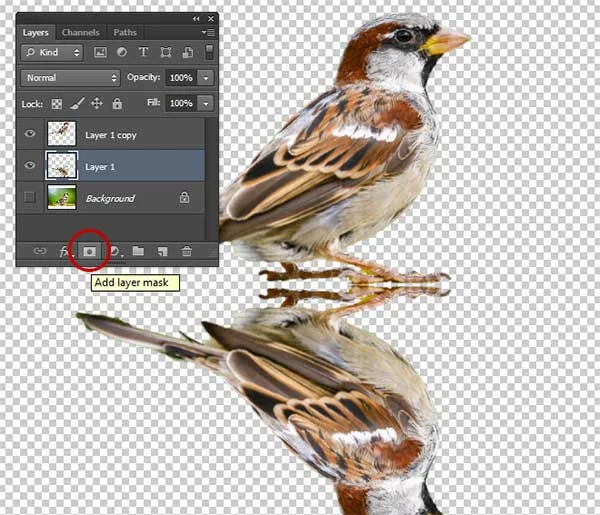
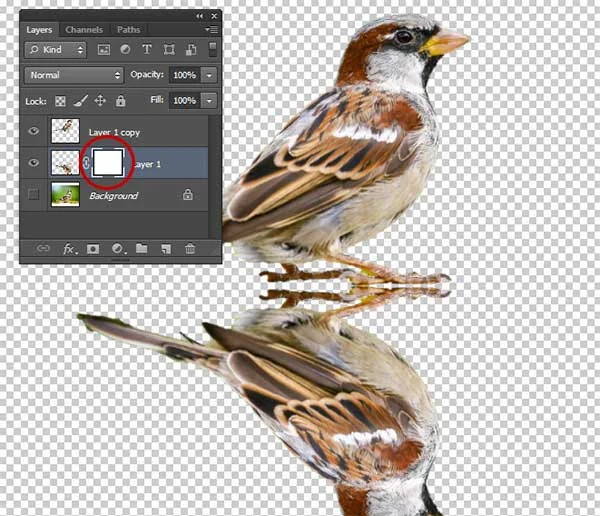
Now add Layer Mask to the Reflection Layer. Click on the reflection layer to make sure it's selected then click the Add layer mask button at the bottom of the Layers panel or else you can choose Layer>Layer Mask>Reveal All.
A white layer mask thumbnail appears on the reflection layer, revealing everything on that layer.
Step 8: Apply Gradient on the Reflection layer
Select the Gradient Tool from the Tools panel, or else just press G. There are three available tools to choose from, the Gradient Tool, the Paint Bucket Tool, and the 3D Material Drop Tool. Press Shift+G to cycle through the three available tools until the one you want is active.
Choose Black to White color and Linear Gradient in the options bar.
Make sure the layer mask thumbnail is selected by clicking on it.
While holding down the Shift key, drag the mouse in the document window to create a reflection effect.
Step 9: Apply The Gaussian Blur on the Reflection layer
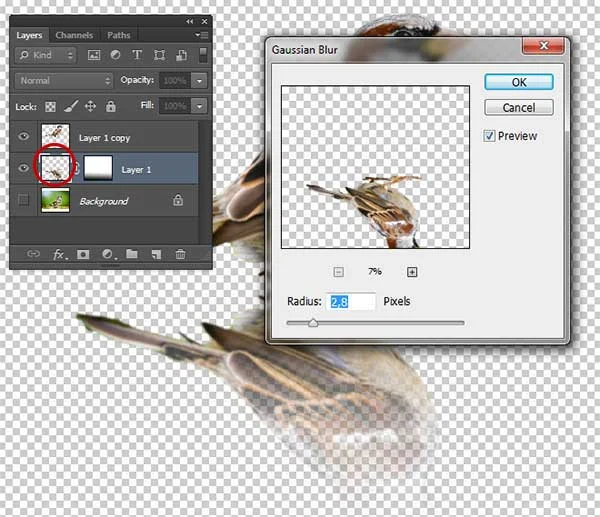
Choose Filter>Blur>Gaussian Blur. In the Gaussian Blur dialog box, move the Radius slider until the image starts to look smooth and blurry. Click OK if you are happy with the result.Step 10: Create a New Layer For Background
Select the Background layer on the Layers Panel.
Create a new layer by choosing Layer>New>Layer or else just press Shift+Ctrl+N. The New Layer dialog box appears allowing you to name your layer and specify other options. Leave the default settings and click OK.
In the Layers panel, a layer with the default name of Layer 2 appears above the Background layer.
Step 11: Fill The New Layer With Color
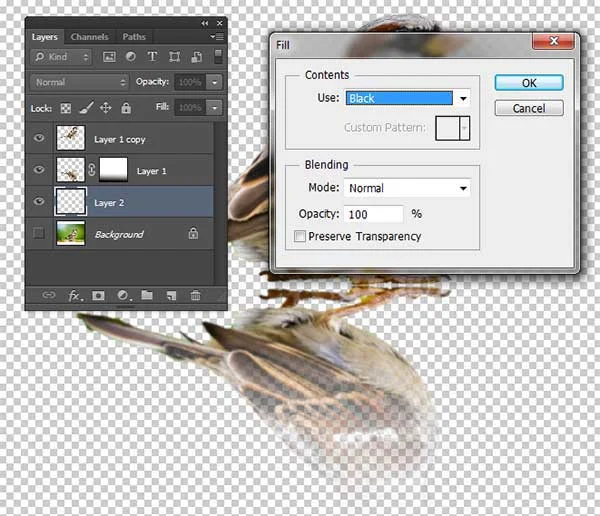
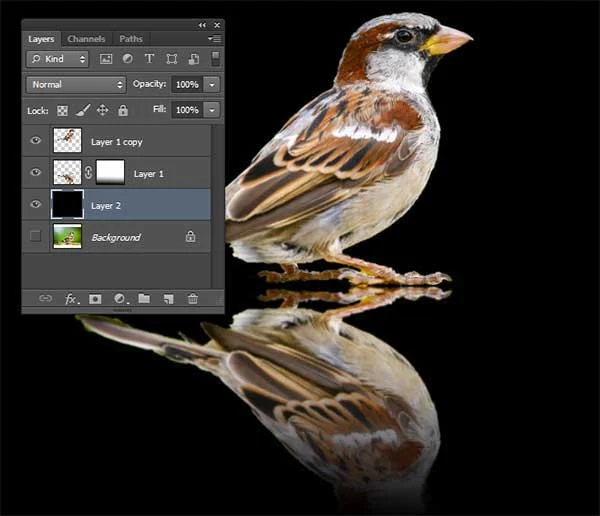
Fill the new layer with Black using Edit>Fill command. Choose Edit>Fill or else just press Shift+F5. In the Fill dialog box, under Contents, you can choose a Black color to fill the new layer with Black. Click OK.Now, the color that you choose fills the layer.
Step 12: Lower the Opacity of the Reflection layer
Lower the Opacity of the reflection layer. Access the Opacity slider by clicking the right-pointing arrow or by entering a percentage value in the Opacity text box.Step 13: Save Document
Choose File>Save or else just press Ctrl+S to save your project file. The Save As dialog box appears. Navigate to the folder where you want to store the file. Type a name in the File Name text box and leave the default Photoshop (*.PSD;*.PDD) format. Click Save to store the image.Once you have finished, you will probably also want to use File>Save As (Shift+Ctrl+S) to export the image in a more widely used format, such as JPEG, PNG, TIFF, etc.
There you have it! How to create a reflection in Photoshop.
There you have it! How to create a reflection in Photoshop.











No comments:
Post a Comment