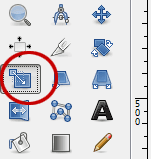
Today's tutorial will explain to you as to how to create a collage of Polaroids for a given image in GIMP. We will use the Scale Tool to resize the image, the Move Tool to move the image, the Rectangle Select Tool to draw rectangle selection, Drop Shadow to add a drop shadow, the Rotate Tool to rotate a Polaroid's frame and Layer Mask to insert the image.
1. Create a New Image
Use File>New or else just press Ctrl+N.
The Create a New Image dialog box appears.
In the pop-up window, you can set the Width and Height of the new image.
Enter a value for the initial width with 3000 px and height with 2000 px manually or through the up and down arrows.
Click Advanced Options, select Background Color for “Fill with”.
Click OK.
2. Insert Image
For this GIMP Collage tutorial, I'll use this image that I downloaded from Pixabay, stock image: 817369
Use File> Open As Layers command in the top menu to open the image you'd like to insert.
Click on the image, then click OK.
You can now edit the image as follows:
- Use Tools>Transform Tools>Scale command to resize the image to match the size of the Background layer. Click anywhere inside the image. In the Scale dialog box, click the chain to keep the image does not distort. Set the new values for the image's width and height. Press the Scale button when you are done.
- Use Tools>Transform Tools>Move command to move the image. Click and hold anywhere inside the image and drag.
3. Draw a Rectangle Selection
Select Rectangle Selection Tool from the toolbox or use Tools> Selection Tools> Rectangle Select (R).
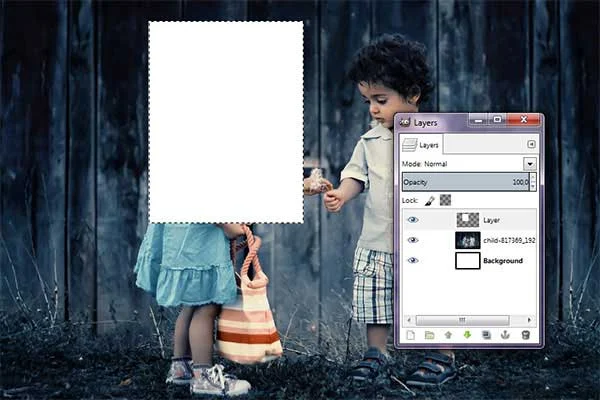
Click and drag your mouse to choose a portion of the document.
If you are done, just leave the mouse.
You should see a dotted line or marching ants outline the selection.
Now, the selected portion of the document has been picked in rectangular shaped.
4. Create a New Layer
Use Layer> New Layer or press Shift+Ctrl+N to create a new layer.
The New Layer window open.
Type a name in the Layer Name text box and choose Transparency in the Fill with drop-down menu.
Click OK.
A new, empty layer, added to the layer stack of the image, just above the active layer.
The New Layer window open.
Type a name in the Layer Name text box and choose Transparency in the Fill with drop-down menu.
Click OK.
A new, empty layer, added to the layer stack of the image, just above the active layer.
5. Fill Selection With White Color
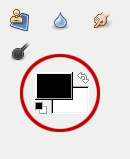
Make sure the background color is white by pressing keyboard key D, then go to Edit> Fill with BG color (or by using the keyboard shortcut Ctrl+.).
Now the white color fills the active layer selection.
6. Shrink Selection
Use Select> Shrink.
The Shrink Selection dialog box appears.
In the pop-up window, set your shrink value manually or through the up and down arrows.
Click OK to apply.
The Shrink command reduces the size of the selected area.
The Shrink Selection dialog box appears.
In the pop-up window, set your shrink value manually or through the up and down arrows.
Click OK to apply.
The Shrink command reduces the size of the selected area.
7. Fill Selection With Green Color
Click the background color box.
The Change Background Color dialog box appears.
Choose a green color and click OK.
Go to Edit> Fill with BG color (or by using the keyboard shortcut Ctrl+.).
Now a green color fills the active layer selection.
You can remove the selection by going to Select> None.
The Change Background Color dialog box appears.
Choose a green color and click OK.
Go to Edit> Fill with BG color (or by using the keyboard shortcut Ctrl+.).
Now a green color fills the active layer selection.
You can remove the selection by going to Select> None.
8. Add Drop Shadow
Make sure you already use Select>None to remove the selection.
Use Filters> Light and Shadow> Drop Shadow.
The Script-Fu: Drop Shadow dialog box appears.
Here, you can just leave the default value and then click the OK button.
Merge the two layers by choosing Layer> Merge Down.
Use Filters> Light and Shadow> Drop Shadow.
The Script-Fu: Drop Shadow dialog box appears.
Here, you can just leave the default value and then click the OK button.
Merge the two layers by choosing Layer> Merge Down.
9. Rotate The Polaroid Layer
Use Tools>Transform Tools>Rotate, a Rotation Information dialog is open.
Set the angle, center X, and center Y manually or through the up and down arrows.
Click the Rotate button when you're done.
Set the angle, center X, and center Y manually or through the up and down arrows.
Click the Rotate button when you're done.
10. Duplicate The Polaroid Layer
Use Layer> Duplicate Layer.
Click the Move Tool icon or else use Tools>Transform Tool>Move and then Click and hold anywhere inside the duplicate rectangle layer and drag to the position you want.
Click the Move Tool icon or else use Tools>Transform Tool>Move and then Click and hold anywhere inside the duplicate rectangle layer and drag to the position you want.
11. Rotate The Duplicate Polaroid Layer Using the Rotate Tool
Now you can rotate the duplicate layer to the position you want.
Use Tools>Transform Tools>Rotate, a Rotation Information dialog is open.
Set the angle, center X, and center Y manually or through the up and down arrows.
Click the Rotate button when you're done.
Use Tools>Transform Tools>Rotate, a Rotation Information dialog is open.
Set the angle, center X, and center Y manually or through the up and down arrows.
Click the Rotate button when you're done.
12. Duplicate Layer Polaroid As Many as You Want
Repeat steps 10 through 11 to duplicate and rotate the rectangle layer as many as you want and then arranged it all to your satisfaction.
13. Duplicate The Image Layer
Activate the image's layer by clicking on it and then duplicate layer by choosing Layer> Duplicate Layer.
Move the image's layer right on top of one of the duplicate polaroid layer.
14. Create a Layer Mask
Toggling the visibility of the image's layer by clicking on the eye icon on the left.
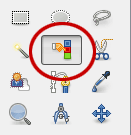
Click “Select by color” tool or else use Tools>Selection Tools>By color Select and then click on the inner Polaroid shaped layer that is in green color.
Click on the image's layer. Again, toggling the visibility of the image's layer by clicking on the eye icon on the left and then go to Layer> Add Layer Mask, choose “Selection”.
Click the Add button.
When you're done, remove the selection by going to Select> None.
Select the Polaroid layer then click on the inner Polaroid layer that is in green color.
Select the image's layer on the Layers Dialog and toggling the visibility of the image's layer by clicking on the eye icon on the left.
15. Fill All Polaroid Frame With Image
Repeat steps 13 through 14 to fill all polaroid frame with the image.
Repeat steps 13 through 14 to fill all polaroid frame with the image.
16. Save Your Document
Use File>Save command in the top menu or else just press Ctrl+S to save your project file.
The Save Image dialog box appears.
Navigate to the folder where you want to store your project file.
Type a name in the Name text box and leave the default GIMP (*.XCF) format.
XCF is GIMP's native format and is useful because it stores everything about your image and will allow you to later edit your image in GIMP, in case you notice a problem.
Click Save to store the project file.
Once you have finished, you will probably also want to export the image in a more widely used format, such as JPEG, PNG, TIFF, etc.
Here is the result:


worked great! thank you!!!
ReplyDeleteYou're welcome. Glad you liked it! :)
Delete