Here is the easy way to create an Infrared Effect in Photoshop. In this Photoshop tutorial we'll work with Hue/Saturation and Curves Adjustment Layer to recreate the infrared look, use the Motion blur filter to the clouds and add a slight vignette using Lens Corrections filter. Let's get started!
1. Open an Image File
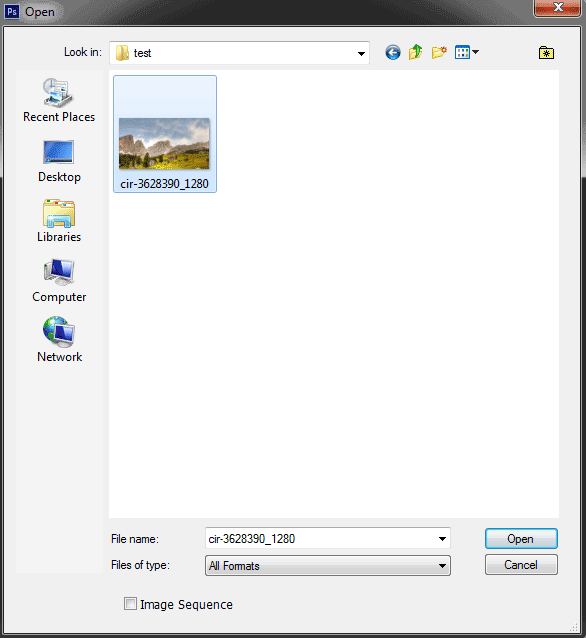
Choose File>Open or else just press Ctrl+O to Open up your base image in Adobe Photoshop.
The standard Open dialog box appears.
Navigate to the folder that contains your file then select the name of the file you want to open.
If your file does not appear, try to view all files by selecting All Formats from the Files of type list.
Click the Open button.
The standard Open dialog box appears.
Navigate to the folder that contains your file then select the name of the file you want to open.
If your file does not appear, try to view all files by selecting All Formats from the Files of type list.
Click the Open button.
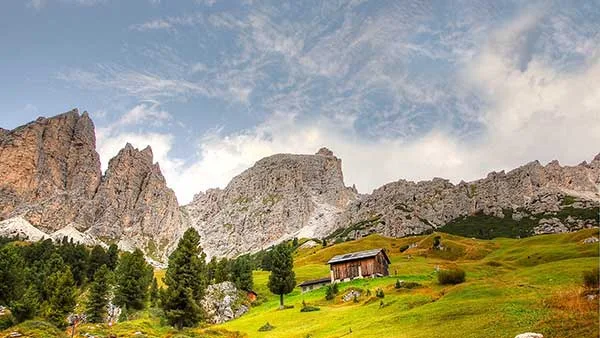
For this Photoshop tutorial, I'll use this image, 3628390, that downloaded from Pixabay.
2. Duplicate Layer
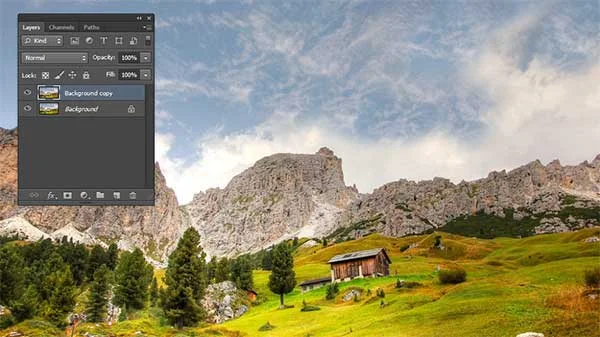
Duplicate the Background in this original image by going to the top menu and choose Layer>Duplicate layer or else just press Ctrl+J.
In the Layers panel, a duplicate layer with the default name of Background copy or Layer 1 appears above the Background layer.
In the Layers panel, a duplicate layer with the default name of Background copy or Layer 1 appears above the Background layer.
3. Invert the Duplicate Layer
Choose Image>Adjustments>Invert or else just press Ctrl+I. Photoshop permanently inverts the colors in your image.
4. Change the Blend Mode to Color
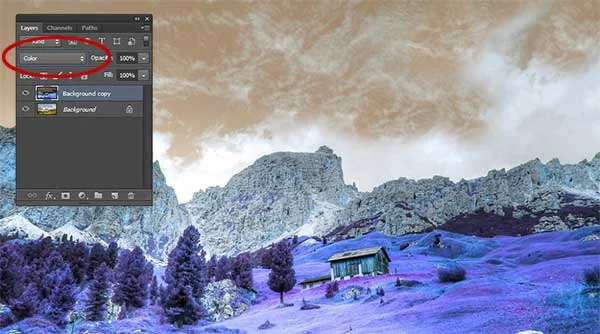
Change the Blend Mode from Normal to Color by going to the drop down menu in the options bar.
5. Create a Hue/Saturation Adjustment Layer
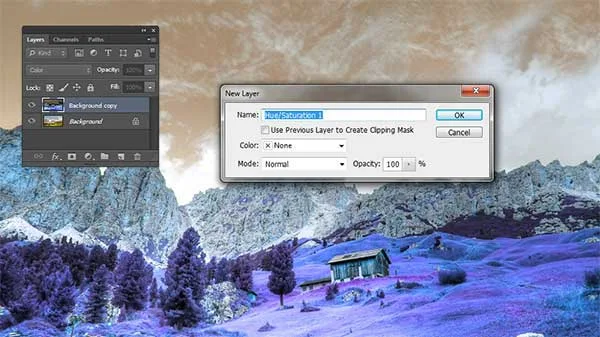
Create a Hue/Saturation Adjustment Layer. Choose Layer>New Adjustment Layer>Hue/Saturation.
The New Layer dialog box appears.
In the New Layer dialog box, name the layer if you want, leave the other options at their defaults, and click OK.
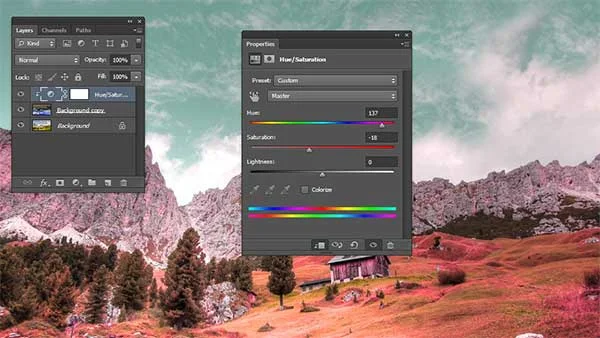
The Hue/Saturation controls display on the Properties panel.
Click the clipping mask icon to clip the Hue/Saturation adjustment to the layer below.
The New Layer dialog box appears.
In the New Layer dialog box, name the layer if you want, leave the other options at their defaults, and click OK.
The Hue/Saturation controls display on the Properties panel.
Click the clipping mask icon to clip the Hue/Saturation adjustment to the layer below.
6. Adjust The Green Color into Red
Drag the Hue and the Saturation slider to change the Grass color into Red.
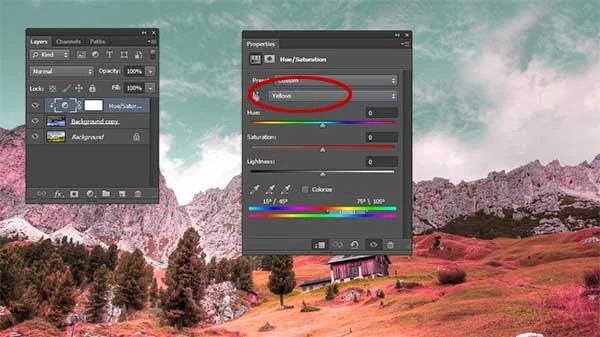
7. Choose Yellows To Adjust the Sky color
Choose Yellows from the drop-down menu to Adjust the Sky color.
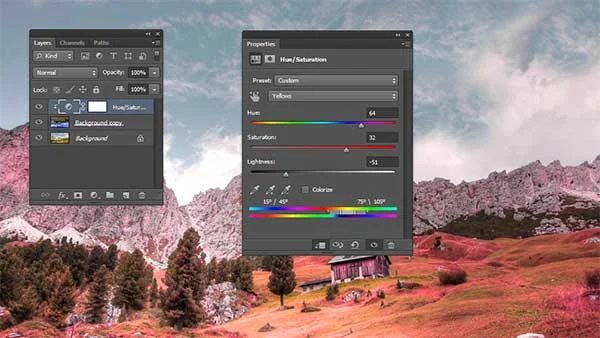
Drag the Hue, the Saturation and the Lightness slider to darken the sky.
Drag the Hue, the Saturation and the Lightness slider to darken the sky.
8. Choose Cyan To Adjust the Rocks Color
Choose Cyan To Adjust the Rocks Color. Remove the color from the Rocks by adjusting the Hue and the Saturation slider.
9. Boost Tone And Contrast Using a Curves Adjustment Layer
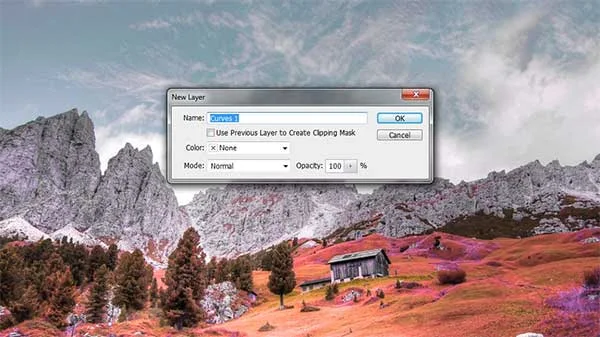
Create a Curves Adjustment Layer. Choose Layer>New Adjustment Layer>Curves.
The New Layer dialog box appears.
In the New Layer dialog box, name the layer if you want, leave the other options at their defaults, and click OK.
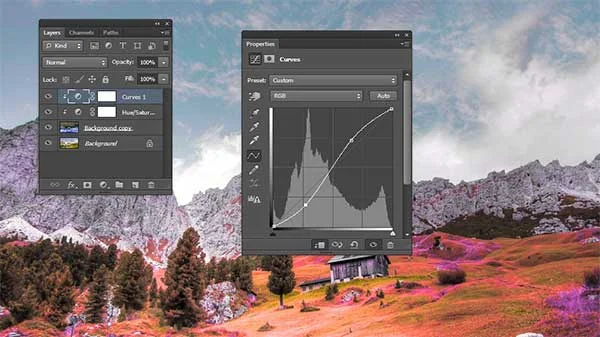
The Curves controls display on the Properties panel.
Adjust the curve to make a subtle “S” curve.
Click the clipping mask icon to clip the Curves adjustment to the layer below.
10. Group All Layers (Optional)
Select the layers that you want to be in a group by clicking on all layer, while holding-down the Ctrl key.
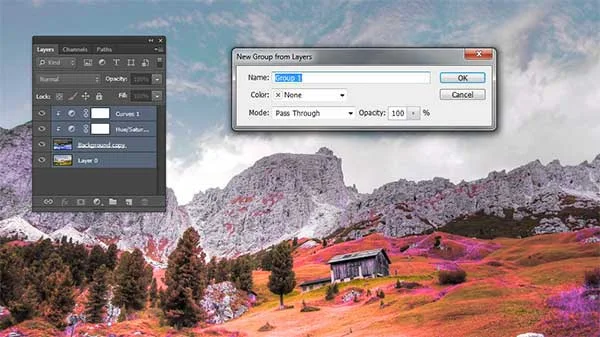
Choose Layer>New>Group from Layers or select New Group from Layers from the Layers panel menu.
The New Group from layers dialog box appears.
Name the group and click OK.
Choose Layer>New>Group from Layers or select New Group from Layers from the Layers panel menu.
The New Group from layers dialog box appears.
Name the group and click OK.
Select the layers that you want to be in a group by clicking on all layer, while holding-down the Ctrl key.
11. Duplicate Group Layer (Optional for backup)
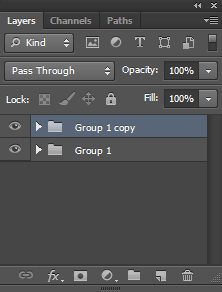
With the Layer Group selected in the layers panel, choose Layer>Duplicate Group.
12. Merge All Layers
Click the eye icon layer group to turn off its visibility.
Select the duplicate layer group then choose Layer>Merge Group.
Select the duplicate layer group then choose Layer>Merge Group.
13. Convert the Merged Layer To Smart Object
Convert the merged Layer To Smart Object by choosing Filter>Convert for smart filters.
14. Apply the Radial Blur Filter
Apply Radial Blur filter for our infrared effect.
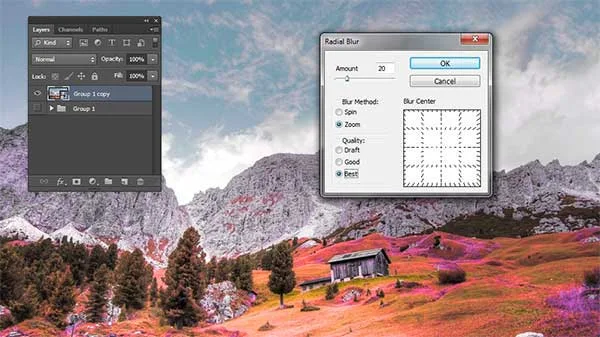
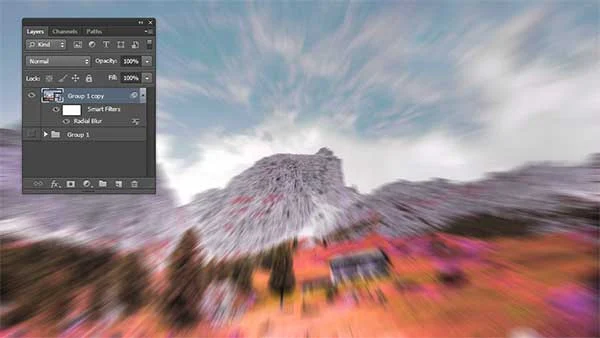
Now go to Filter>Blur>Radial Blur to give a moving and blurry effect.
The Radial Blur dialog box appears.
Set Amount to 20, Set Blur Method to Zoom to blur along radial lines and mimic the effect of zooming in to your image, specify Quality level to Best, and indicate where you want the center of your blur by clicking and dragging inside the Blur Center box.
Click OK when you're done.
15. Select The Brush Tool
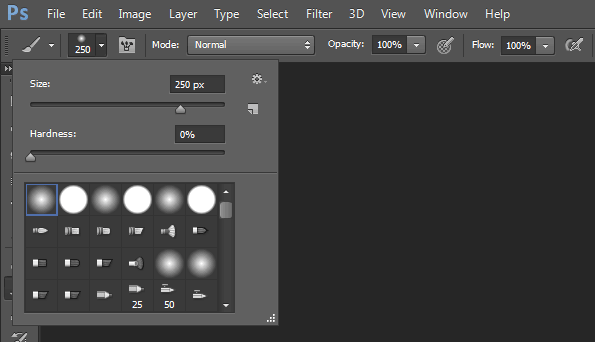
Select the Brush Tool from the Tools panel, or press B.
There are four available brush tools to choose from, Brush Tool, Pencil Tool, Color Replacement Tool, and Mixer Brush Tool.
Press Shift+B to cycle through the four available brush tools until the one you want is active.
There are four available brush tools to choose from, Brush Tool, Pencil Tool, Color Replacement Tool, and Mixer Brush Tool.
Press Shift+B to cycle through the four available brush tools until the one you want is active.
Choose a large, Soft Round brush, Normal mode, and an Opacity 100% on the Options bar.
Press D to make sure that the Foreground color is black.
Press D to make sure that the Foreground color is black.
16. Apply Brush Strokes to Reveal Foreground
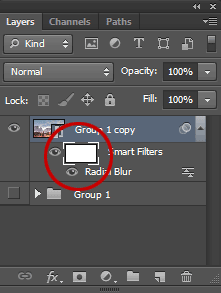
Click on the Smart Filters mask.
Using your mouse, apply brush strokes to the image (except the sky) to reveal some of the underlying image.
Using your mouse, apply brush strokes to the image (except the sky) to reveal some of the underlying image.
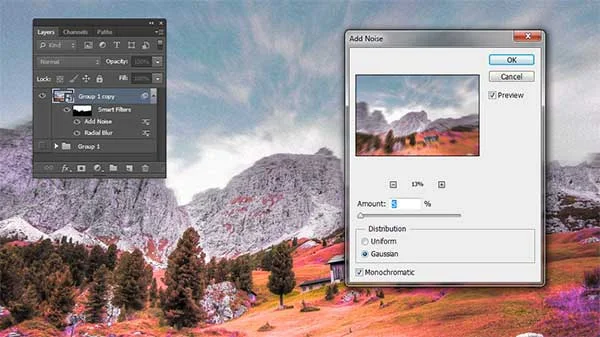
17. Apply Noise Filter
Now add noise to the smart object layer.
Make sure the smart object layer is selected.
Choose Filter>Noise>Add Noise.
The Add Noise dialog box appears.
Adjust the Amount to 5%-10% by typing in a number or just drag along the slider right below.
Next, set Distribution to Gaussian. It's a bit more sporadic when "Gaussian" is selected.
Tick "Monochromatic" at the bottom to make the noise just black and white.
You can zoom out using the minus sign on the left side below the image preview or zoom in with the plus sign on the right.
Click OK when you're done.
Click OK when you're done.
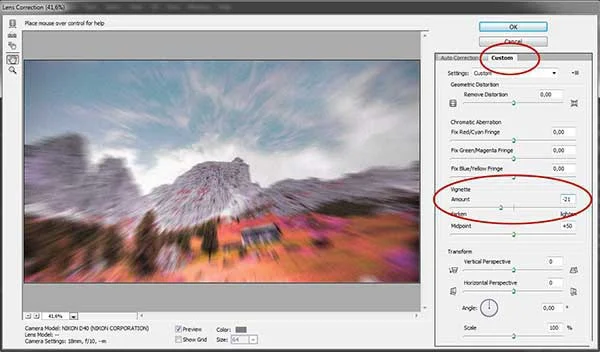
18. Add Vignette
Now apply vignette or darkening in the corners, to the image.
Select the merged layer.
Go to Filter>Lens Correction or else just press Shift+Ctrl+R.
The Lens Correction dialog box appears.
Click the Custom tab.
Drag the Vignette Amount slider to the left and the Vignette Midpoint slider to the left or right.
Click OK when you're happy with the result.
Select the merged layer.
Go to Filter>Lens Correction or else just press Shift+Ctrl+R.
The Lens Correction dialog box appears.
Click the Custom tab.
Drag the Vignette Amount slider to the left and the Vignette Midpoint slider to the left or right.
Click OK when you're happy with the result.
19. Save the Document
Choose File>Save or else just press Ctrl+S to save your project file.
The Save As dialog box appears.
Navigate to the folder where you want to store the file.
Type a name in the File Name text box and leave the default Photoshop (*.PSD;*.PDD) format.
Click Save to store the image.
The Save As dialog box appears.
Navigate to the folder where you want to store the file.
Type a name in the File Name text box and leave the default Photoshop (*.PSD;*.PDD) format.
Click Save to store the image.
Once you have finished, you will probably also want to use File>Save As (Shift+Ctrl+S) to export the image in a more widely used format, such as JPEG, PNG, TIFF, etc.
Here is the result:













No comments:
Post a Comment