In this tutorial, we will learn how to create an out of bounds effect in Photoshop. We will begin by tracing the frame (smartphone) using the Pen tool, make a selection and then copy it into a new layer, add the frame to the background image (in this tutorial we'll use a bridge image), apply a Layer Mask to the frame layer then use the Brush tool to create a realistic Out of Bounds effect.
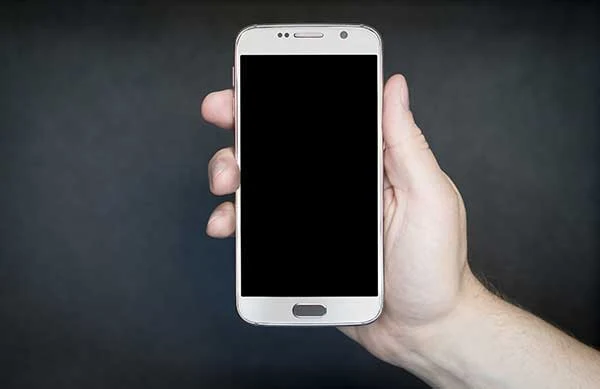
Step 1: Open Up Your Frame Image
Choose File>Open or else just press Ctrl+O to open up your frame image in Adobe Photoshop. The standard Open dialog box appears. Navigate to the folder that contains your file then select the name of the file you want to open. If your file does not appear, try to view all files by selecting All Formats from the Files of type list. Click Open.
Step 2: Grab The Pen Tool
Grab the Pen tool by selecting it from the toolbar on the left. There are five available tools to choose from, the Pen Tool, the Freeform Pen Tool, the Add Anchor Point Tool, the Delete Anchor Point Tool, and the Convert Point Tool. If the Pen Tool is not visible, right-click on one of the tools above, to see all available tools.
Make sure Path and Combine Shapes is chosen from the menu in the options bar.
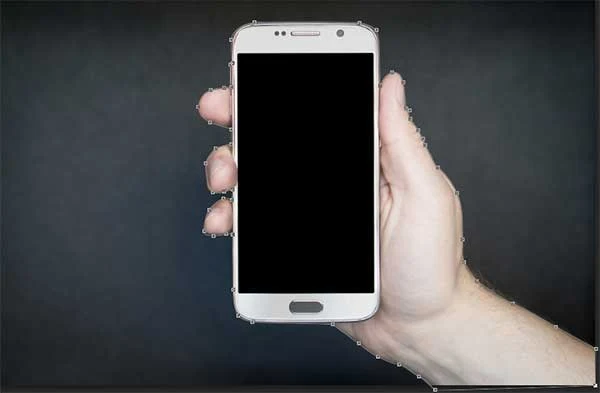
Step 3: Cut Out The Frame From its Background
Use The Pen Tool To Trace Around The Subject. Start by clicking once to place an initial anchor point. Continue clicking to set anchor points to create a path. Close the path by position the Pen tool over the first anchor point. Click or drag to close the path.
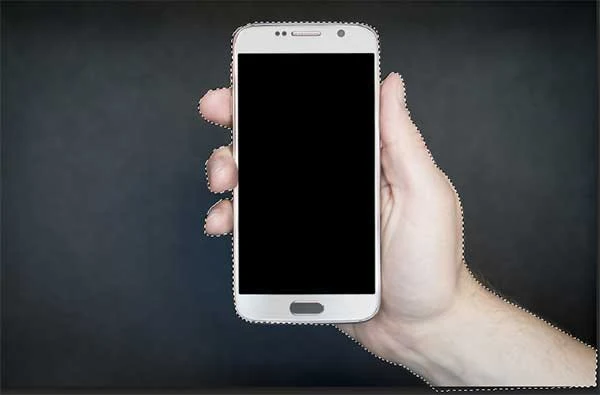
Now simply press Ctrl+Enter to turn the path into a selection.
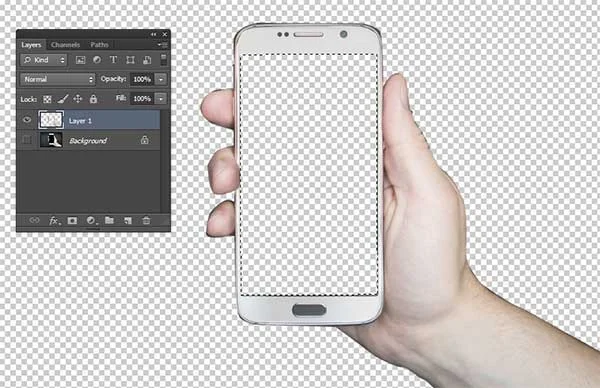
Copy the selection onto its own layer by going to Layer>New>Layer via copy or else just press Ctrl+J.
A layer with the default name of Layer 1 appears above the Background layer. You can hide the Background layer by clicking on the eye icon on the left.
Step 4: Cut Out The Smartphone Screen
Select the Smartphone layer on the Layers panel.
Trace the screen using the Pen Tool.
Turn the path into a selection by pressing Ctrl+Enter then delete it by going to Edit>Clear. Clear the selection by choosing Select>Deselect or else just press Ctrl+D.
Step 5: Open Your Image
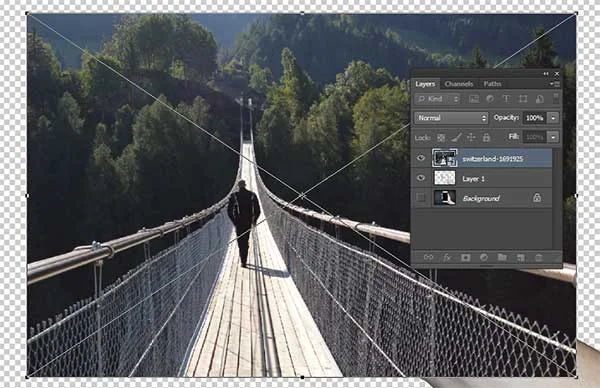
To get impressive out of bounds result, you need a shot of a person at a perfect angle. Choose File> Place command in the top menu to open your image. The Place dialog box appears. Navigate to the folder that contains your image file then select the name of the file you want to open. If your file does not appear, try to view all files by selecting All Formats from the Files of type list. Click Place.
You can now adjust the image as follows:
- Resize the image by dragging any corner while holding down the Shift key to keep the image does not distort.
- Move the image by clicking and hold anywhere inside the image and drag.
- Rotate the image by moving your cursor farther out from any corner until you see two arrows. Click and hold, then drag the image.
- Press Enter key when you are done.
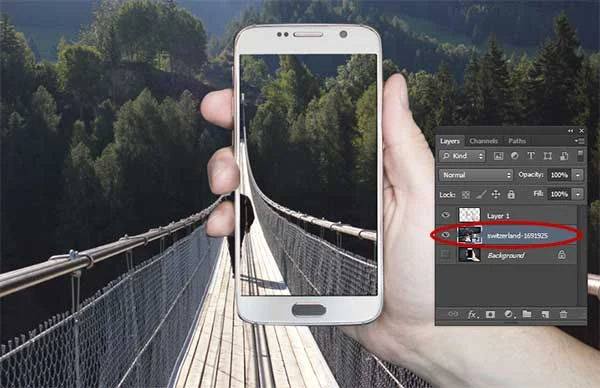
Move this layer below the frame/smartphone layer.
Step 6: Adjust Size and Position of The Frame/Smartphone Layer Using Free Transform
Select the Frame layer on the Layers panel.
Choose Edit>Free Transform or else just press Ctrl+T to invoke Free Transform command. Adjust the size and position of the frame layer. The effect here works better when the person appears at the center of the frame.
Step 7: Duplicate the Frame Layer
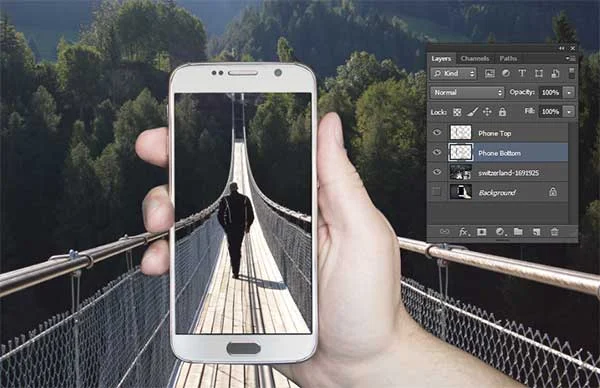
Duplicate the Frame layer by going to the top menu and choose Layer>Duplicate layer or else just press Ctrl+J. In the Layers panel, a duplicate layer with the default name of Layer 1 copy appears above the original frame layer.
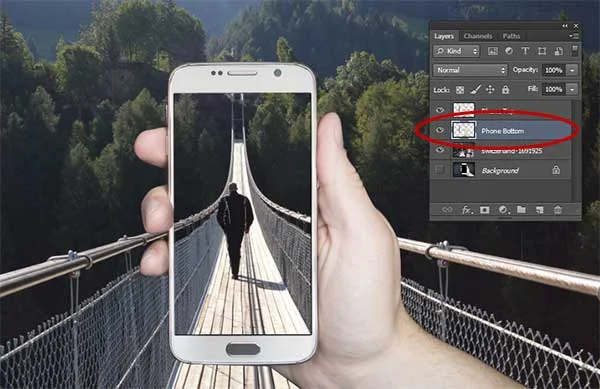
Rename Layer 1 with a new name like “Phone Bottom” and Layer 1 copy with “Phone Top”.
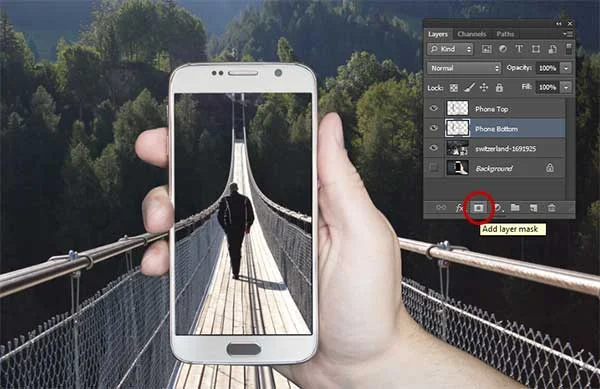
Step 8: Add a Layer Mask to the Phone Bottom Layer
Select the Phone Bottom layer on the Layers panel.
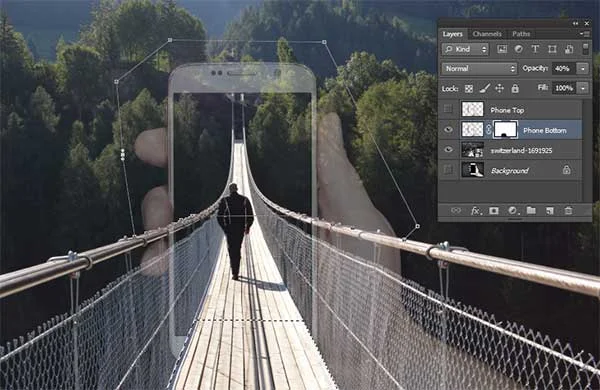
Click the Add layer mask button at the bottom of the Layers panel or you can choose Layer>Layer Mask>Reveal All.
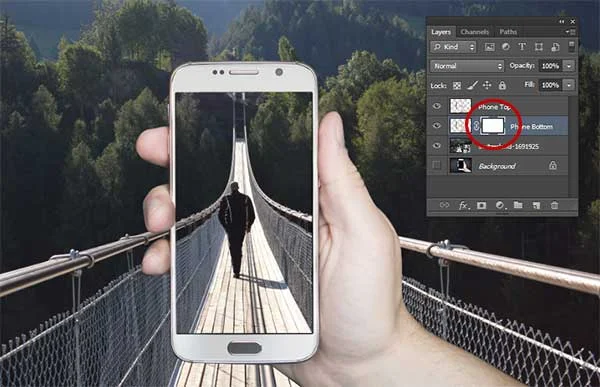
A white layer mask thumbnail appears on the selected layer, revealing everything on the Phone Bottom layer.
Step 9: Use the Pen Tool and the Brush Tool to create a realistic out of bounds effect
Select the upper parts of the smartphone using the Pen Tool.
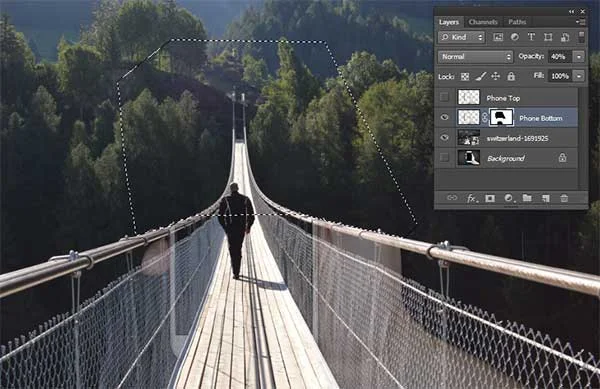
Change the path into a selection. Paint away using the Brush Tool. Also, paint away, the smartphone parts that are behind the bridge.
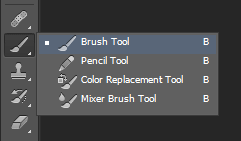
Select the Brush Tool from the Tools panel, or press B. There are four available brush tools to choose from, Brush Tool, Pencil Tool, Color Replacement Tool, and Mixer Brush Tool. Press Shift+B to cycle through the four available brush tools until the one you want is active.
Choose a large, Hard Round brush, Normal mode, and an Opacity 100% on the Options bar.
Choose a black color for the foreground color.
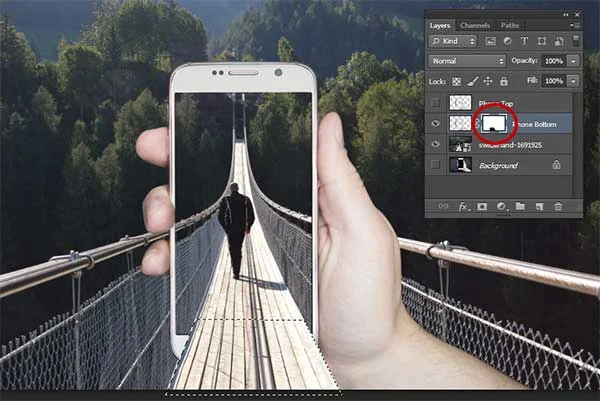
Make sure the layer mask thumbnail is selected by clicking on it then paint away using the Brush Tool.
Select the smartphone upper parts using the Pen Tool.
Change the path into a selection.
Paint away using the Brush Tool.
Step 10: Add a Layer Mask to the Phone Top Layer
Select the Phone Top layer on the Layers panel.
Click the Add layer mask button at the bottom of the Layers panel or you can choose Layer>Layer Mask>Reveal Selection.
A white layer mask thumbnail appears on the selected layer, revealing the selection on the Phone Top layer.
Step 11: Apply Brightness/Contrast to the Phone Top layer
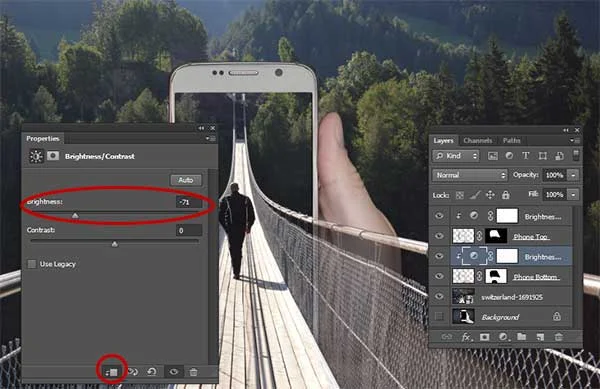
Now adjust brightness contrast using the Brightness/Contrast adjustment layer. Select the Phone Top layer on the Layers panel. Choose Layer>New Adjustment Layer>Brightness/Contrast. The New Layer dialog box appears. Just click OK.
Drag the Brightness slider to the left. Click the clipping mask icon to clip the Brightness/Contrast adjustment to the layer below it.
Step 12: Apply Brightness/Contrast to the Phone Bottom layer
To create a realistic out of bounds effect, adjust brightness contrast using the Brightness/Contrast adjustment layer. Select the Phone Bottom layer on the Layers panel. Choose Layer>New Adjustment Layer>Brightness/Contrast. The New Layer dialog box appears. Just click OK.
Drag the Brightness slider to the right. Click the clipping mask icon to clip the Brightness/Contrast adjustment to the layer below it.
Lower the opacity of the Phone Bottom layer.
Step 13: Save the Document
Choose File>Save or else just press Ctrl+S to save your project file. The Save As dialog box appears. Navigate to the folder where you want to store the file. Type a name in the File Name text box and leave the default Photoshop (*.PSD;*.PDD) format. Click Save to store the image. Once you have finished, you will probably also want to use File>Save As (Shift+Ctrl+S) to export the image in a more widely used format, such as JPEG, PNG, TIFF, etc.
There you have it! Out of Bounds Effect in Photoshop.
More on Photoshop Tutorials:
















cool work
ReplyDeleteThank you
Deletei use gimp 2.8 to do my out of bounds work
ReplyDeleteThats great!
DeleteAmazing tutorial
ReplyDelete