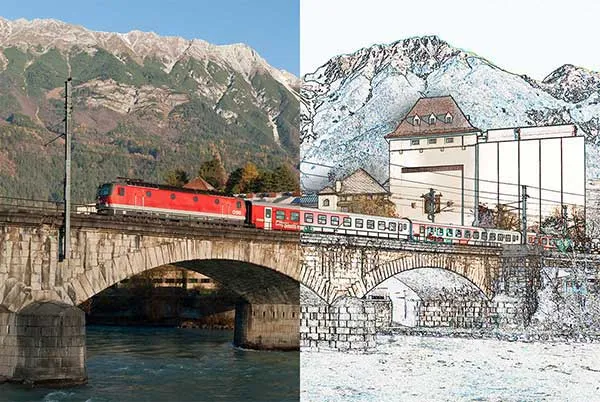
In today’s tutorial, I’m going to take you through the process of creating a watercolor effect in Photoshop from a given image. We’ll use the Brush Tool and the Find Edges filter, a built-in Photoshop filter to produce the basic outlines from a source image, then mix in using layer's blending mode to enhance the realism.
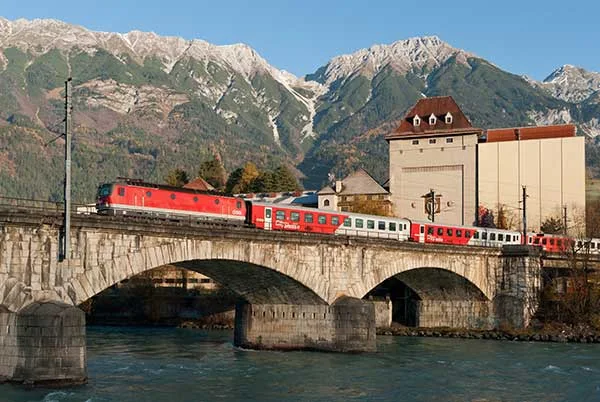
1. Open image.
Choose File>Open (or Ctrl+O). In the standard Open dialog box, navigate to the folder that contains your file then select the name of the file you want to open. Click Open.
For this Photoshop tutorial, I'll use this image, Austria-84109, downloaded from Pixabay.
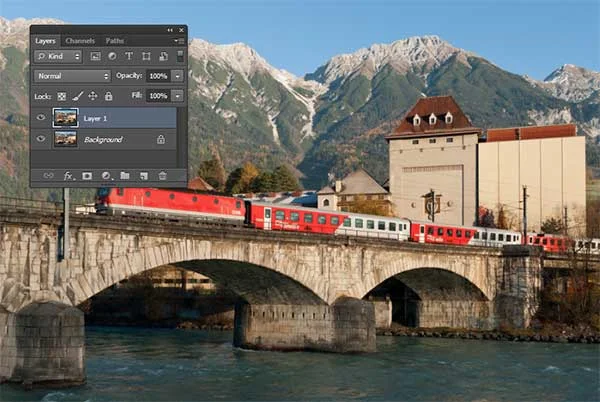
2. Duplicate layer.
Choose Layer>Duplicate layer (or Ctrl+J). In the Layers panel, a duplicate layer with the default name of Background copy or Layer 1 appears above the Background layer.
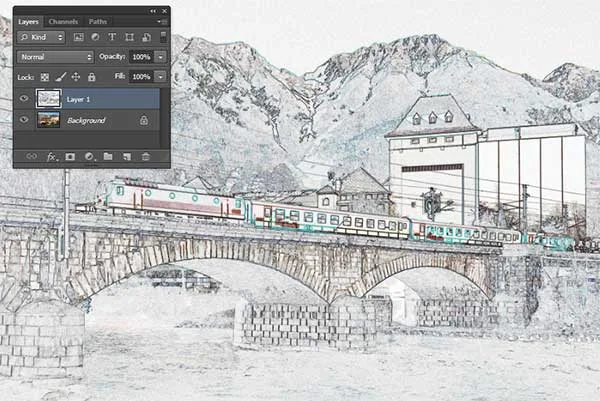
3. Apply Find Edges filter.
Choose Filter>Stylize>Find Edges. The layer will change quite dramatically. The layer has lost a lot of detail.
4. Add Layer Mask to the duplicate layer.
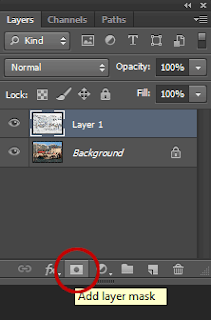
Click on the duplicate layer to make sure it's selected then click the Add layer mask button at the bottom of the Layers panel (or Layer>Layer Mask>Reveal All).
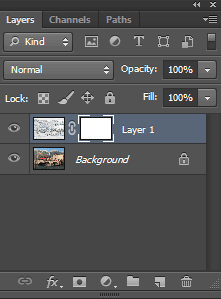
A white layer mask thumbnail appears on the duplicate layer, revealing everything on that layer.
5. Grab The Brush tool.
Select the Brush Tool from the Tools panel, or press B.
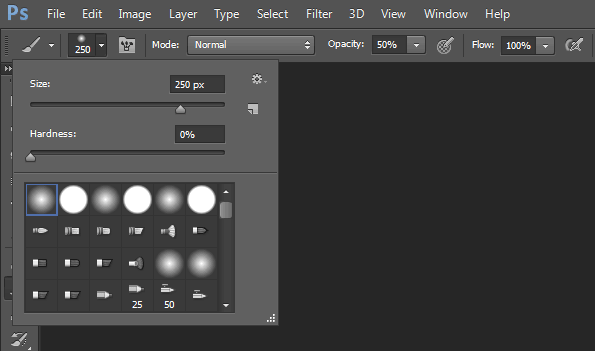
Choose a large, Soft Round brush, Normal mode, and an Opacity below 50% on the Options bar.
Press D to make sure that the Foreground color is black.
6. Apply Brush Strokes to the layer Mask thumbnail.
Click on the Layer Mask thumbnail to select it.
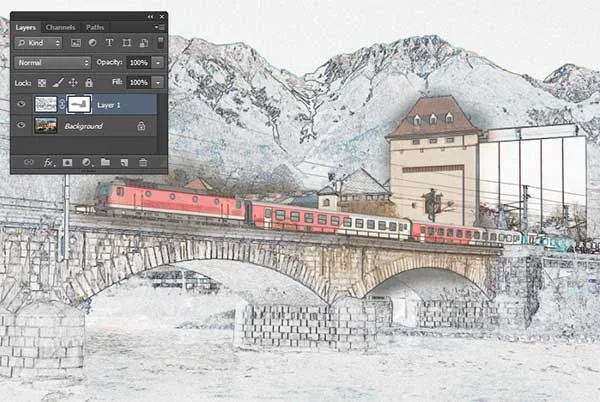
Using your mouse, apply brush strokes to the layer mask to reveal some of the underlying image.
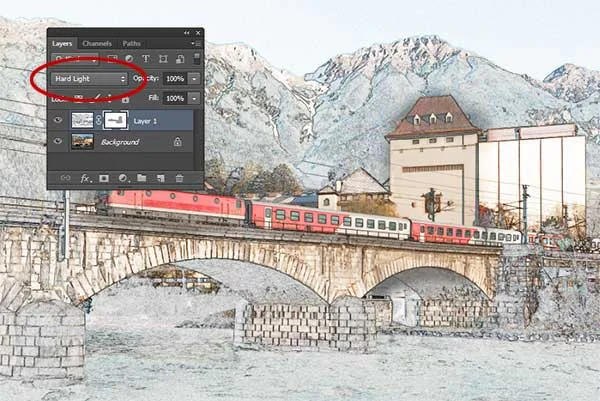
Choose Hard Light as the blending mode for the duplicate layer.
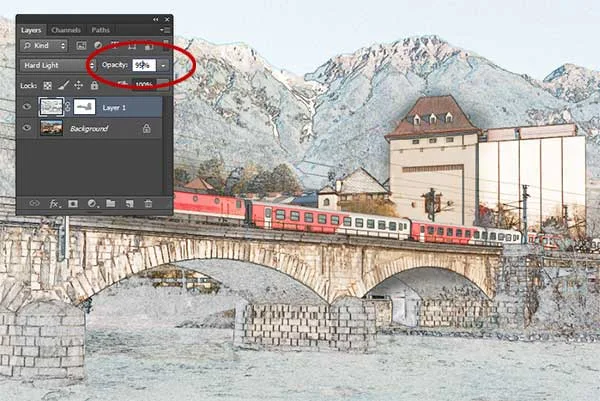
7. Lower the Opacity of the duplicate layer.
Access the Opacity slider by clicking the right-pointing arrow or by entering a percentage value in the Opacity text box.
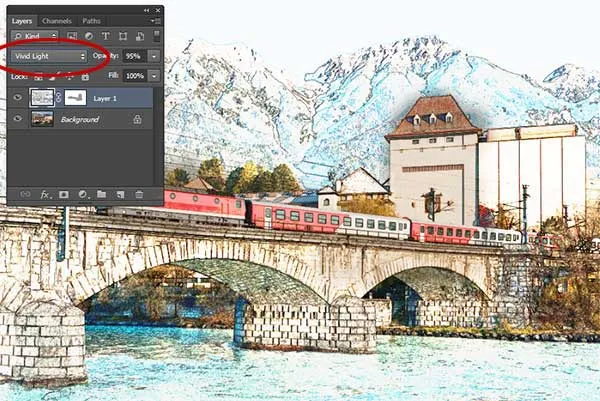
8. Change the blending mode of the duplicate layer.
This is an experimental process. Try Lighter Color, Vivid Light, Hard Light, Pin Light, or Luminosity, until you get the watercolor result you’re looking for. For this image, I'll stick with Hard Light.
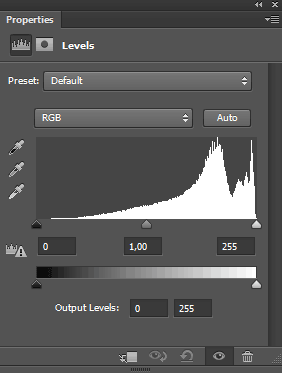
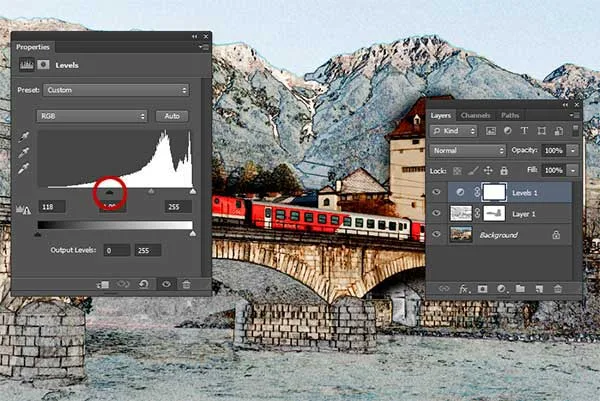
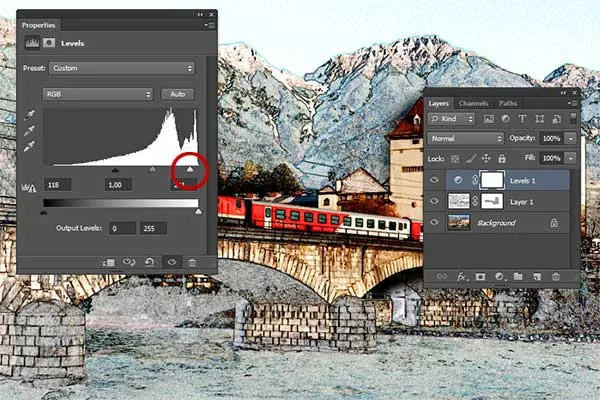
9. Intensify the contrast via a Levels adjustment layer.
With the duplicate layer selected, Choose Layer>New Adjustment Layer>Levels. In the New Layer dialog box, just click OK.
The Levels controls display on the Properties panel. Darken the shadows by moving the black input shadows slider (left slider) to the right.
Brighten the highlights by moving the white input high lights slider (right slider) to the left.
Click the clipping mask icon to clip the levels adjustment to the layer below (not all layers below).
10. Save document.
Choose File>Save (or Ctrl+S) to save your project file. In the Save As dialog box, navigate to the folder where you want to store the file. Type a name in the File Name text box and leave the default Photoshop (*.PSD;*.PDD) format. Click Save to store the image.
Once you have finished, you will probably also want to use File>Save As (Shift+Ctrl+S) to export the image in a more widely used format, such as JPEG, PNG, TIFF, etc.
There you have it! Turn a Photo into a watercolor in Photoshop.




No comments:
Post a Comment