In this text effect tutorial, I will take you through the process of placing multiple images in a text using Paint.NET.
I will use the Text Tool to create the text on canvas, the Move Selected Pixels tool to move and resize the text, and the Magic Wand Tool to create a selection.
Video: Placing Multiple Images in Text using Paint.NET.
1. Create a New Image
Choose File>New (Ctrl+N) to create a new, blank image.
In the New Image dialog, you can set the Width and Height of the new image.
For this tutorial, I’ll enter a value for the initial width with 1280 pixels and height with 720 pixels manually or through the up and down arrows, then click OK.
The new image will be filled with white.
2. Create a New Layer For the Text
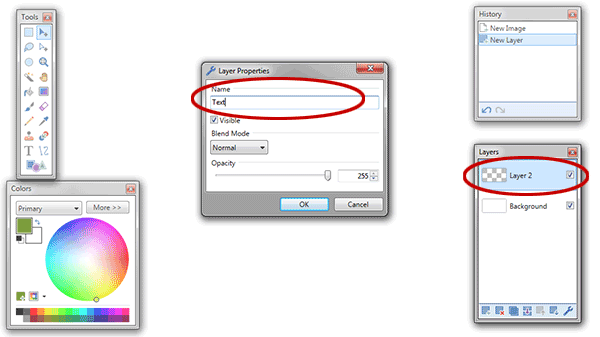
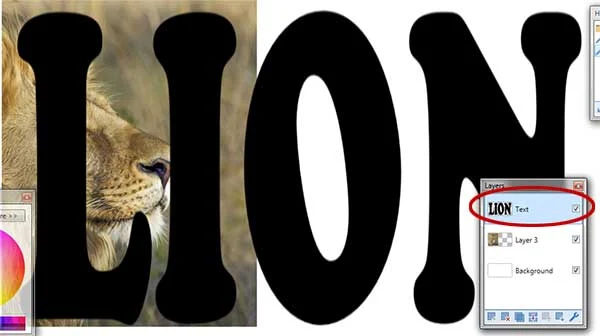
Choose Layers> Add New Layer (Ctrl+Shift+N) to create a new layer for the text.
A new, transparent layer, immediately added to the layer stack on the Layers window, just above the active layer.
Now we have two layers, the Background layer and Layer 2 for the text.
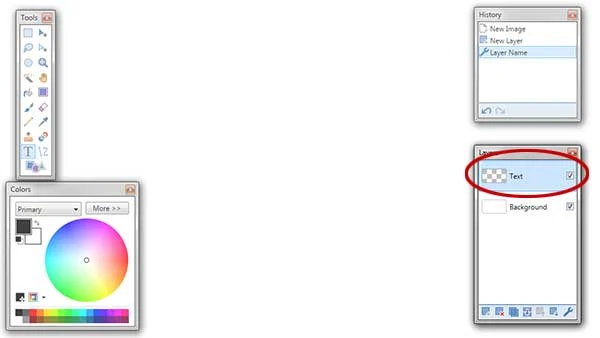
Double click Layer 2 in the Layers Window then enter a new name like “Text”.
3. Select the Text Tool
To places text into an image we need to use the Text tool.
Select the Text Tool from the Tool Window by clicking the tool icon or else just press T.
In the Text Tool Options, you can choose the font type and size.
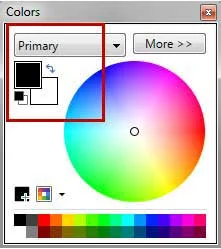
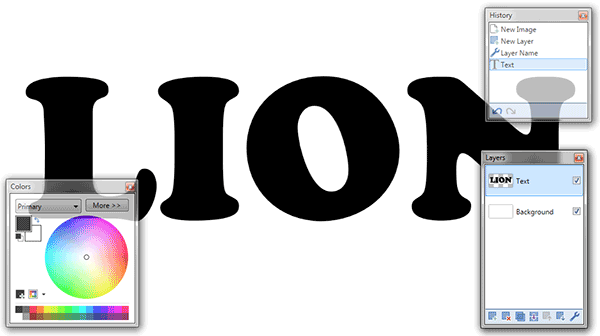
In the Colors Window, choose black for the Primary color.
4. Type the Text On the Editing Window
Make sure the text layer is selected by clicking on it in the Layers Window.
Click on any portion in the Editing Window, where you would like to create the text, then type the text.
Press Enter or click Finish in the Tool Bar when finished.
5. Adjust Text On Canvas
Select the Move Selected Pixels tool from the Tools Window by clicking the tool icon or else just press M once.
Click and drag to move the text to another location.
6. Resize The Text
Now we'll use the Move Selected Pixels tool to adjust the size of the text.
When the Move Selected Pixels tool is active, you'll see several handles appear on the edges and corners of the selection.
These handles are called Control Nubs.
Click and drag the handle on the edges to resize the text.
You can use the keyboard shortcut Ctrl++ to zoom out the image and Ctrl+- to zoom in.
Press Enter when you’re done.
7. Open image in Paint.NET
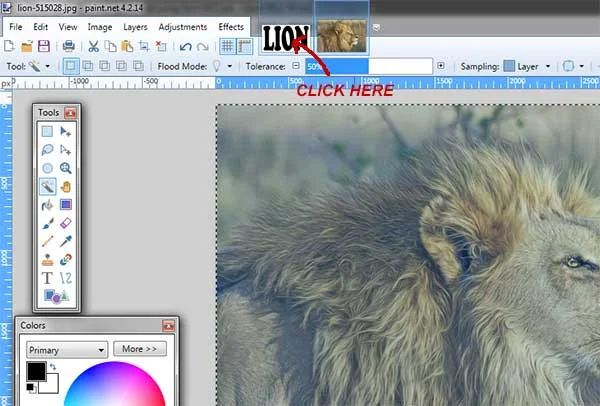
Choose File>Open... (or just press Ctrl+O) to open your image.
Use the Navigation pane on the left to navigate to a location on your computer where you have your images.
Click the image you want to open, then click the Open button.
The opened image is displayed in the Editing Window.
For this Paint.NET tutorial, I'll use this images, 515028, 515030, 721836, 3040797, downloaded from Pixabay.
8. Copy The Image And Paste Into New Layer
Choose Edit>Select All (Ctrl+A) then Edit>Copy (Ctrl+C) to copy the image to clipboard.
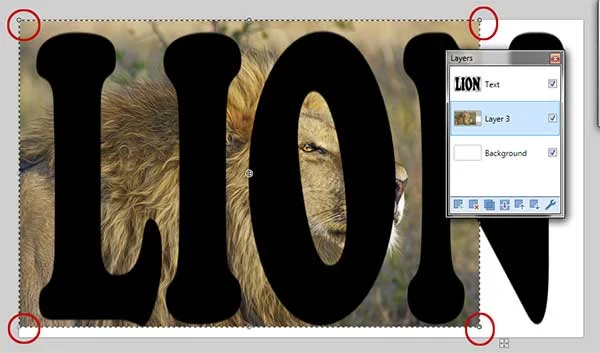
Go to your text document then paste the image by going to Edit>Paste into New Layer (Ctrl+Shift+V).
When the Paste dialog box appears, choose Keep Canvas Size.
Press Ctrl+- to zoom out your canvas then resize the image by dragging handles in the corner (while holding down the Shift key to keep the image doesn’t distort).
Drag inside the transform box to move the image.
Press Enter when you’re done.
Go to your text document then paste the image by going to Edit>Paste into New Layer (Ctrl+Shift+V).
9. Make Selection In Character
The next step is to make a selection of one of the characters in the text.
Make sure the text layer is selected by clicking it in the Layer windows.
Select the Magic Wand Tool in the Tools Window or just press S four times.
In the Tools Option, choose Contiguous Mode.
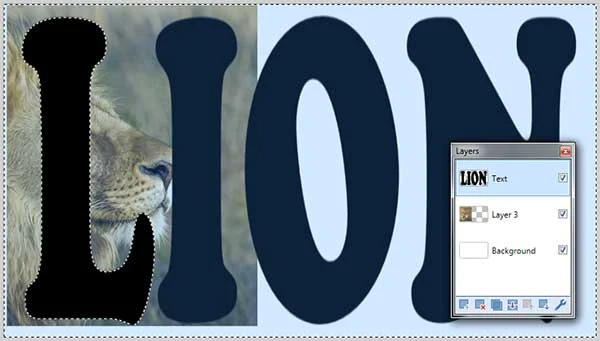
Click on one of the characters in your text to create a selection.
You'll see marching ants around your chosen character.
Paint.NET loads selection outlines that correspond to the shape of your character.
Now you have the selection of the character.
Invert the selection by choosing Edit>Invert Selection (Ctrl+I).
Untick the visibility checkbox beside the text’s layer in the Layers Window.
10. Activate The Image’s Layer then press the Delete key
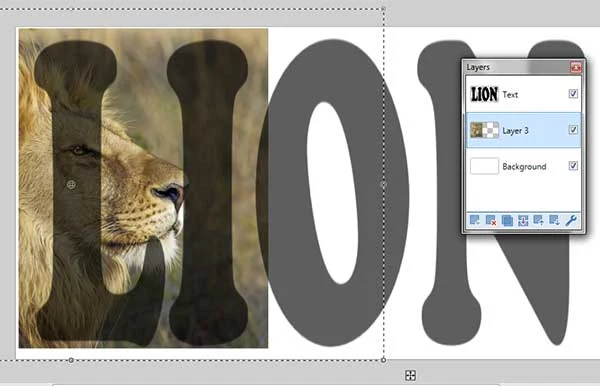
Click on the image’s layer in the Layers window to make it active. Press Delete.
You will see the character is now filled with the image of Lion below it.
Choose Edit>Erase Selection or just press Delete. You will see the character is now filled with the image of Lion below it.
11. Place Others Images
To create multiple images text effect, repeat through steps 9 to 10 to insert other images to your text.
12. Save Your Document
At last, use File>Save (or just press Ctrl+S) to save your project file.
In the Save As window, navigate to the folder where you want to store your project file.
Type a name in the File name text box and leave the default Paint.NET (*.pdn) format.
Pdn is Paint.NET's native format and is useful because it stores everything about your image and will allow you to later edit your image in Paint.NET, in case you notice a problem.
Click Save to store the project file.
Once you have finished, you will probably also want to export the image in a more widely used format, such as JPEG, PNG, TIFF, etc.
Here is the result:
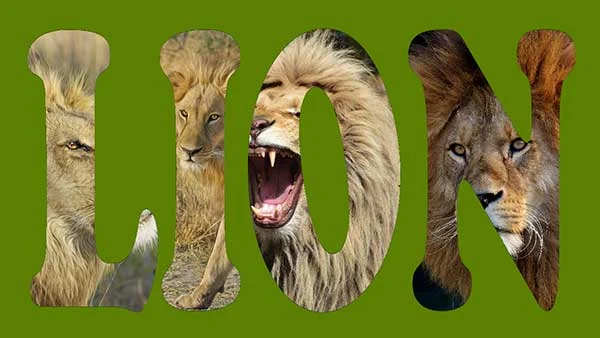
Placing Multiple Images in Text using Paint.NET
More on Paint.NET Tutorials:











No comments:
Post a Comment