You may want to change your photo into a sunset. Over the following steps, I'll show you how to convert your picture into a sunset picture in Paint.NET. This technique will work with almost any day images. Even if you've never used Paint.NET, it will only take a few minutes to learn the basics and get started on your sunset.
We'll create a new layer for the sunset effect above the original image, fill the new layer with an orange color, and change its blend mode from Normal to Overlay. If you need a darker sunset effect, you can just duplicate the original image layer and change its blend mode to Multiply and alter its opacity until you are happy with the result.
If you liked my tutorials, please subscribe to my YouTube channel - JTSGraph.
Steps to make a sunset effect in Paint.NET:
1. Open Image
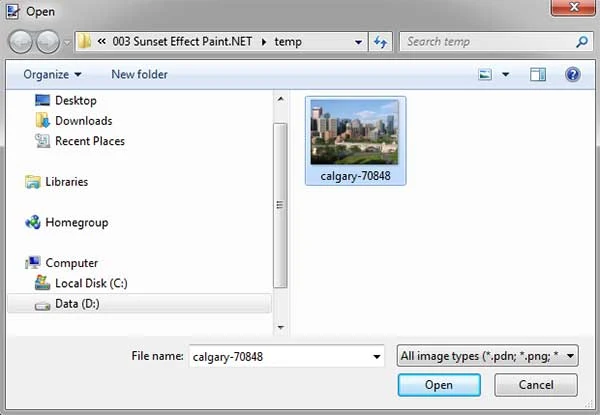
Go to File>Open... (Ctrl+O) to open your image. In the Open dialog, use the Navigation pane on the left to navigate to a location on your computer where you have your images. Click the image you want to open, then click Open.
The opened image displayed in the Editing Window. For this Paint.NET tutorial, I'll use this image, 70848, downloaded from Pixabay.
2. Create a New Layer
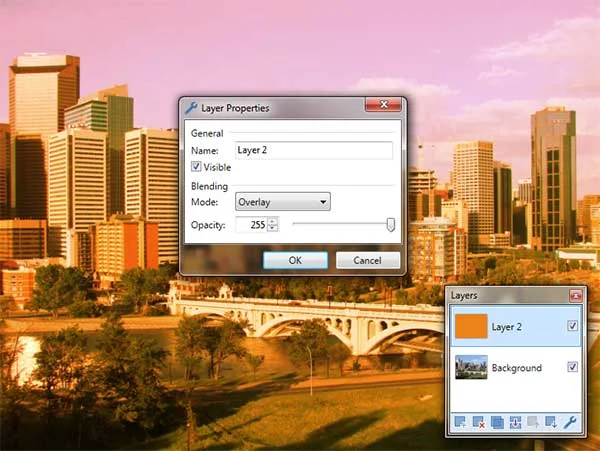
Create a new layer by going to Layers> Add New Layer or else just press Ctrl+Shift+N. In the Layers Window, a new, transparent layer with the default name of Layer 2 appears above the Background (image) layer.3. Choose an Orange color
Choose an orange color for background by setting the Primary colors in the Colors window. Select Primary from the drop-down list in the Colors Window then chooses an orange color you like by clicking on the Colors Wheels. You can use this color #ec821a if you like.4. Fill the new layer with Orange color
Now fill the new layer with orange color. Make sure Layer 2 is selected in the Layers Window. Go to Edit>Select All to select the entire active layer then choose Edit>Fill Selection (or you can just press the Backspace key on the keyboard). The selection filled with the current Primary color (orange). Choose Edit>Deselect or Ctrl+D to remove the selection.5. Change blend mode to Overlay
Double-click Layer 2 in the Layers window or choose Layers>Layer Properties (F4). The Layer Properties dialog appears. Click the Blending Mode drop-down menu located at the center of the Layers window and then change the layer's blending mode to Overlay.
If you want a darker sunset effect, You can duplicate the Background layer. Select the Background layer in the Layers Window.
Choose Layers>Duplicate Layer or else just press Ctrl+Shift+D. In the Layers window, a duplicate layer with the default name of Background appears above the original Background layer.
Choose Layers>Layer Properties or else just press F4. The Layer Properties dialog appears. Click the Blending Mode drop-down menu located at the center of the Layers window and then change the layer's blending mode to Multiply.
Alter its opacity until you are happy with the result.
7. Save Document
Choose File>Save command in the top menu or else just press Ctrl+S to save your project file. The Save As window appears. Navigate to the folder where you want to store your project file. Type a name in the File name text box and leave the default Paint.NET (*.pdn) format. Pdn is Paint.NET's native format and is useful because it stores everything about your image and will allow you to later edit your image in Paint.NET, in case you notice a problem. Click Save to store the project file. Once you have finished, you will probably also want to export the image in a more widely used format, such as JPEG, PNG, TIFF, etc.


No comments:
Post a Comment