In this tutorial, you will learn how to add a lens flare effect in GIMP using a new layer and blending modes, and position it exactly in the image, where we need it. This free picture editing program gives you full control over the lens flare effect, its intensity, position, and color. The lens flare and the photo are completely separate from each other. This way, you can always go back to the original photo if you don’t like the result.
Steps to add a lens flare to a photo in GIMP:
1. Open image
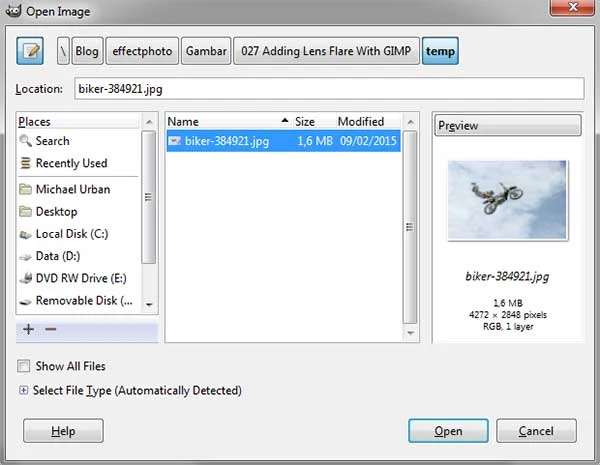
Use File>Open... command in the top menu or else just press Ctrl+O to open your image. The “Open Image” dialog will appear, allowing you to navigate to the file and click on its name. Navigate through your folders in the Places panel and the Name panel until your images' name appears in the Name panel. Click the image you want to open. When an image file is selected, you can view the preview of the image file at the right-hand side of the box, although it's not easy to find an image based on a thumbnail. Click Open.
For this GIMP tutorial, I'll use this image, 384921, downloaded from Pixabay.
2. Adjust color using Curves
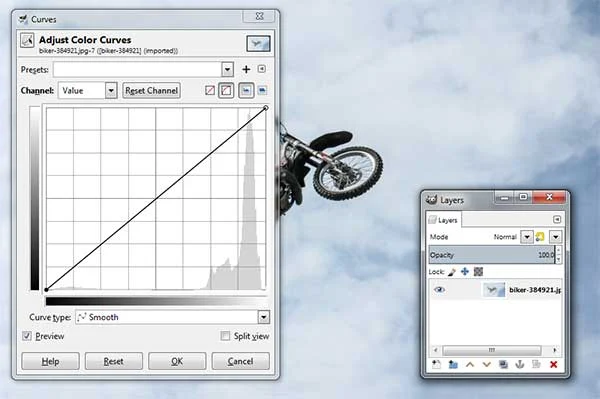
We need to adjust the color, brightness, and contrast of the active layer using the Curves Tool. Use Colors>Curves to activate the Curves Tool. The Curves dialog box appears.
We create anchors and segments on the curve and we move them to shape the curve. If you click on the curve, a new anchor is created. You can click-and-drag on the curve to bend the curve. Moving the anchor of a pixel downwards makes this pixel darker.
3. Create a new layer
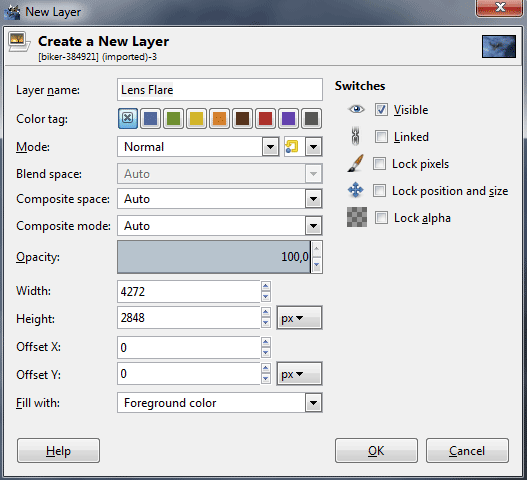
Press the D button to reset the background color to default (black). Use Layer> New Layer or press Shift+Ctrl+N to create a new layer.
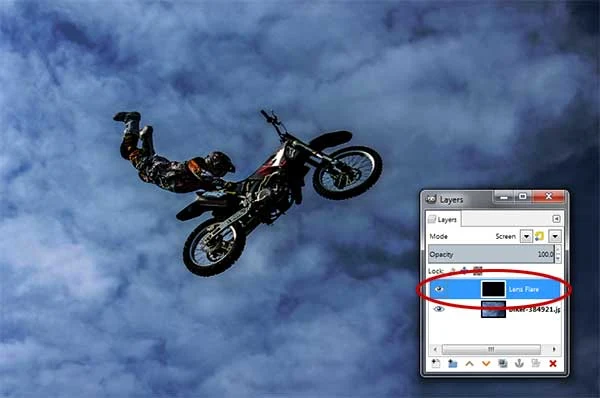
The New Layer window open. Type a name in the Layer Name text box (you can name it 'Lens Flare') and choose Foreground color in the Fill with drop-down menu. Click OK.
A new, empty layer, added to the layer stack of the image, just above the active layer.
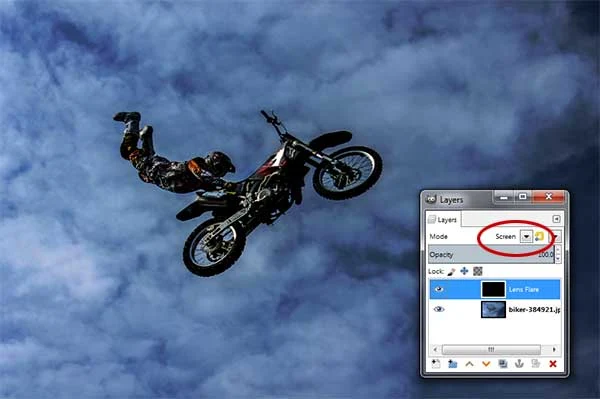
Change the Lens Flare layer's blend mode to Screen.
4. Apply the Lens Flare filter
Select the Lens Flare layer on the Layers dialog. Use Filters>Light And Shadow>Lens Flare to apply Lens Flare filter.
The Lens Flare dialog box appears.
Tick the Preview checkbox then set the center of flare effect (in X and Y coordinates) using the input box or by clicking into the preview. When you're happy with how the lens flare look, click OK to close out of the dialog box. GIMP will then apply the effect to your image.
There you have it! Tutorial, adding lens flare to a photo with GIMP.
5. Save document
Use File>Save command in the top menu or else just press Ctrl+S to save your project file. The Save Image dialog box appears. Navigate to the folder where you want to store your project file. Type a name in the Name text box and leave the default GIMP (*.XCF) format. XCF is GIMP's native format and is useful because it stores everything about your image and will allow you to later edit your image in GIMP, in case you notice a problem. Click Save to store the project file.
Once you have finished, you will probably also want to export the image in a more widely used format, such as JPEG, PNG, TIFF, etc.
More on GIMP Tutorials:
More on GIMP Tutorials:
- Creating photo border in GIMP
- How to change hair color in GIMP
- Change eye color in GIMP
- How to sharpen image with GIMP








Tehn set the Lens flare the Way Gimp likes it. Like fuck it, you simply cant adjust the size. Thats the size the developers liked, and thats how it will stay forever. Ridiculous.
ReplyDelete