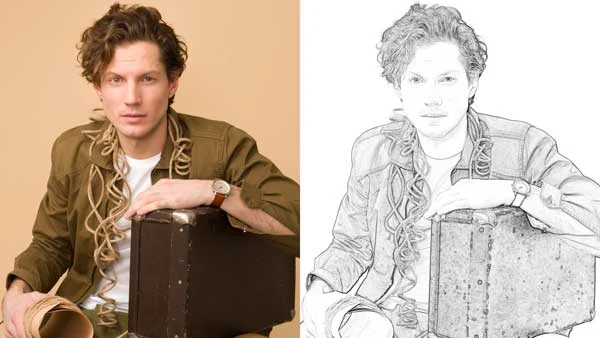
Turn a photo into a hand sketch drawing in GIMP by desaturating and applying value propagate filter. Make sure you have already backup your photo.
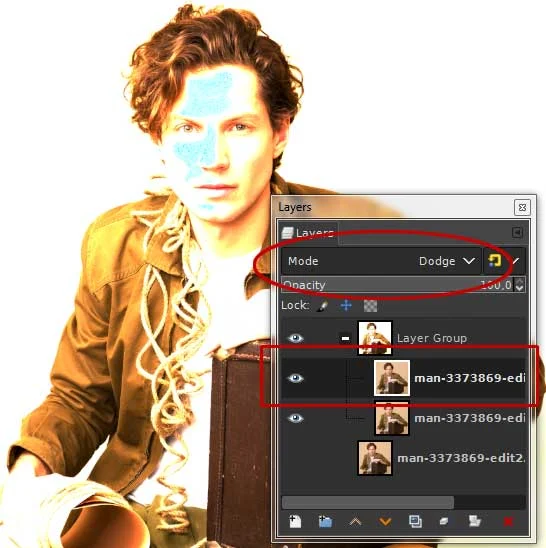
Firstly, duplicate the layer then change its blend mode from normal to Dodge. Invert the picture's color by going to Colors>Invert. The next step is applying the value propagate filter for two or three times until you get the desired effect of hand sketch.
Watch the video for detailed instructions and use the written steps for quick reference. If you liked my tutorials, please subscribe to my YouTube channel - JTSGraph.
Steps to turn an image into sketch in GIMP:
1. Open image.
Use File>Open... (or Ctrl+O). For this GIMP tutorial, I'll use this image, man-3373869.
2. Duplicate layer.
Use Layer> Duplicate Layer (or Shift+Ctrl+D). A new layer which is a nearly identical copy of the active layer added to the image.
Now select the duplicate layer on the Layers Dialog and change its blend mode from normal to Dodge.
3. Invert color.
Select the duplicate layer on the Layers Dialog then invert its color by going to Colors>Invert.
4. Apply Value Propagate filter.
Go to Filters>Distorts>Value Propagate. Select the “More black (smaller value)” radio button by clicking on it. Click OK when you are done.
5. Repeat step 4 until you're happy with the result.
If you're still not happy with the result, try applying the value propagate filter again for two or three times. You can use keyboard shortcut Ctrl + F to repeat the last step (in this case, the value propagate filter is our last step).
6. Desaturate both layers.
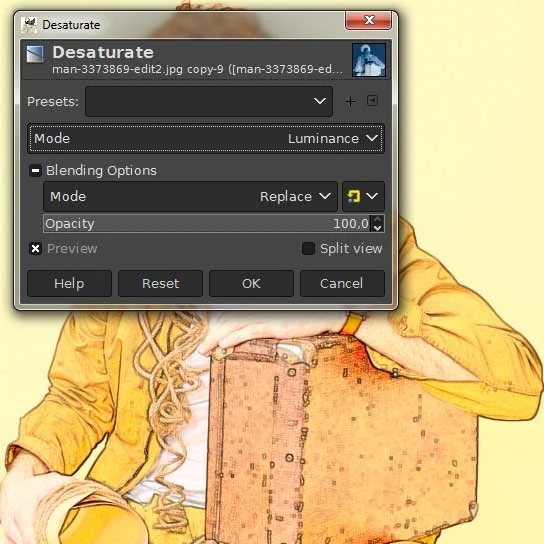
If you'd like a black & white sketch effect, then apply Desaturate for both layers. Use Colors>Desaturate>Desaturate. In the Desaturate dialog box, you can just leave the default settings and click OK.
Desaturate both layers.
7. Save your work.
Use File>Save (or Ctrl+S). Navigate to the folder where you want to store your project file. Type a name in the Name text box and leave the default GIMP (*.XCF) format. XCF is GIMP's native format and is useful because it stores everything about your image and will allow you to later edit your image in GIMP, in case you notice a problem. Click Save to store the project file.Once you have finished, you will probably also want to export the image in a more widely used format, such as JPEG, PNG, TIFF, etc.


I found your video on Youtube and then your blog. This one in particular is very helpful. Thank yoy!
ReplyDeleteThanks for your nice comment :)
Deletethis is about the neatest solution I've come across; thankyou
ReplyDeletethanks
DeleteVery Helpful, thanks man.
ReplyDeleteGlad you liked it
DeleteThis is by far the easiest method I have tried, and easy to follow
ReplyDeletedrs
Glad you liked it :)
DeleteHi there when I desaturate my picture turns back in to color???? Any suggestions?
ReplyDeleteDesaturate both layer.
DeleteI tried to do this and it just made my picture more blurry
ReplyDeleteThis was very helpfull for me. With a litle plus work and a few good choosen brush the result can be fantastic,really. Thanks
ReplyDeleteGlad you liked it :)
DeleteThank you, this is a great effect! Very clear tutorial!
ReplyDeleteGlad you liked it :) Thank you for visiting
DeleteI copied this original picture and applied those steps in GIMP 2.10.28... Don't get this result at all. Already from Dodge Mode step, it does not produce the same. Then in Value Propagate steps, it does not act this way at all, just makes thicks blurred contours and traits, which can't be use then... Any suggestion ?
ReplyDeleteThanks for this, had a really nice result converting a foto I made to a sort of drawing :)
ReplyDeletePerfect tutorial. Thank you so much.
ReplyDeleteFantastic! Thanks!
ReplyDeleteWOW! Works great! Now if only I could find a final solution to the JQ.
ReplyDeleteGreat tutorial! Very helpful and such a clear result! Thank you!
ReplyDeleteBrilliant - thanks a million for this!!! Worked a treat.
ReplyDelete