In this tutorial, I will show you how to sharpen image edges in GIMP 2.10.14 using the High pass filter.
Sharpening works by increasing contrast at edges in the image. Remember to reduce image noise before sharpening so that you don’t intensify the noise. The best way to sharpen an image is by using separate layers. Make separate layers for noise reduction and high pass filter.
Sharpening works by increasing contrast at edges in the image. Remember to reduce image noise before sharpening so that you don’t intensify the noise. The best way to sharpen an image is by using separate layers. Make separate layers for noise reduction and high pass filter.
If you liked my tutorials, please subscribe to my YouTube channel - JTSGraph.
Jump to:
- Step 1: Open Image
- Step 2: Zoom Image up to 100%
- Step 3: Duplicate Layer
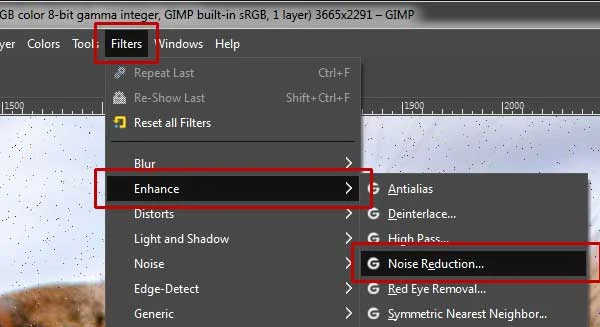
- Step 4: Apply Noise Reduction
- Step 5: Create a New Layer Group
- Step 6: Duplicate the "Noise Reduced" layer two times
- Step 7: Move Both Duplicate Layers to the Sharpen Group Layer
- Step 8: Apply The High Pass Filter
- Step 9: Change its Blend Mode to Hardlight or Softlight
- Step 10: Save Document
Step 1: Open Image
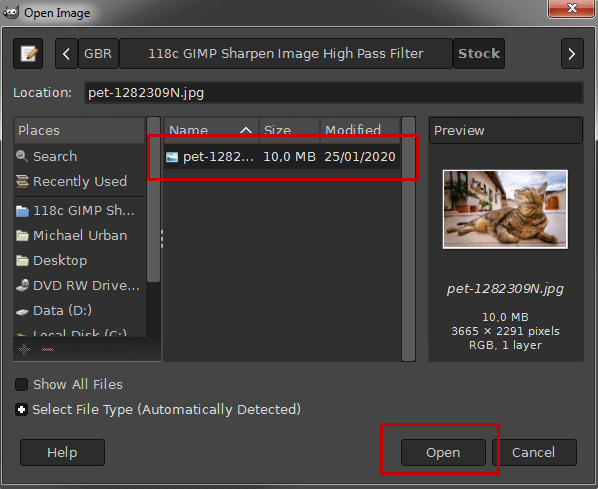
Navigate through your folders in the Places panel and the Name panel until your images' name appears in the Name panel. Click the image you want to open then click Open.
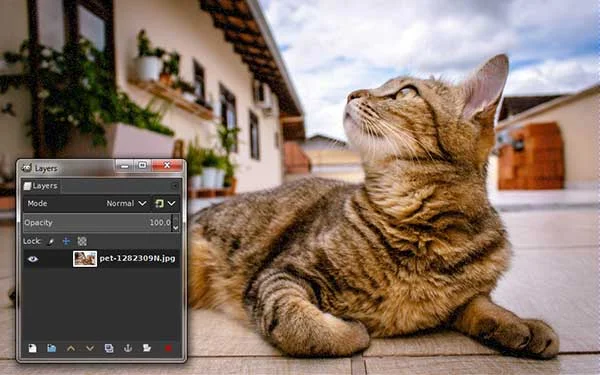
For this GIMP tutorial, I'll use this image, 1282309, that I downloaded from Pixabay.
Step 2: Zoom Image up to 100%
Zoom Image up to 100% to get an accurate view of the sharpening. Use View> Zoom>1:1 (100%). This option maximizes the image.
Zoom image to get an accurate view.
Step 3: Duplicate Layer
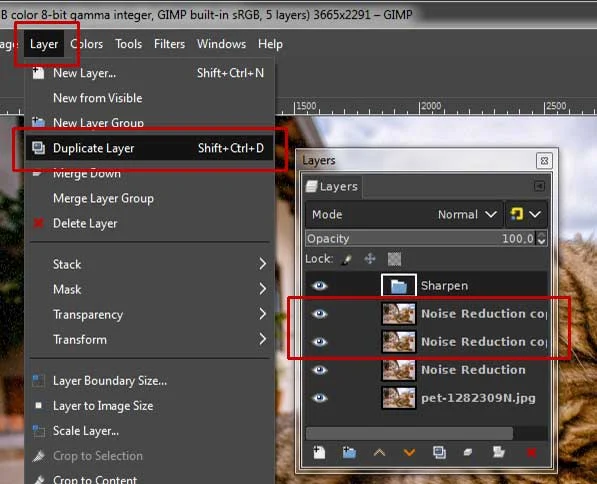
Preserve your original image by duplicating the image layer. Go to Layer>Duplicate Layer or else just press Shift+Ctrl+D.
This creates a new perfect copy of the currently active layer just above. We will apply the Noise Reduction filter to this duplicate layer. You can name this duplicate layer with “Noise Reduction”.
Step 4: Apply Noise Reduction
In the Noise Reduction pop-up window, enter a value for the Strength through the up and down arrows.
If you're not happy with the result, you can quickly undo a step at any time by going to Edit>Undo or else just pressing Ctrl+Z.
Experiment with different values and discover values that work best for your image. Once you are satisfied with the result, click "OK" to apply it to the image.
Step 5: Create a New Layer Group
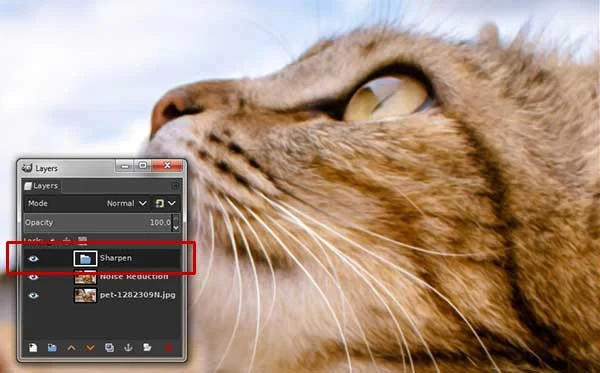
Use Layer>New Layer Group to create a new group layer.
You can name it "Sharpen".
Step 6: Duplicate the "Noise Reduced" layer two times
Use Layer>Duplicate Layer. The top duplicate layer is for the high pass filter.
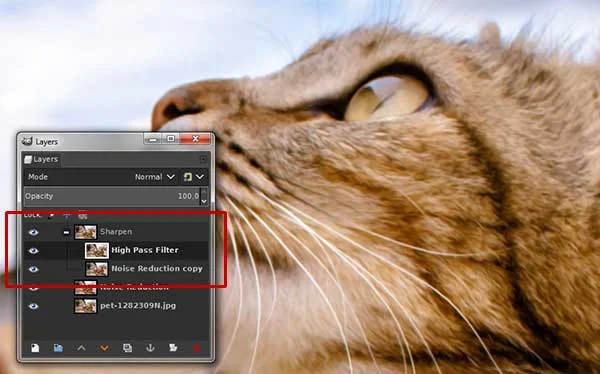
Rename the top duplicate layer with a new name like “High Pass Filter”. The top duplicate layer is for the high pass filter.
Step 7: Move Both Duplicate Layers to the Sharpen Group Layer
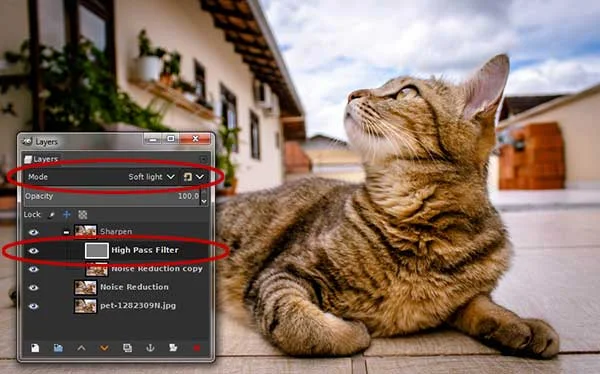
Drag to move both duplicate layers to the Sharpen group layer. Make sure the High Pass filter layer is on top position.
Step 8: Apply The High Pass Filter
Make sure the High Pass Filter layer is selected in the Layers dialog. Use Filter>Enhance>High Pass Filter.
Experiment with different Std.Dev and Contrast value. We want to increase contrast only along the edges.
After applying High Pass.
Step 9: Change its Blend Mode to Hardlight or Softlight
Step 10: Save Document
Use File>Save in the top menu or Ctrl+S. In the “Save Image” dialog, type your document's name in the “Name” box and save it.
You should save it using the extension “.xcf”. XCF is GIMP's native format, and is useful because it stores everything about your image and will allow you to later edit your image in GIMP, in case you notice a problem.
Once you have finished, you will probably also want to export the image in a more widely used format, such as JPEG, PNG, TIFF, etc.
Here is the result:
More on GIMP Tutorials:









I wanted to sharpen the edge of a bird's beak, which kinda merged with the sand in the background. This effect worked a treat. Thank you. :-)
ReplyDeleteGlad you liked it
Delete