In today's Photoshop tutorial, I am going to take you through the process of turning a photo into a collage of Polaroids. We'll be using the Rectangular Marquee tool, Clipping Mask, Drop Shadow layer style and Free Transform that comes with Photoshop. Once you have arranged it to your satisfaction, you can play around with other Photoshop's tools to add your own artistic effects.
Download This Template
Download PSD file here or find others free Photoshop Collage Templates here.Step 1: Open Image
Choose File>Open (or Ctrl+O). Navigate to the folder that contains your file then select the name of the file you want to open. Click Open. Unlock the Background layer by choosing Layer> New> Layer from Background.
For this Photoshop Collage tutorial, I'll use these images, 112217 and 731212, that downloaded from Pixabay.
For this Photoshop Collage tutorial, I'll use these images, 112217 and 731212, that downloaded from Pixabay.
Step 2: Create Layer For Polaroid Frame
Choose Layer> New> Layer (or Shift+Ctrl+N). Click and drag the new layer to the bottom position. The new layer will have the default blending mode of Normal.Step 3: Draw Rectangular Selection
Select the Rectangular Marquee Tool at the top of the Tools panel (or just press M). Press Shift+M to cycle through the four available marquee tools until the one you want is active.
Select the layer you want to edit, in this case, Layer 1. Drag your mouse diagonally to create a selection. To move your selection while drawing it, keep the mouse button down, then drag to the new position with the SpaceBar held down. When you release the mouse, a selection border appears. If you want to move the selection after releasing the mouse, drag inside it with any selection tool.
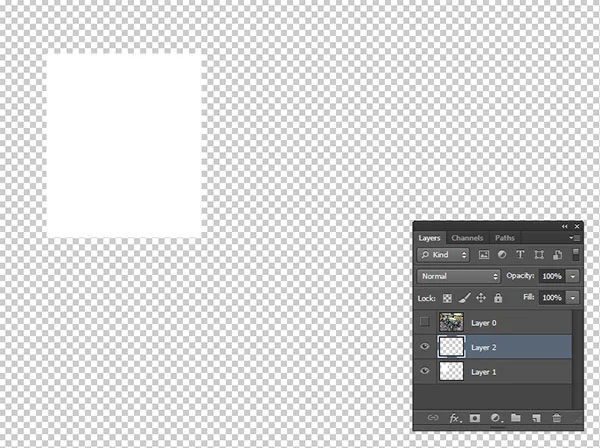
Choose Edit>Fill (or Shift+F5). The Fill dialog box appears. In this dialog box, under Contents, you can select to fill with White color. Click OK. Now, the white color that you choose fills the selection. Remove the selection by choosing Select> Deselect.
Step 4: Create Layer For Polaroid Photo
Go to Layer> New Layer.
Create a new selection inside the Polaroid frame using the Rectangular Marquee tool.
Fill the selection with white color using Edit> Fill, then remove the selection using Select> Deselect command.
Step 5: Create Clipping Mask
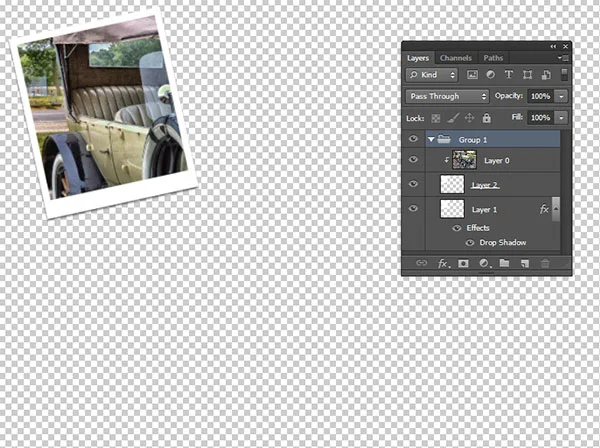
On the Layers Panel, make sure the layers to clipped are listed consecutively. Stack the base layer—in this case, the polaroid layer (Layer 2), below the layer to be clipped—in this case, the images' layer (Layer 0). Go to Layer> Create clipping mask. Now the content of the base layer clips the layer above it.Step 6: Add Drop Shadow
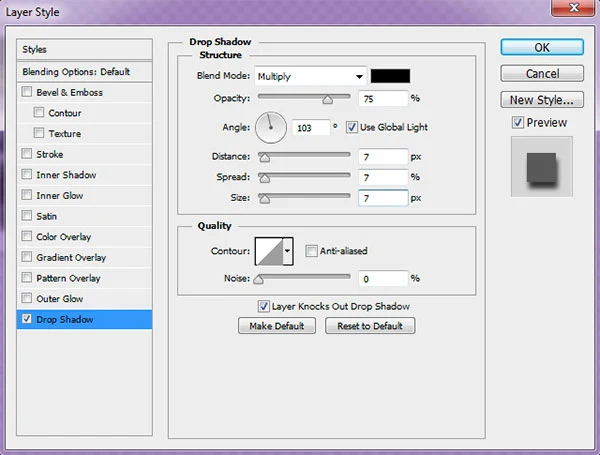
Click the Polaroid Frame layer/Layer 1. Go to Layer>Layer Style>Drop Shadow. Choose a Distance value (in pixels) by which you want the shadow to be offset from the edge of the layer shapes. Choose a Spread value (in percentage) to control where the shadow begins to fade. Choose an overall size value (in pixels) for the shadow.Step 7: Adjust using Free Transform
On the Layers Panel, click the Polaroid frame layer (Layer 1) and the Polaroid photo layer (Layer 2) with the Shift held down. Choose Edit>Free Transform. A transform box with handles now surrounds the white part of the layer. You can now transform the polaroid as follows:- To scale it proportionally, drag a corner handle with the Shift held-down.
- To rotate it, position the pointer outside the transform box, then drag the mouse after the pointer becomes a curved, two headed-arrow.
Step 8: Group All Layers
Hold down the Shift key, click all the layer and then go to Layer> Group Layer.Step 9: Duplicate Layer Group
Duplicate the layer group by choosing Layer> Duplicate Group. Expand group layers. Use the Free Transform command to adjust its position (see step 7). Repeat this step as many frames as you want.Step 10: Add Background Photo
If you'd like a background image, choose File> Place. Navigate to the folder that contains your file then select the name of the file you want to open and then click the Place button. Move this background to the bottom position.Step 11: Save Document
Choose File>Save or else just press Ctrl+S to save your project file. The Save As dialog box appears. Navigate to the folder where you want to store the file. Type a name in the File Name text box and leave the default Photoshop (*.PSD;*.PDD) format. Click Save to store the image. Once you have finished, you will probably also want to use File>Save As (Shift+Ctrl+S) to export the image in a more widely used format, such as JPEG, PNG, TIFF, etc.There you have it! Turn a photo into a collage of polaroids in Photoshop.


No comments:
Post a Comment