In today tutorial, we are going to learn how to make a Grid Collage in Photoshop from multiple images. We'll be using Guides, Free Transform, Rectangular Marquee Tool and Layer Style that comes with Photoshop. Once you have arranged it to your satisfaction, you can play around with other Photoshop's tools to add your own artistic effects. You can use the Rectangle Tool to create squares shape, or for faster way, see how to create a contact sheet in Photoshop.
If you liked my tutorials, please subscribe to my YouTube channel - JTSGraph.
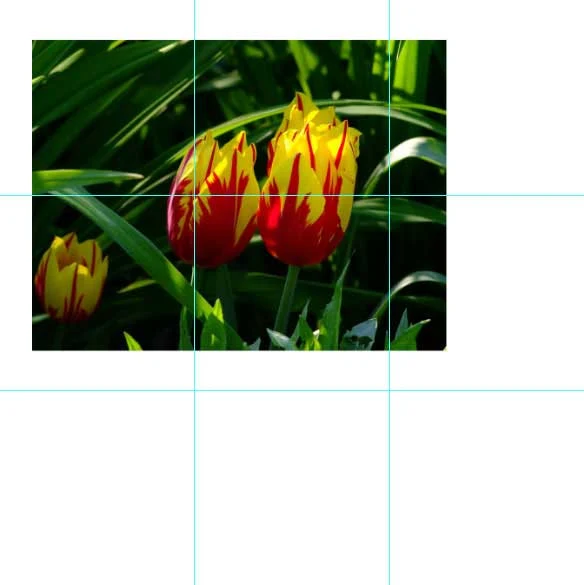
Steps to make a collage in Photoshop:
1. Create new document
Choose File> New (or Ctrl+N). In the pop-up window, type a name in the Name field and enter the following information: Width 1350 pixels, Height 1350 pixels, Resolution 72 Pixels/Inch, Color Mode RGB color, and Background contents White. Click OK.
2. Create vertical and horizontal guides
Guides help you position any object (shapes or images) precisely. See this tutorial on how to make a grid or guides. We will create two horizontal and two vertical guidelines.
- Create the first vertical guide. Choose View> New Guide. In the dialog box, select Vertical orientation, enter 450 px position and click OK. Repeat this step for position 900 px.
- Now create a horizontal guide. Choose View>New Guide. In the dialog box, select Horizontal orientation, enter 450 px position and click OK. Repeat this step for position 900 px.
- If you didn't see the guidelines, then choose View> Show> Guides.
- If you want to lock all guides, choose View>Lock Guides. This way you can't move them by accident.
- Choose View>Snap to enabling snaping that will help you to align any object (including shape) you want. Make sure that View>Snap to>Guides is checked.
3. Open all images
Stock images used in this Photoshop Collage tutorial: 643102, 320774, 717599, 2544, 21690, 175254, 175605, 699516, 708410.
You can use File>Place to place an image onto the canvas. But in this tutorial, I will use Edit>Paste command. Choose File> Open. Navigate to the folder that contains your image file then select the name of the file you want to open. Click on all the images while pressing the Ctrl key, then click Open.
Open all photos.
4. Import images to the document
Click on one of the images, choose Select> All, then Edit>Copy, click again the main document (the photo collage document), then choose Edit> Paste.
5. Adjust image
Now you can adjust image size and position using Free Transform to your satisfaction as follows:
- Select the image layer to which you want to manipulate.
- Choose Edit>Free Transform or Ctrl+F.
- Resize the image by dragging any corner while holding down the Shift key to keep the image does not distort.
- Move the image by clicking and hold anywhere inside and then drag.
- You can rotate the image by moving your cursor farther out from any corner until you see two arrows. Click and hold, then drag the image.
- Press Enter key when you are done.
6. Make selection then duplicate layer
Select the Rectangular Marquee Tool at the top of the Tools panel (or just press M). Press Shift+M to cycle through the four available marquee tools until the one you want is active.
Now, drag your mouse over part of the image in the first guide square while holding down the Shift key to keep the rectangular selection doesn't distort. Duplicate the image layer by going to Layer>New>Layer via copy or Ctrl+J.
You can now delete the image's layer.
7. Add stroke
Choose Layer> Layer Style> Stroke. I will choose a white color, size 10 pixels, and position: Inside. Click OK.
8. Insert all the images
Repeat steps 4 through 7 to open and manipulate each picture you'd like to insert. You can copy stroke layer style to another layer by click and drag while pressing the Alt Key. When you are done, you can clear the guides by going to View> Clear Guides.
9. Add canvas size
To add a border in the photo collage, we can enlarge the size of the background layer by about 10 pixels. Click on the Background layer and then choose Image> Canvas Size. In the pop-up window, enter the following information: Width 10 pixels, Height 10 pixels, click the Relative checkbox and choose center Anchor.
Fill the background with white color by going to Edit>Fill.
10. Save document
Choose File>Save or else just press Ctrl+S to save your project file. The Save As dialog box appears. Navigate to the folder where you want to store the file. Type a name in the File Name text box and leave the default Photoshop (*.PSD;*.PDD) format. Click Save to store the image. Once you have finished, you will probably also want to use File>Save As (Shift+Ctrl+S) to export the image in a more widely used format, such as JPEG, PNG, TIFF, etc. 


Thanks for sharing this informative blog
ReplyDeleteGet the best Photoshop Beginner Course.
What is the largest size you could print based off of these specs? We are looking create a 24 inch x 24 inch piece with 64 drawings (8 x 8 grid, elementary school art project).
ReplyDeleteThis comment has been removed by the author.
DeleteFor 24 x 24 inch, use 7200 x 7200 pixels
DeleteGreat tutorial. Thanks heaps.
ReplyDeleteThank you
Deletethis sucks balls
ReplyDelete