Over the following steps, I will show you how to create a photo mosaic in Adobe Photoshop using Pattern and Guides to help us in position images. By combining the use of Guides with the “Snap” feature, we can perfectly align images along guidelines. We'll experiment with a variety of imagery to build up a digital mosaic.
If you liked my tutorials, please subscribe to my YouTube channel - JTSGraph.
Download Project Files
Download the project file (PSD) here.Download the Mosaic pattern (PSD) here.
Steps to make a photo mosaic in Photoshop:
1. Prepare photos for mosaic pattern
Please prepare or download images to be used for the mosaic pattern, at least 10 different images. You can download images for free from Pixabay, Stockvault or Rgbstock.
2. Create a new document for pattern
Choose File> New or just press Ctrl+N. In the pop-up window, type a name in the Name field and enter the following information: Width 1500 pixels, Height 1500 pixels, Resolution 72 Pixels/Inch, Color Mode RGB color, and Background contents White. Click OK. For faster way, you can create a Contact Sheet in Photoshop and skip to step 7.
3. Create vertical guides
Guides help you position any object (shapes or images) precisely. See this tutorial on how to make a grid or guides. We will create 9 vertical guides.
Create the first vertical guide. Choose View> New Guide. In the dialog box, select Vertical orientation, enter 10 % position and click OK. Repeat this step for position 20%, 30%, 40%, 50%, 60%, 70%, 80% and 90%.
If you didn't see the guidelines, then choose View> Show> Guides.
4. Create horizontal guides
Now create horizontal guides. We will create 9 horizontal guides.
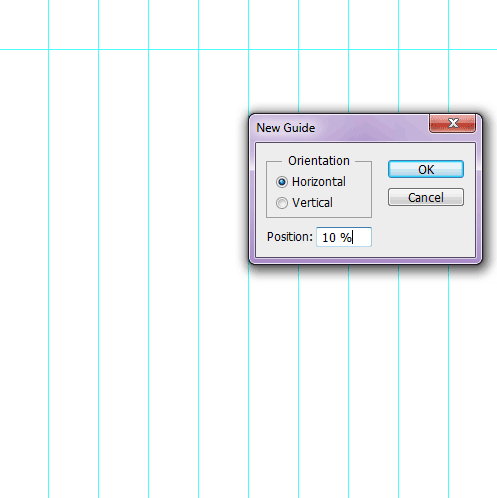
Choose View>New Guide. In the dialog box, select Horizontal orientation, enter 10 % position and click OK. Repeat this step for position 20%, 30%, 40%, 50%, 60%, 70%, 80% and 90%.
If you want to lock all guides, choose View>Lock Guides. This way you can't move them by accident.
Snapping is a useful feature in Photoshop that allows users to align images, layers, shapes or text perfectly with other objects or guides. Choose View>Snap to enabling snaping that will help you to align any object (including images) you want. Make sure that View>Snap to>Guides is checked.
5. Insert image
Choose File>Place (or File>Place Embedded in Photoshop CC) to open the image you'd like to insert. Navigate to the folder that contains your image file then select the name of the file you want to open. Click Place.
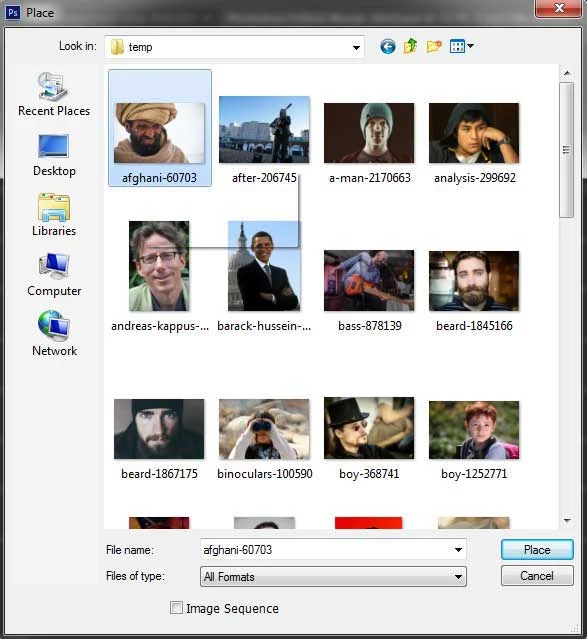
You can now edit the image as follows:
- Resize the image by dragging any corner while holding down the Shift key to keep the image does not distort.
- Move the image by clicking and hold anywhere inside the image and drag.
- Rotate the image by moving your cursor farther out from any corner until you see two arrows. Click and hold, then drag the image.
- Press Enter key when you are done.
Select the rectangular marquee tool at the top of the Tools panel. or else just press M.
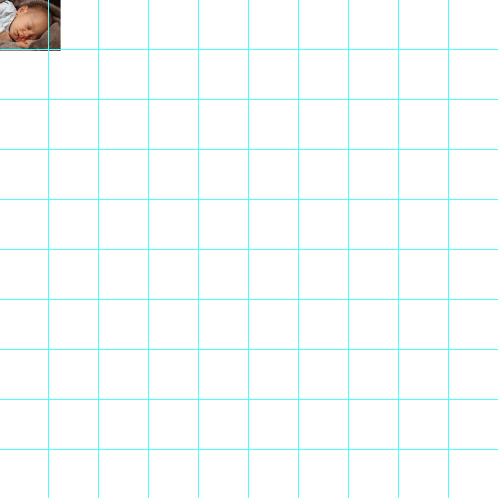
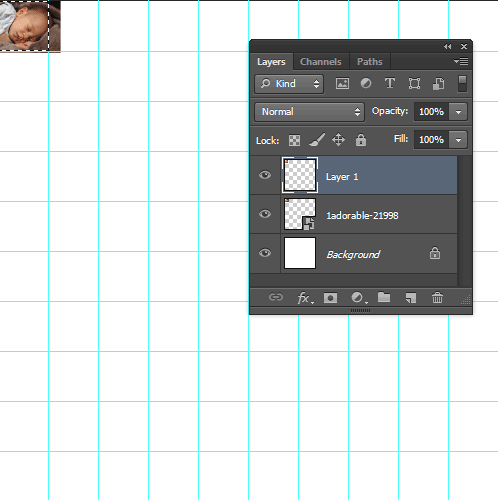
Now, drag your mouse over part of the image in the first guide square while holding down the Shift key to keep the rectangular selection doesn't distort. Duplicate the image layer by going to Layer>New>Layer via copy or Ctrl+J.
You can now delete the image's layer.
6. Insert all images
Repeat step 5 to open and manipulate each picture you'd like to insert. The result will be shown as below:
7. Define mosaic pattern
The next step, Choose Edit> Define Pattern. Name it like 'Mosaic'. Click OK. Now you can save and close your Pattern.PSD document.
8. Open your main image
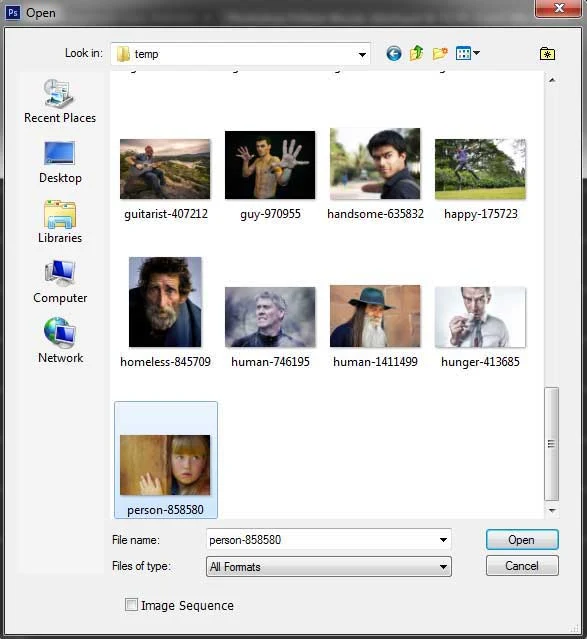
Stock image used in this Photoshop Collage tutorial: person-858580.
Choose File>Open or press Ctrl+O to Open up your main image.
Create a new layer to fill with our mosaic pattern by going to Layer>New>Layer or just press Shift+Ctrl+N. The New Layer dialog box appears allowing you to name your layer and specify other options. Leave the default settings and click OK. In the Layers panel, a layer with the default name of Layer 1 appears above the Background layer.
9. Fill with mosaic pattern
Select Layer 1 and then choose Edit> Fill. Select Pattern in Use drop-down menu. In the Custom Pattern, choose a mosaic pattern that we previously created. Click OK.
10. Desaturate, change the Blend Mode and Opacity
Desaturate Layer 1 by choosing Image> Adjustments> Desaturate or press Shift+Ctrl+U. Change its blend mode to Overlay by going to the drop-down menu in the Layers panel. Adjust its opacity if necessary.
11. Save document
Choose File>Save or press Ctrl+S to save your project file. Navigate to the folder where you want to store your project file. Type a name in the File Name text box and leave the default Photoshop (*.PSD;*.PDD) format. Click Save to store the project file.Once you have finished, you will probably also want to use File>Save As (Shift+Ctrl+S) to export the image in a more widely used format, such as JPEG, PNG, TIFF, etc.
There you have it! Create A Photo Mosaic In Photoshop.
There you have it! Create A Photo Mosaic In Photoshop.







How can I download the app for my MacBook? Please help!!
ReplyDeleteThis comment has been removed by the author.
DeleteInstall Photoshop go here https://bit.ly/3HkTs9T
Delete