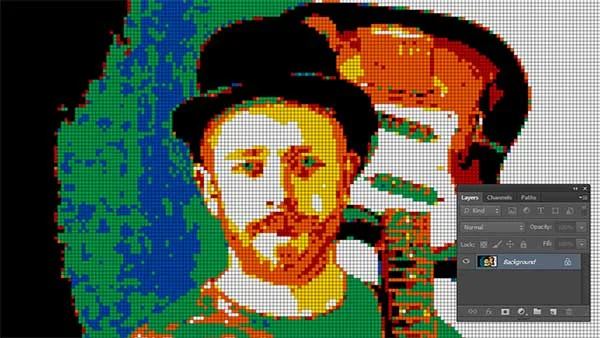
Learn how to create Rubik's cube Mosaic in Photoshop. We’ll adjust bightness/contrast, vibrant, saturation, apply Surface Blur filter, poster edges filter, pixelate filter, tweak image colors using Curves and then replace the images color with the rubiks color Scheme using Image>Mode>Indexed Color.
Step 1: Open Image
Choose File>Open or else just press Ctrl+O to Open up your base image in Photoshop. The standard Open dialog box appears. Navigate to the folder that contains your file then select the name of the file you want to open. If your file does not appear, try to view all files by selecting All Formats from the Files of type list. Click Open.
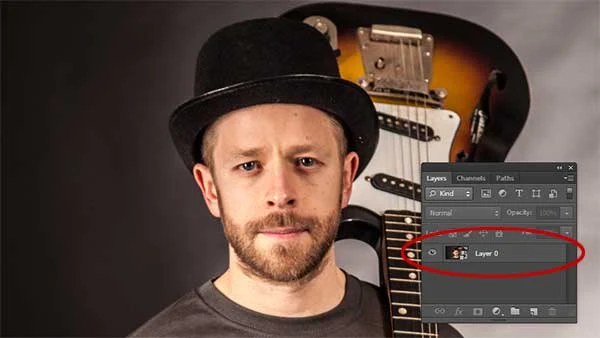
For this Photoshop tutorial, I'll use this image, 890877, that I downloaded from Pixabay.
Step 2: Convert layer to Smart Object
Go to Layer>Smart Objects>Convert to smart object.
Step 3: Adjust Brightness/Contrast
Go to Layer>New Adjustment Layer>Brightness/Contrast. I'll move the contrast slider to the right.
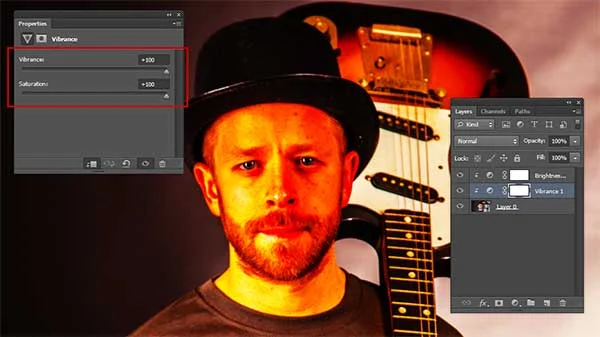
Step 4: Adjust Vibrance and Saturation
Go to Layer>New Adjustment Layer>Vibrance. I'll move the vibrance and Saturation sliders to the right.
Step 5: Apply Surface Blur Filter
Go to Filter>Blur Surface Blur. I'll fill in the radius of 20 pixels and also 20 pixels for Threshold.
Step 6: Apply Poster Edges Filter
Go to Filter>Filter Galery>Poster Edges. I will fill Edge Thickness: 1, Edge Intensity: 1, and posterization: 1. Adjust these values depending on your photo.
Step 7: Apply Mosaic Pixelate Filter
Go To Filter>Pixelate>Mosaic. I'll fill in cell size: 20 square. Adjust this value depending on your photo.
Step 8: Create a new document for the Grid pattern
Create a new document for the Grid pattern. Choose File> New. Enter the Height and Width 20 pixels respectively.
Step 9: Stroke The Document
Make a selection by choosing Select> All.
Then stroke by choosing Edit> Stroke.
Stroke The Document.
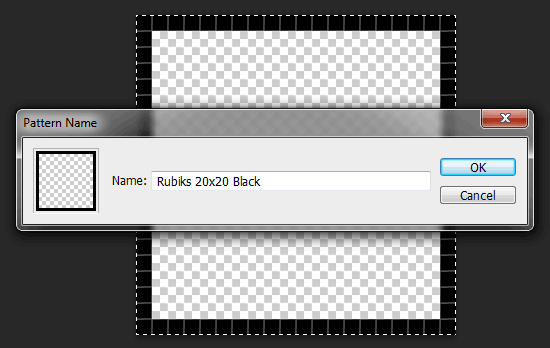
Step 10: Define Pattern
Choose Edit> Define Pattern. Please give the name of the pattern. Close the document by choosing File> Close.
Step 11: Create a new layer
Create a new layer. Back to the main document. Create a new layer by choosing Layer> New Layer.
Step 12: Apply Rubik's Cubes Pattern Into a New Layer
Apply Rubik's Cubes Pattern Into a New Layer. Choose Edit> Fill.
Use column select Pattern and choose the pattern rubiks we have made in the field of custom pattern.
Step 13: Replace the images color with the rubiks color Scheme
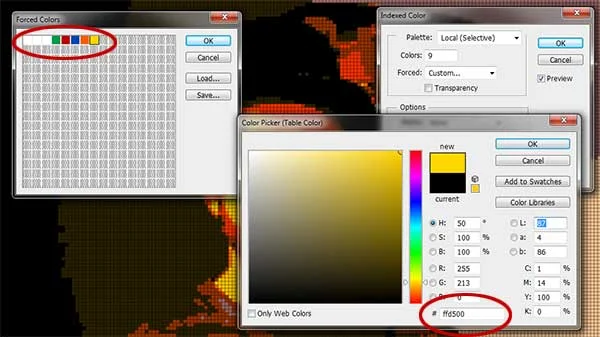
Go to Image>Mode>Indexed Color to replace the images color with the rubiks color Scheme.
Replace the images color with the rubiks color Scheme. White (#FFFFFF), Green (#009B48), Red (#B90000), Blue (#0045AD), Orange (#FF5900), Yellow (#FFD500). You can Undo (Ctrl+Z) anytime if you're not happy with the result.
Step 14: Tweak Image Colors using Curves
Tweak Image Colors using Curves. If you're not happy with the result, press Ctrl+Z to undo the try to tweak the image colors with Curves Adjustment Layer then change to rubiks color again using Image>Mode>Indexed Color.
Go to Image>Mode>Indexed Color again to replace the images color with the rubiks color Scheme.
Step 15: Change Mode to RGB color again
Finally, change Mode to RGB color again by going to Image>Mode>RGB Color then crop using the Crop Tool.
Step 16: Save Document
Choose File>Save or else just press Ctrl+S to save your project file. The Save As dialog box appears. Navigate to the folder where you want to store the file. Type a name in the File Name text box and leave the default Photoshop (*.PSD;*.PDD) format. Click Save to store the image.
There you have it! Rubik's cube mosaics with Photoshop.
More on Photoshop Tutorials:









have you tried to change the colors of the img to the Rubik's original colors?
ReplyDeleteIt's not the original rubiks color, sorry
DeleteThe concept is great but can you add the colors of the Rubik's cube since the last questions you answered was two years ago maybe you already found a solution to add it.
ReplyDeleteNot answering because your using an Anonymous account
DeleteSorry, I'm too busy right now. I'll try to change the rubik's color
DeletePlease see the updated tutorial here https://youtu.be/7Y0AaOgS0g0
DeleteThank you for your patience.
This comment has been removed by the author.
ReplyDeleteToo bad Rubik’s cubes don’t have black sides
ReplyDelete