Kaleidoscope is a geometric shape composed of shapes and colors with a symmetrical arrangement. In this tutorial we'll learn how to create a Kaleidoscope effect digitally using Photoshop from a given image. Once the image is open in Photoshop, we'll build up the kaleidoscope by duplicating, rotating, and blending the layer several times to achieve symmetry.
If you liked my tutorials, please support me by subscribing to my YouTube channel - JTSGraph, I really appreciate that!
Step 1: Open image
Choose File>Open (or Ctrl+O). In the standard Open dialog box, navigate to the folder that contains your file then select the name of the file you want to open. Click Open.
For this Photoshop tutorial, I'll use this image, jellyfish-5592320, that downloaded from Pixabay.
For this Photoshop tutorial, I'll use this image, jellyfish-5592320, that downloaded from Pixabay.
Step 2: Crop Image
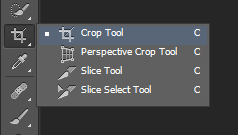
Select the Crop Tool from the Tools bar.
Click and drag out a cropping border around the area you want to keep then click the checkmark in the options bar or press Enter.
Step 3: Duplicate Layer
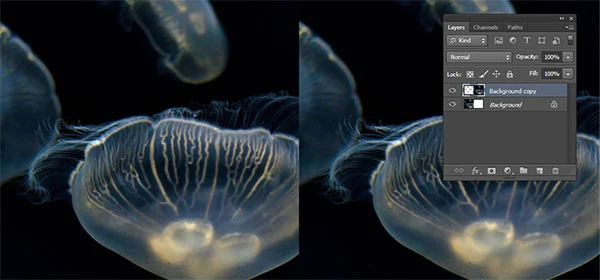
Choose Layer>Duplicate Layer. In the Layers panel, a duplicate layer appears above the original layer.
Step 4: Increase Canvas Width
Increase the Canvas Width by going to Image>Canvas Size (or Alt+Ctrl+C). In the Canvas Size dialog box, uncheck Relative, then increase the Width value by entering 200% in the Current Size Width. Click the black dot in the left center of the Anchor arrows that represent the existing image area.
Increase the Canvas width.
Step 5: Move the copy of the image
Select the Move Tool from the Tools bar.
Drag the copy of our image into the new space (to the right).
Step 6: Create Mirror Effect
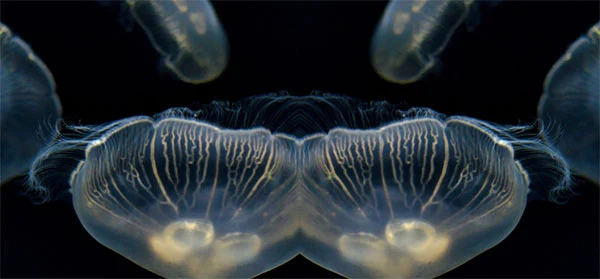
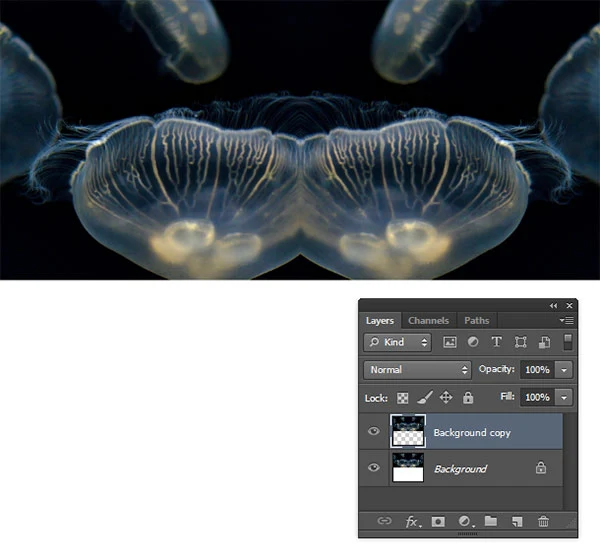
Flip Horizontal to create mirror effect. Select the top layer or the copy image then choose Edit>Transform>Flip Horizontal.
Step 7: Merge Both Layer
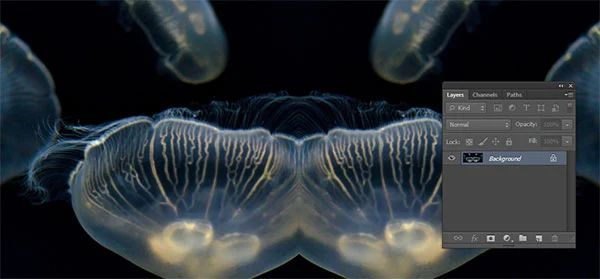
Choose Layer>Merge Down to merge both layers into a single layer.
Step 8: Remove blank or white spaces
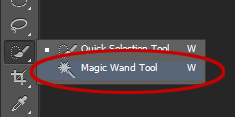
If there is any blank or white spaces, remove it. Select any selection tools from the Tools bar. Here, I’m using the Magic Wand Tool.
Select white spaces, inverse the selection then choose Image>Crop.
Step 9: Duplicate Layer Again
Choose Layer>Duplicate Layer to duplicate the Background layer.
Step 10: Increase Canvas Height
Increase the Canvas Height by going to Image>Canvas Size (or Alt+Ctrl+C). In the Canvas Size dialog box, uncheck Relative, then increase the Width value by entering 200% in the Current Size Width. Click the black dot in the left center of the Anchor arrows that represent the existing image area.
Increase the Canvas height.
Step 11: Flip Vertical
Flip vertical the duplicate image by going to Edit>Transform>Flip Vertical.
Step 12: Move the copy of the image
Select the Move Tool from the Tools bar. Drag the copy of our image into the new space (to the bottom).
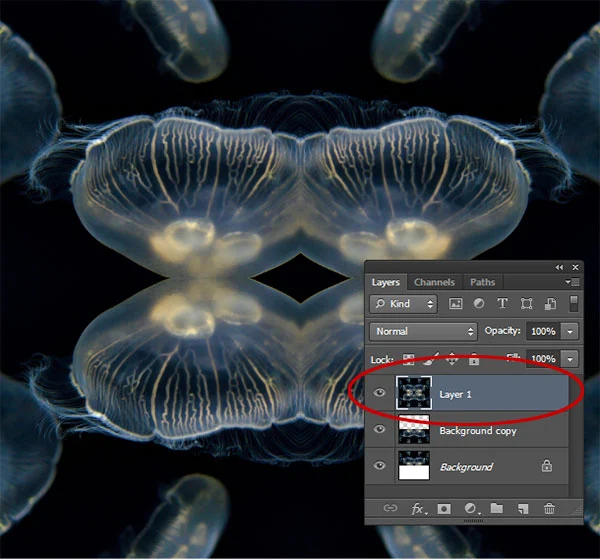
Step 13: Merge Visible
Merge the all visible layers into a new layer. Press and hold the Alt key, choose Layer>Merge Visible.
Step 14: Remove blank or white spaces
Again, if there is any blank or white spaces, remove it.
Select any selection tools from the Tools bar. Here, I’m using the Magic Wand Tool. Select white spaces, inverse the selection then choose Image>Crop.
Step 15: Rotate 90 degrees CW
Rotate the new layer by 90 degrees CW. Choose Edit>Transform>Rotate 90 degrees CW.
Step 16: Crop image
Press and Hold the Ctrl key, click on the new layer's thumbnail to load selection.
Then choose Image>Crop.
Step 17: Change its Blending Mode
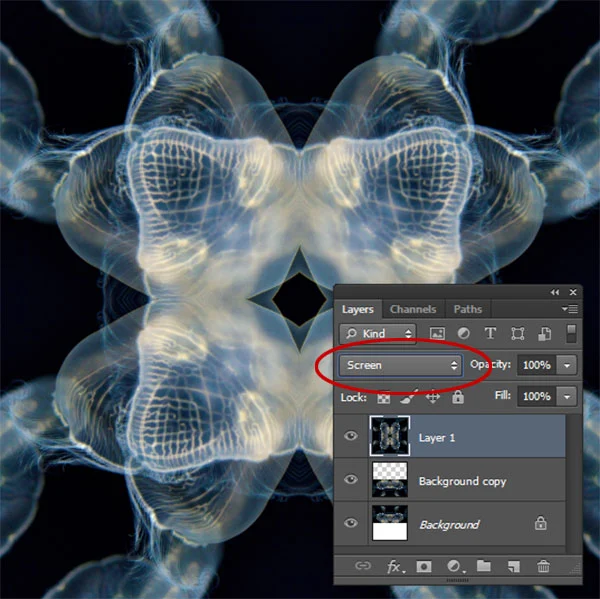
Try changing its blend mode using different blend mode and see how its look. I’m using Screen in this example.
Step 18: Merge Visible
Merge all the visible layers into a new layer. Press and hold the Alt key, choose Layer>Merge Visible.
Step 19: Rotate by 45 degrees
Now rotate the new layer by 45 degrees. Choose Edit>Transform>Rotate.
In the Options bar, enter 45 degrees for the angles options then click the checkmark.
Step 20: Change its Blending Mode
Try changing its blend mode using different blend mode and see how its look. I’m using Lighten here.
Step 21: Boost Tone And Contrast
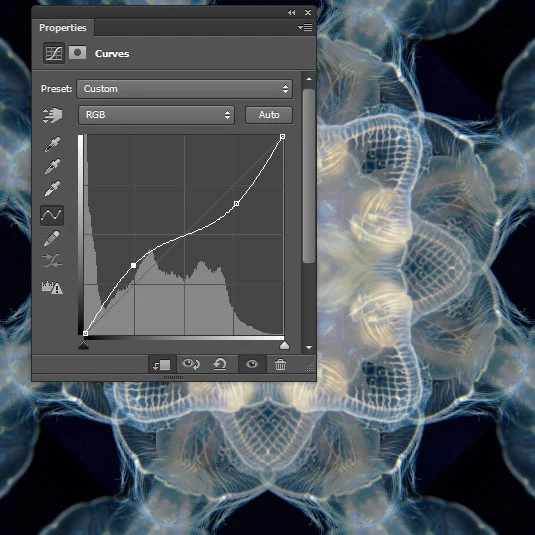
Create a Curves Adjustment Layer. Choose Layer>New Adjustment Layer>Curves. In the New Layer dialog box, name the layer if you want, leave the other options at their defaults, and click OK. The Curves controls display on the Properties panel. Adjust the curve to boost tone and contrast. Click the clipping mask icon to clip the Curves adjustment to the layer below it.
Boost tone and contrast using Curves.
Step 22: Save Document
Choose File>Save (or Ctrl+S) to save your project file. In the Save As dialog box, navigate to the folder where you want to store the file. Type a name in the File Name text box and leave the default Photoshop (*.PSD;*.PDD) format. Click Save to store the image.
Once you have finished, you will probably also want to use File>Save As (Shift+Ctrl+S) to export the image in a more widely used format, such as JPEG, PNG, TIFF, etc.
That's all there is to it! And here is the result: Create a Kaleidoscope Effect In Photoshop.
More on Photoshop tutorial:














confusing
ReplyDeleteYou can watch the video for detailed instructions :)
DeleteYou can also use a Photoshop action to make this effect:
ReplyDeletehttp://www.psd-dude.com/tutorials/resources/kaleidoscope-effect-photoshop.aspx