Learn how to apply a text watermark to an image in GIMP with these 7 simple steps where the watermark remains editable. It is important to protect your images and prevent people from using your works without your permission. Watermarking your images is a popular way to protect them. Apply a text watermark or a graphic watermark to photos in GIMP is very easy and quick. You can add a simple text watermark using the Text Tool, resize the text using the Scale Tool, adjust the text position using the Move Tool, and you can adjust its opacity on the Layers dialog.
Step 1: Open Image in GIMP
Use File>Open... command in the top menu or else just press Ctrl+O to open your image. The Open Image dialog appears, allowing you to navigate to the file and click on its name. Navigate through your folders in the Places panel and the Name panel until your images' name appears in the Name panel. Click the image you want to open.
When an image file is selected, we can view the preview of the image file at the right-hand side of the box, although it's not easy to find an image based on a thumbnail. Click Open.
For this GIMP tutorial, I'll use this image, 1031360, downloaded from Pixabay.
When an image file is selected, we can view the preview of the image file at the right-hand side of the box, although it's not easy to find an image based on a thumbnail. Click Open.
For this GIMP tutorial, I'll use this image, 1031360, downloaded from Pixabay.
Step 2: Select the Text Tool
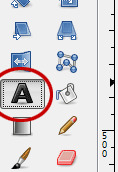
To places text into an image we need to use the Text tool. Select the Text Tool from the toolbox by clicking the tool icon or else use Tools>Text.
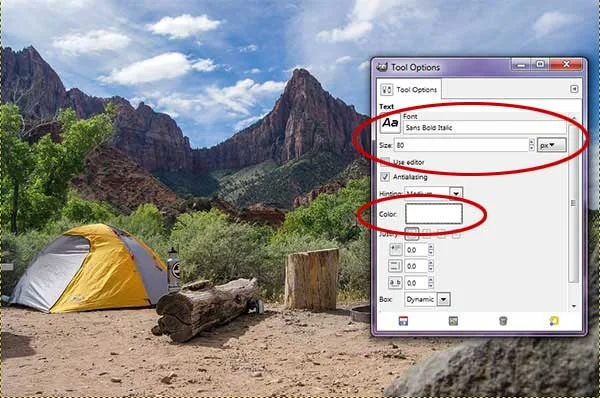
Step 3: Choose Font Type and Font Color
In the Text Tool Options dialog, you can choose the Font type, color, and size.
Step 4: Type the text
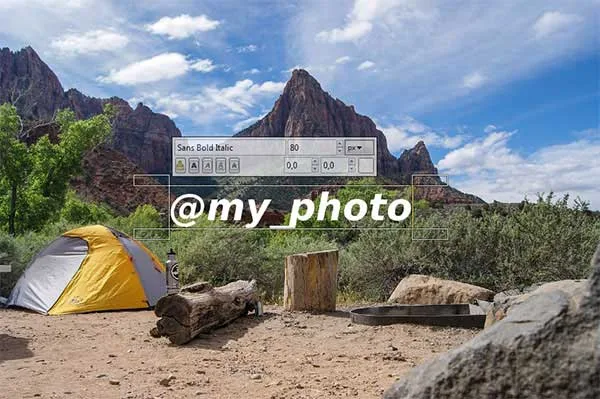
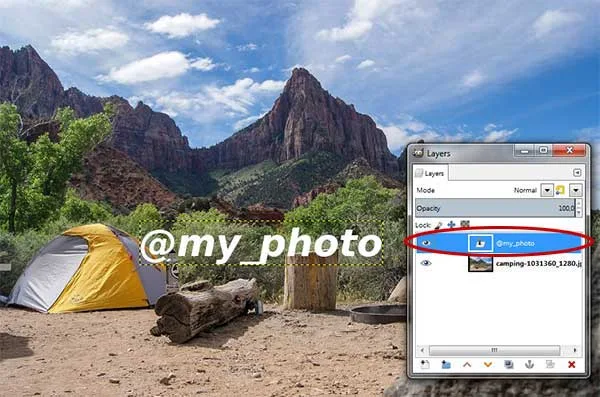
Click on any portion in the image, where you would like to create the text. Then enter the text on the canvas. Your text will appears on the canvas in a rectangular frame. Each time you create a new type with the Text Tool, it will appear on a new layer.
Step 5: Adjust the position Using the Move Tool
If you need to move the text on canvas, you have to select the Move tool and click on a character to drag the frame and its text. Select the Text layer on the Layers dialog. Select the Move Tool from the toolbox by clicking the tool icon or else use Tools>Transform Tools>Move.
Make sure the text layer is selected on the Layers dialog.
Just click and drag on any portion of the text. The text gets moved as you move the cursor.
Step 6: Adjust Text Size Using the Scale Tool
We'll use the Scale Tool to adjust the size of the text. Make sure the text layer is selected on the Layers dialog.
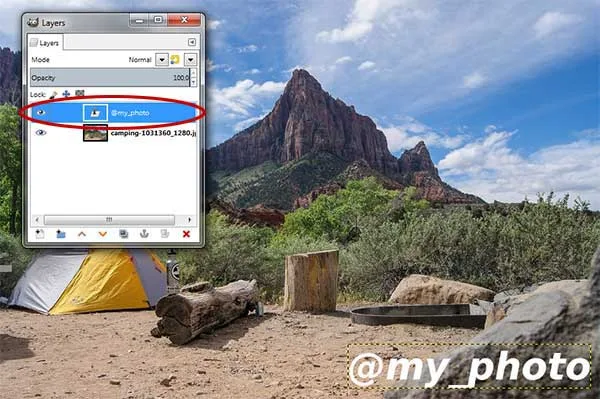
Select the Scale Tool from the toolbox by clicking the tool icon or else use Tools>Transform Tools>Scale.
The Scale dialog box appears. Here, you can set Width and Height you want to give to the text or you can just drag handles in the text.
If you prefer using handles, you can scale your text as follows:
- Drag a side handle if you want to scale just the height or width of the text.
- Drag a corner handle if you want to scale both the height and the width of the text.
- Click the Scale button when you're done.
Step 7: Adjust the Text Opacity
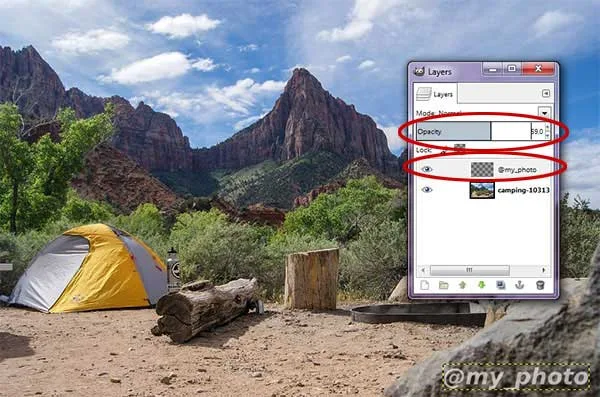
Select the text layer on the Layers dialog then alter the layer's opacity to about 60%.
Step 8: Save Your Document
At last, use File>Save command in the top menu or else just press Ctrl+S to save your project file. The Save Image dialog box appears. Navigate to the folder where you want to store your project file. Type a name in the Name text box and leave the default GIMP (*.XCF) format. XCF is GIMP's native format and is useful because it stores everything about your image and will allow you to later edit your image in GIMP, in case you notice a problem. Click Save to store the project file.Once you have finished, you will probably also want to export the image in a more widely used format, such as JPEG, PNG, TIFF, etc.
There you have it! Apply a Text Watermark to Photo in GIMP.




Thank you! Great information and very understandable!
ReplyDeleteI'm more than happy to know you liked it! thank you
Delete