In this tutorial, we are going to learn how to create a triangle photo collage in Photoshop. We'll be using Guides, Polygon tool and Clipping Mask that comes with Photoshop. Guides help us position polygon shapes precisely, the Polygon tool to draw triangle shapes, and Clipping Mask to clips the image layer into the triangle layer. Once you have arranged it to your satisfaction, you can play around with other Photoshop's tools to add your own artistic effects.
If you liked my tutorials, please subscribe to my YouTube channel - JTSGraph.
Download This Triangle Photo Collage Template
Download the Triangle Photoshop Collage template here or find others free Photoshop Collage Templates here.Step 1: Create a new Document
Choose File> New (or Ctrl+N). In the pop-up window, type a name in the Name field and enter the following information:
Width 3000 pixels, Height 2000 pixels, Resolution 300 Pixels/Inch, Color Mode RGB color, and Background contents Transparent or White. Click OK.
Step 2: Create Guides
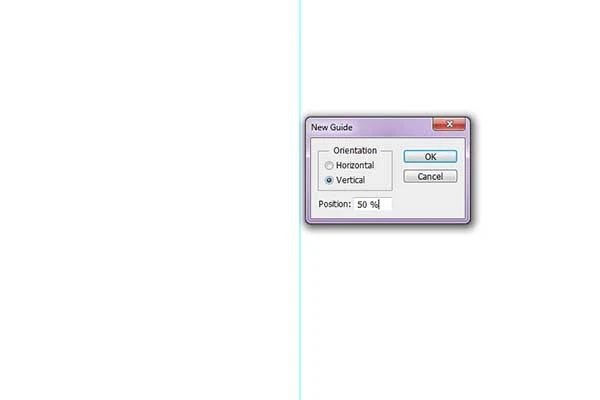
Guides help you position any object (shapes or images) precisely. It is pretty easy to make guides in Photoshop. Create a vertical guide. Choose View> New Guide. In the dialog box, select Vertical orientation, enter 50% position and click OK.Now create a horizontal guide. Choose View>New Guide. In the dialog box, select Horizontal orientation, enter 50% position and click OK.
If you didn't see the guidelines, then choose View> Show> Guides.
If you want to lock all guides, choose View>Lock Guides. This way you can't move them by accident.
Step 3: Choose Polygon Tool
Select the Polygon Tool from the Tools panel (or press U). Press Shift+U to cycle through the six available shape tools until the one you want is active.In the Options Bar, make sure Shape is chosen from the menu then choose shape color. To choose the color of the shape, click the color swatch in the options bar, and then choose a color available.
You can also choose a color from the Color Picker.
Lastly, fill the stroke size and set the number of sides in Sides field with 3.
Step 4: Draw Triangle Shape
To draw a Triangle shape, click inside your document and drag away from the starting point. When you release your mouse button, Photoshop completes the shape and fills it with your chosen color. Now duplicate the Triangle shape by going to Layer> Duplicate Layer, or else by pressing Ctrl+J. Then resize and reposition your duplicate shape layer using Edit> Free Transform Path.You can edit the shape as follows:
- Resize the Triangle shape by dragging any corner while holding down the Shift key to keep the shape does not distort.
- Move the Triangle shape by clicking and hold anywhere inside the shape and drag.
- Rotate the Triangle shape by moving your cursor farther out from any corner until you see two arrows. Click and hold, then drag the shape.
- Press Enter key when you are done.
Duplicate the Triangle shape layer as many as you want and then arranged it all to your satisfaction. When you are done, hide/remove guides by going to View>Show>Guides.
Step 5: Insert Image
For this Photoshop Collage tutorial, I'll use these images that I downloaded from Pixabay.Stock images: 2938, 1835643, 1149144, 1567903, 1758181, 945497, 1903023, 768610
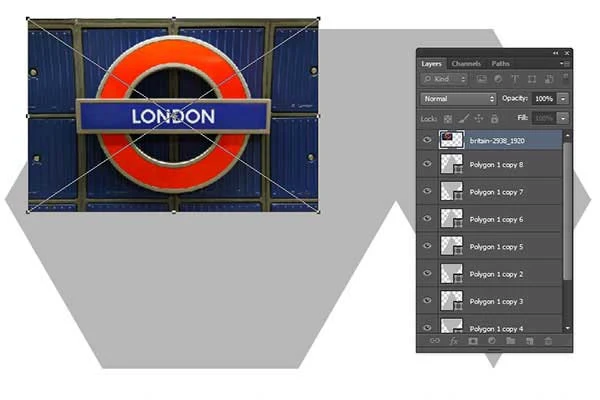
Select the Triangle layer to which you want to insert a picture. Go to File> Place to open the picture you'd like to insert. Navigate to the folder that contains your image file then select the name of the file you want to open. If your file does not appear, try to view all files by selecting All Formats from the Files of type list. Click the Place button.
You can now edit the picture as follows:
- Resize the picture by dragging any corner while holding down the Shift key to keep the picture does not distort.
- Move the picture by clicking and hold anywhere inside the image and drag.
- Rotate the picture by moving your cursor farther out from any corner until you see two arrows. Click and hold, then drag the picture.
- Press Enter key when you are done.
Step 6: Create Clipping Mask
On the Layers panel, make sure the layers to be clipped are listed consecutively. Remember, you must stack the image layer above the Triangle layer.Click the image layer to be clipped, then choose Layer>Create Clipping Mask (or press Alt+Ctrl+G). When layers are put into a clipping mask, the content of the bottommost layer (the Triangle layer), clips the layers above it (the image layer).
Step 7: Insert Other Images
Repeat steps 5 through 6 to open and manipulate each picture you'd like to insert.Step 8: Group All The Triangle Layers
While pressing the Shift key, click on all the triangle layer then choose Layer> Group Layers.Step 9: Add Background Color
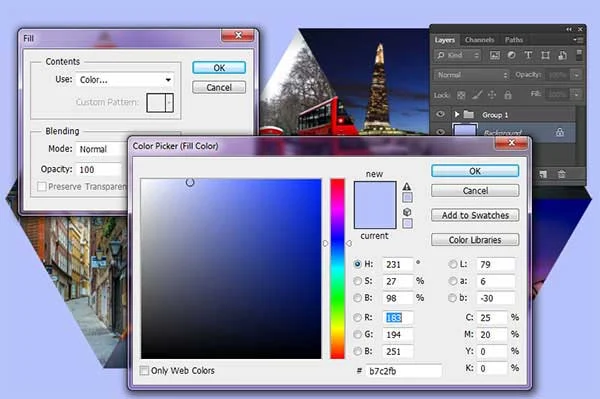
Click the Background layer. Choose Edit>Fill, choose a color and then click OK.Step 10: Save Your Document
Choose File>Save (or just press Ctrl+S) to save your project file. The Save As dialog box appears. Navigate to the folder where you want to store your project file. Type a name in the File Name text box and leave the default Photoshop (*.PSD;*.PDD) format. Click Save to store the project file.Once you have finished, you will probably also want to use File>Save As (Shift+Ctrl+S) to export the image in a more widely used format, such as JPEG, PNG, TIFF, etc.
There you have it! Triangle Photoshop Collage.
There you have it! Triangle Photoshop Collage.


The triangle collage looks great! Can you please mention this article
ReplyDeleteHow to Draw Triangles in Photoshop | Tutorial for Beginners
Nice tutorial Jhon!
Delete