In this quick Photoshop tutorial, I’ll show you how to make a Grid and Guides in Photoshop. Sometimes we need to create the grid or Guides to assist us in laying out any object (shapes or images) symmetrically. Choose File>Open to open any image or choose File>New to create a new one. You must know the width and height of the image that you will be using the grid/guides for.
1. Create The Grid
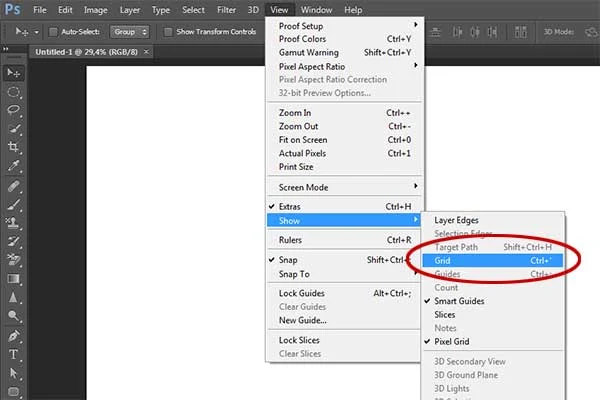
The image size in this example is 3000 pixels width and 2000 pixels height. How to make a Grid in Photoshop? It is pretty easy to make a grid in Photoshop. To add the grid, choose View>Show>Grid (Ctrl+’).
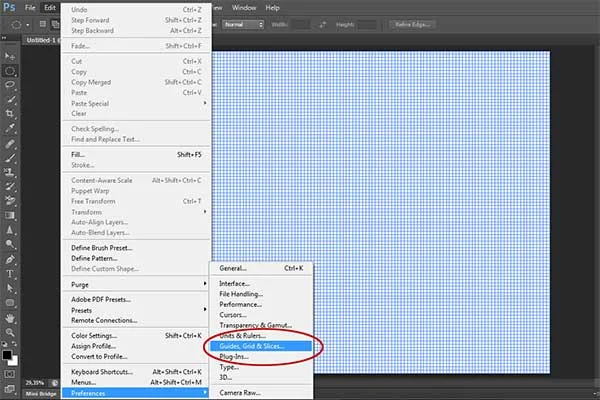
Open up the grid preferences, choose Edit> Preferences> Guides, Grid & Slices.
This will open a preference dialog box.
Choose the color and style you want for the grid lines. You can just leave the default color or, depending on your image, choose a color that you will be able to see.
I will set the “Gridline every” option to be 500 pixels and “Subdivisions” option to be 1.
Choose View>Snap and View>Snap To Grid to enabling snaping that will help you to align any object (including shape) you want.
Choose View>Snap To>Grid.
Here is the result: How To Make a Grid in Photoshop.
2. Create Guides
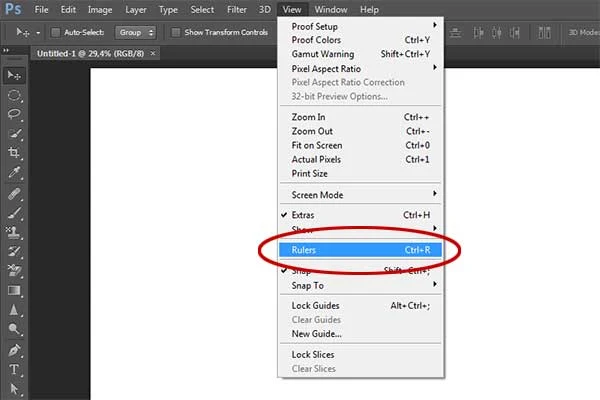
Now, we will try to create five horizontal and vertical guidelines. The image size in this example is 3000 pixels width and 3000 pixels height. We’ll create guides at position 0, 750, 1500, 2250, and 3000 pixels. If the rulers are not visible, choose View > Rulers (Ctrl+R).
If you want to choose a color and style for the guides lines, just open up the guides preferences by going to Edit> Preferences> Guides, Grid & Slices.
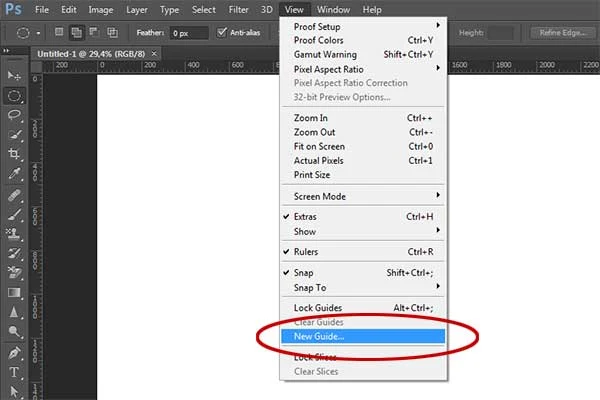
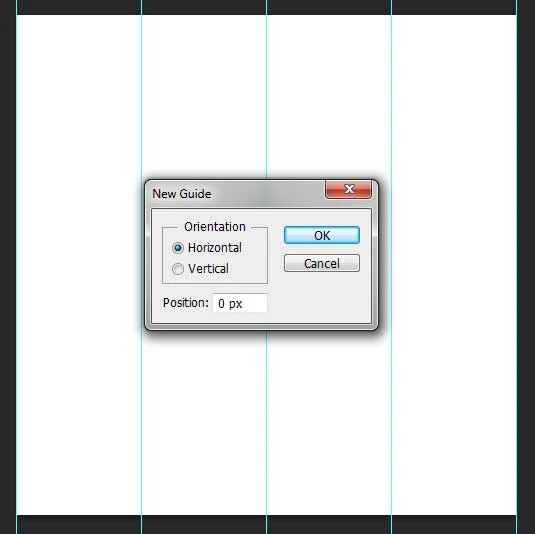
Create the first vertical guide. Choose View> New Guide.
In the dialog box, select Vertical orientation, enter 0 px position and click OK.
Repeat this step for position 750, 1500, 2250, and 3000 pixels.
Now create a horizontal guide. Choose View>New Guide. In the dialog box, select Horizontal orientation, enter 0 px position and click OK.
Repeat this step for position 1000, 2000 and 3000 px.
To Move a guide, grab the Move tool, position your mouse over the guide, then drag the guide.
To Move a guide, grab the Move tool, position your mouse over the guide, then drag the guide.
If you want to remove a single guide, (with the Move Tool active) position your mouse over the guide, then drag the guide outside the image window.
To remove all guides, go to View > Clear Guides.
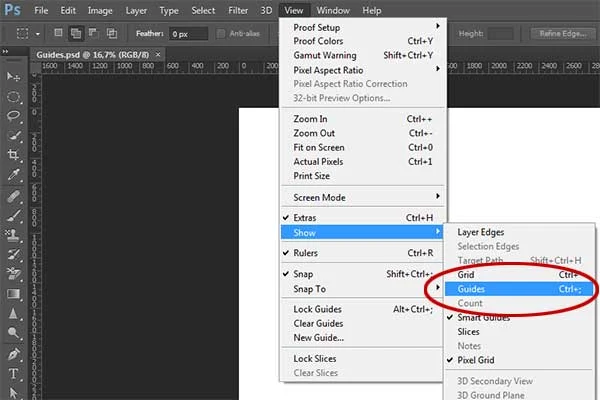
In case you didn't see the guidelines, then choose View> Show> Guides (Ctrl+;).
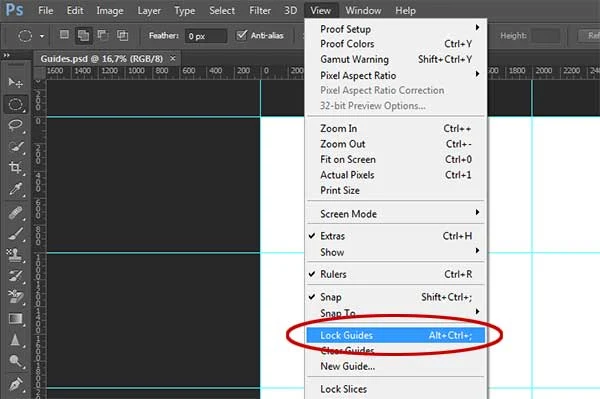
If you want to lock all guides, choose View>Lock Guides (Alt+Ctrl+;).
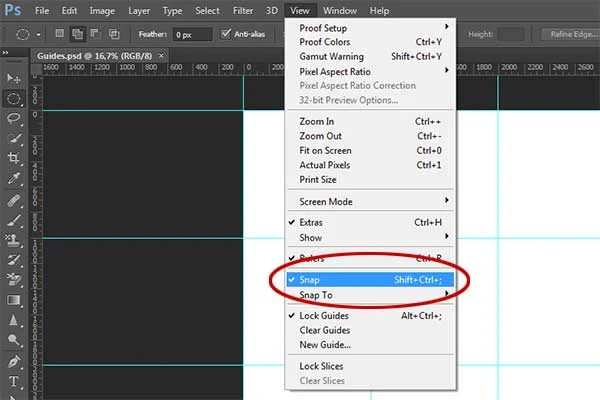
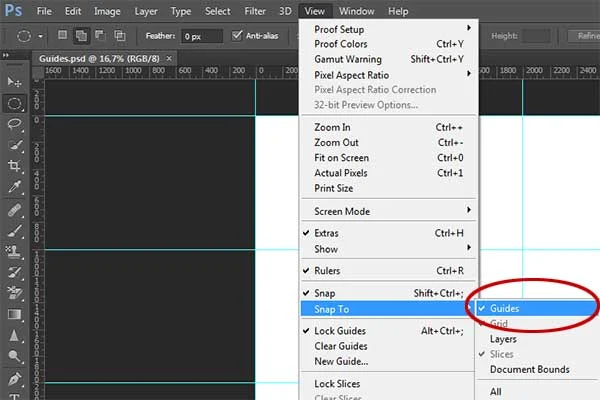
This way you can't move them by accident. Choose View>Snap to enabling snaping that will help you to align any object (including shape) you want.
Make sure that View>Snap to>Guides is checked.
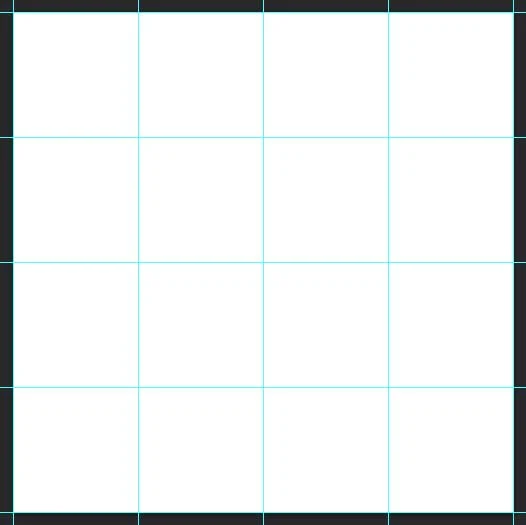
Here is the result: Guides.
3. Save Document
Now you can save your Photoshop grid/guides document as a template for future use, in case you want to use the same grid/guides layout again. Choose File>Save (or Ctrl+S) to save your project file. In the Save As dialog box, navigate to the folder where you want to store the file. Type a name in the File Name text box and leave the default Photoshop (*.PSD;*.PDD) format. Click Save to store the image.
More on Photoshop tutorial:









I've found your blog was very informative on a pain.net tutorial, just advice you can use /search/label/(your desired category) instead of post in on separate page. Thank you for your very helpful tips!
ReplyDeleteGlad you liked it. Thank you.
DeleteGreat tutorial! Creating grids and guides in Photoshop is now much clearer—perfect for achieving clean and precise layouts.
ReplyDelete