Learn how to make a Gel Text Effect In Photoshop. The first step is to create the text using the Horizontal Type Tool. We recommend choosing a bold / large font. Then set the Fill of the text layer to zero percent so that the text is transparent. Next we apply Bevel & Emboss, Color Overlay and Drop Shadow to the text. Because it will apply colored jelly, change the background that we use to RGB color mode.
If you liked my tutorials, please subscribe to my YouTube channel - JTSGraph.
Steps to make a gel text's effect in Photoshop:
1. Open texture.
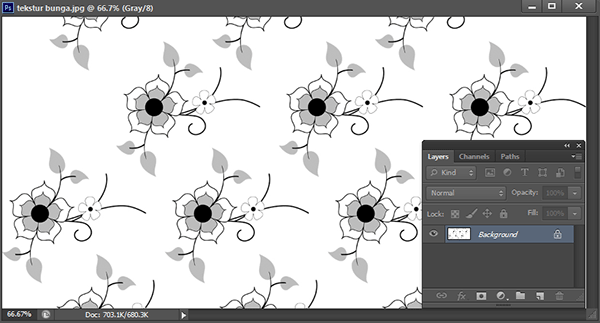
Choose File>Open. The texture source for this Photoshop text effects tutorial is taken from Microsoft Office Images. I'm going to use a flower texture photo to show the transparent jelly text effect.
2. Grab the Horizontal Type Tool.
Click the Horizontal Type Tool icon in the Tool panel.
Please select the type of font you want on the option bar. Choose black for the font color.
3. Type the Text.
Click document then type your text. Press Ctrl+Enter when you are finished typing. Use Free Transform to adjust the size and position of the text in the document by pressing Ctrl+T. You will see a Free Transform box around your writing. While holding down the Shift key, click the end of the Free Transform box and then drag it out to enlarge the text. Click on the center of the text then drag to move your text position. When you have finished setting the position of the text, press the Enter key.
4. Set the Fill of the text's layer to zero percent.
We'll be creating a transparent jelly effect. At this time the text is not visible. The text will be visible later after we style it Color Overlay.
5. Apply Bevel & Emboss.
Activate the text layer by clicking on it then choose Layer> Layer Style> Bevel Emboss. Please fill in the settings for Bevel & Emboss as shown below. You can modify it as you wish.
6. Add a Contour Style.
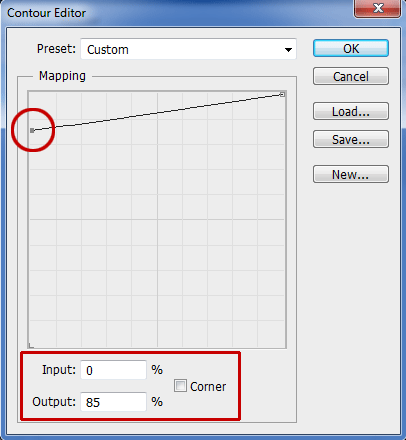
Click the contour style then fill in the settings as shown below. Fill in the range 35 percent then click the Contour box (circled in red) to display the Contour Editor window.
In the Contour Editor window, click the arc up until you get the Input: 0 and Output: 85 values.
7. Make sure the background is in RGB mode.
Before applying a Color Overlay Style, make sure the background layer is in RGB mode. Click the background layer then select Image>Mode>RGB Color. In the dialog box select Don't Flatten.
8. Add a Color Overlay Style.
Click the text layer again then select Layer> Layer Style> Color Overlay. Please click the color box to select the text color you want. I'm going to choose a red color (#ff0000). Move the opacity to 100 percent and change the blend mode to Darken.
9. Add Drop Shadow.
Finally click the Drop Shadow checkbox and fill in the settings in the image below.
10. Adjust opacity.
Click the background layer then set the opacity so that the background image is not too sharp. Until here, your jelly effect is finished.
There you have it! Gel Text Effect In Photoshop.


No comments:
Post a Comment