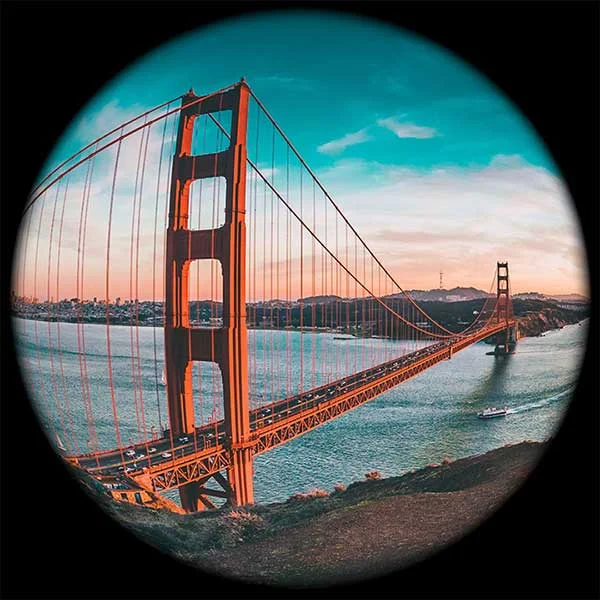
Learn how to create a fisheye effect in Photoshop by drawing a circle selection using the Elliptical Marquee Tool and apply the Spherize filter to it. You can then add a black background and crop it. Let's get started!
If you liked my tutorials, please subscribe to my YouTube channel - JTSGraph.
For this Photoshop tutorial, I'll use this image, 690346, that I downloaded from Pixabay.
Steps to make a fisheye effect in Photoshop:
1. Draw circle selection.
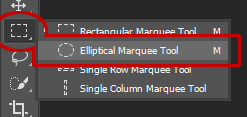
Grab the Elliptical Marquee Tool by selecting it from the toolbar on the left.
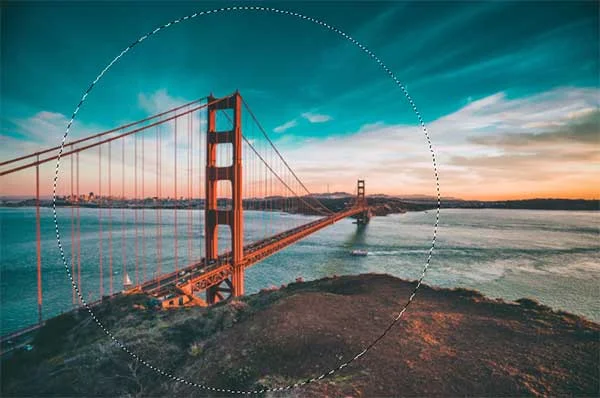
Draw a circle selection by dragging your mouse while holding-down the shift key. Just leave the mouse when you are done. You should see a dotted line outline the selection. Now, the selected portion of the document, in a circle, has been selected.
2. Add a soft black edge.
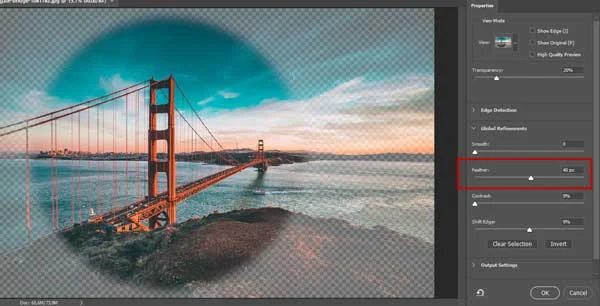
Choose Select>Select and Mask. Enter a value or using the slider in the Feather column to get your desire edge.
3. Apply Spherize filter.
Go to Filter>Distort>Spherize. Drag the Amount slider to 100% and Mode: Normal. This should add a fish-eye lens distortion to the image.
4. Create black background.
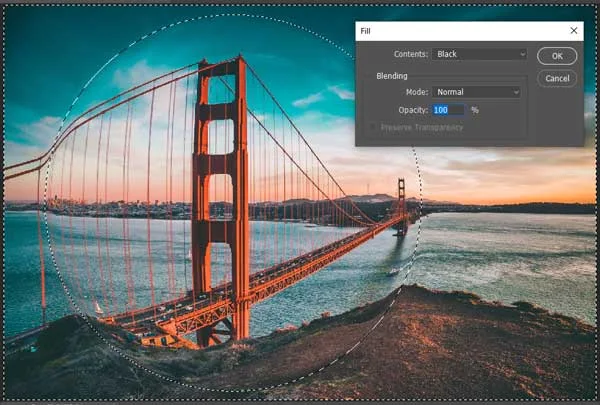
Choose Select>Inverse to invert the selection. Choose Edit>Fill. In the Fill dialog box, under Contents, you can choose a black color to fill the selection area. Choose Select>Deselect to remove selection.
5. Trim image.
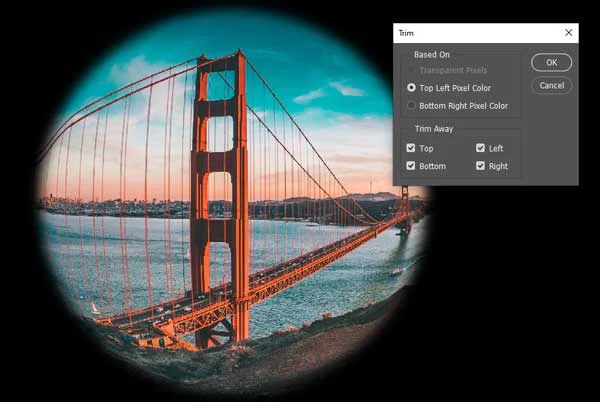
Choose Image>Trim. Check the Top, Bottom, Left and Right Trim Away checkboxs. Click OK.
There you have it! Fisheye-Lens effect in Photoshop.
Fisheye effect or a photo with a convex lens is a photographic technique that uses a unique lens for taking your subject in the form of a circular frame. If you do not have a fisheye camera, you can recreate this fisheye effect easily using Photoshop.
More on Photoshop tutorials:



No comments:
Post a Comment