In this tutorial, I’ll show you how to make rain effect in Photoshop from a given image. First, we need to add canvas size to
create a natural rain effect, create new layer for the rain effect,
add noise, blur, and motion blur to it and work with Levels to adjust
the amount of rainfall.
If you liked my tutorials, please subscribe to my YouTube channel - JTSGraph.
Steps to make a rain effect in Photoshop:
1. Open Image Then Increase Canvas Size
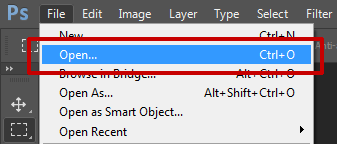
Choose File- Open (or Ctrl + O).
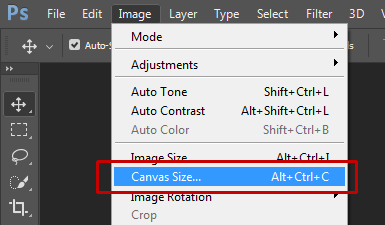
For this Photoshop tutorial, I'll use this image, 1901880. Choose Image- Canvas Size to increase the canvas size.
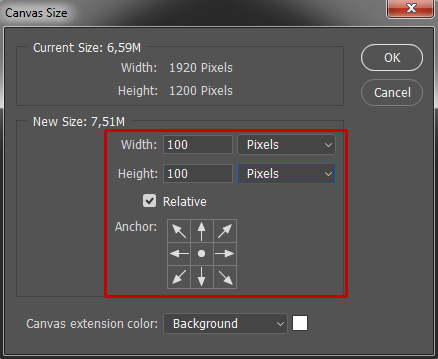
In the Canvas Size window, enter the width and height of 100 pixels. Do not forget to check the Relative checkbox. Click OK.
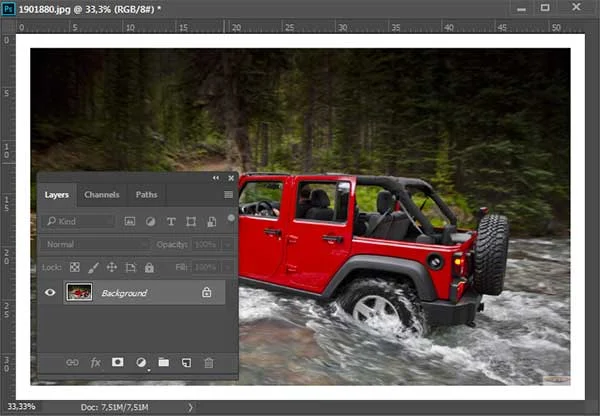
Increase Canvas Size.
2. Create a New Layer For Rain Effect
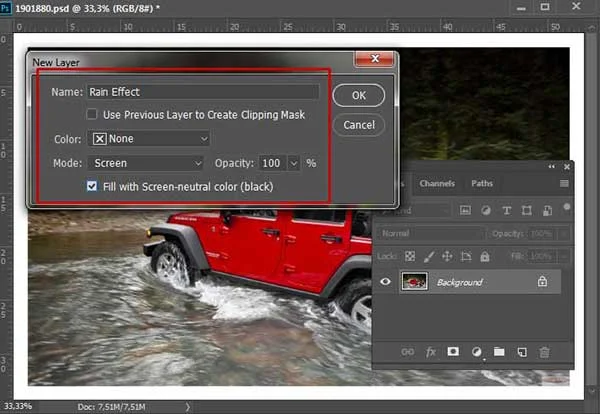
Choose Layer- New Layer.
In the New Layer dialog box, name the layer, set the mode to Screen and check Fill with Neutral Color Screen (Black). Click OK.
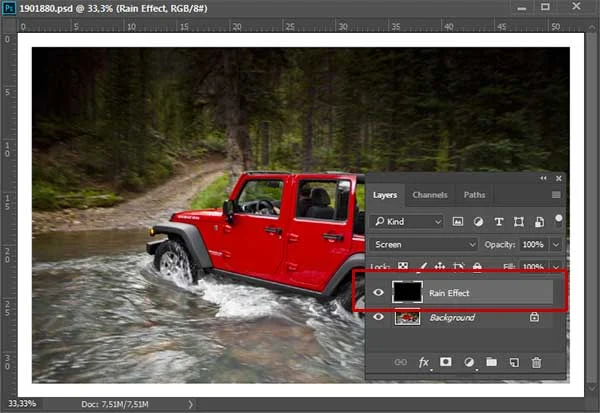
The new layer created.
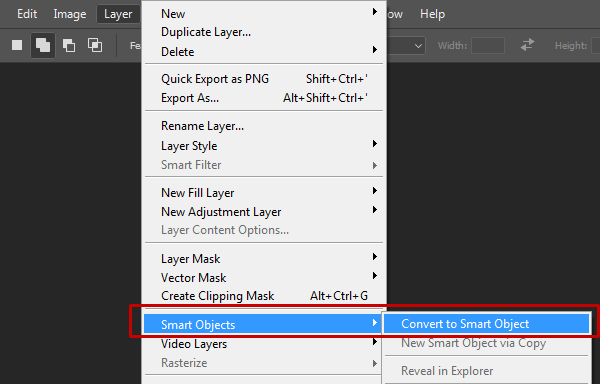
3. Convert to Smart Object
Convert the new layer to Smart Object by going to Layer-Smart Object-Convert to Smart Object.
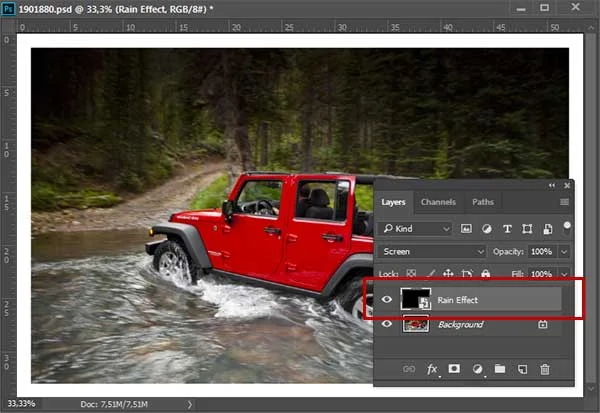
Layer converted to smart object.
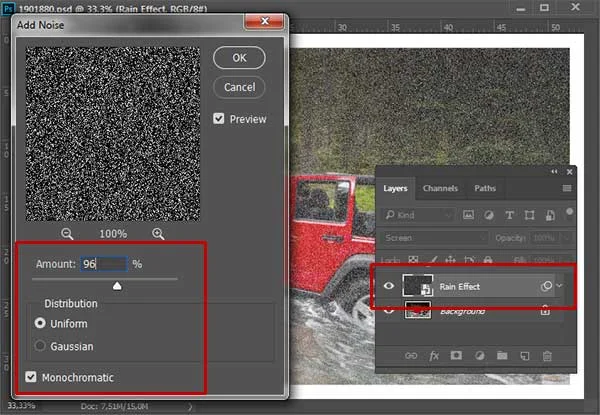
4. Add Noise
Choose Filter- Noise- Add Noise.
Fill in the amount, select Uniform or Gaussian and check Monochromatic. Click OK.
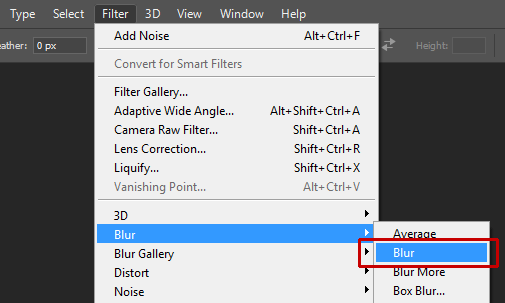
5. Add Blur
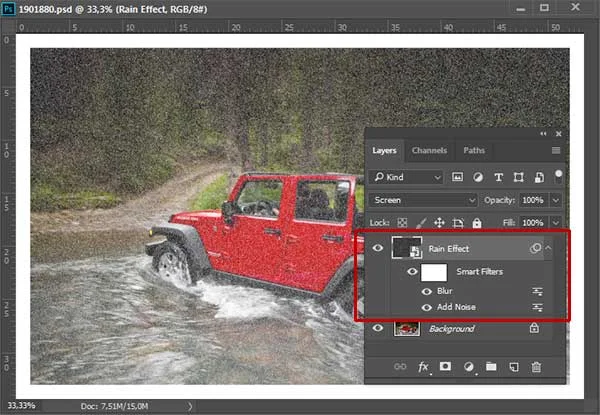
Blur the noise by going to Filter- Blur- Blur.
The Blur Filter applied.
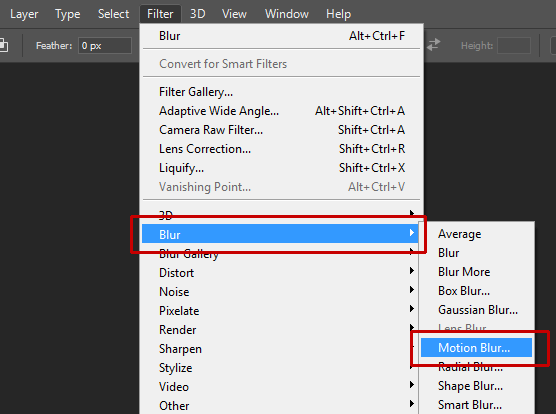
6. Add Motion Blur
Choose Filter- Blur- Motion Blur.
Enter Angle and Distance to adjust the direction of the rainfall. Click OK.
7. Adjust the Amount of rainfall using Levels
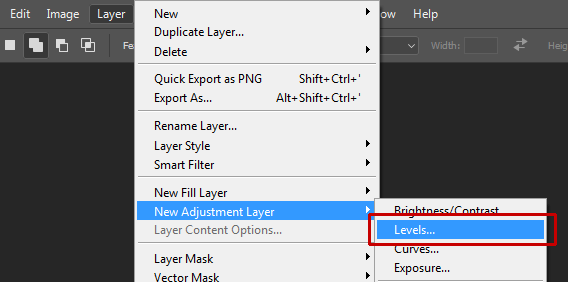
Choose Layer-New Adjustments Layer-Levels.
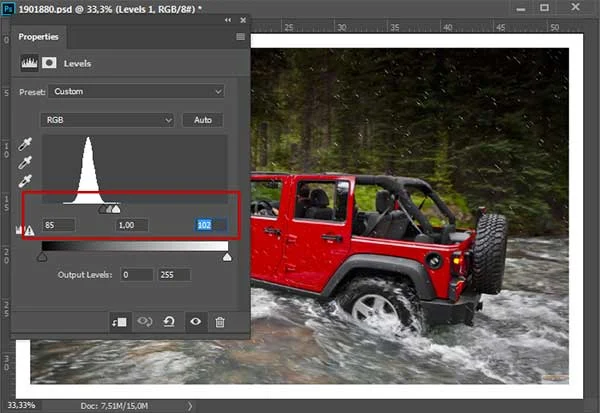
Click the adjustment clips.
Drag the Input Levels slider to set the desired amount of rain.
8. Crop Canvas
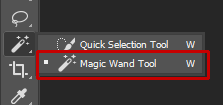
Grab the Magic Wand Tool.
In the Options Bar, set Tolerance to 1.
Click on the image border. Selection will appear around the border.
Inverse selection by choosing Select-Inverse.
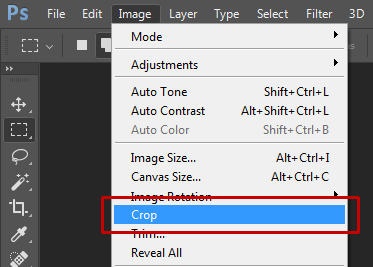
Then crop the image by choosing Image- Crop.
There you have it! How to add rain effect to a photo in Photoshop.
9. Save Project
Choose File-Save (or Ctrl+S) to save your project file. Navigate to the folder where you want to store the file. Type a name in the File Name text box and leave the default Photoshop (*.PSD;*.PDD) format. Click Save to store the image.








Brilliant tutorial, thanks for taking the time to prepare this. Helps with my rainy day YouTube thumbnails.
ReplyDeleteGlad you liked it. Thanks :)
Delete