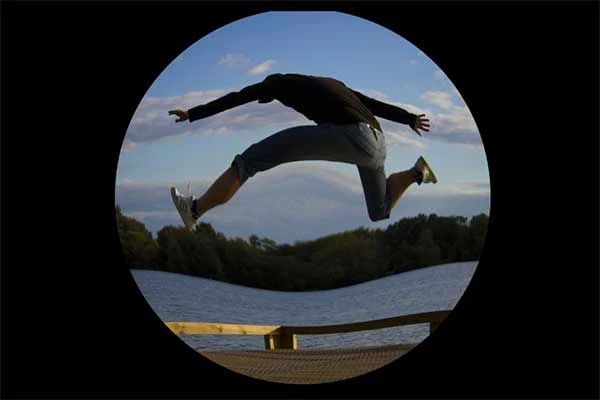
In this Paint.NET tutorial, I'll show you how to create a fisheye effect using the Ellipse Select Tool and Bulge filter that comes with Paint.NET.
We'll start by drawing a circle selection, invert the selection, fill the selection with Black, invert the selection again, apply Bulge filter to the selection and Crop the image. Let's get started!
If you liked my tutorials, please subscribe to my YouTube channel - JTSGraph.
Steps to make a Fisheye effect in Paint.NET:
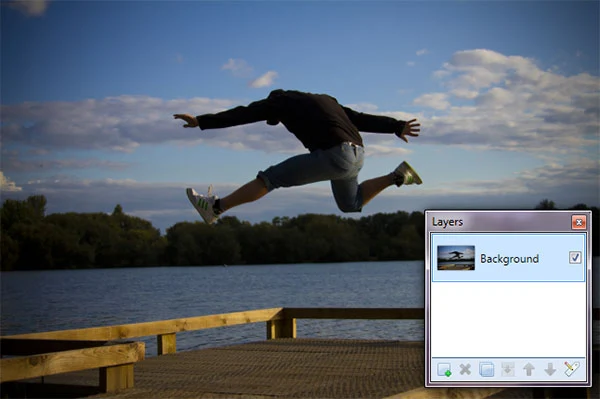
1. Open image.
Go to File>Open... (Ctrl+O). Navigate to a location on your computer where you have your images. Click the image you want to open, then click Open.
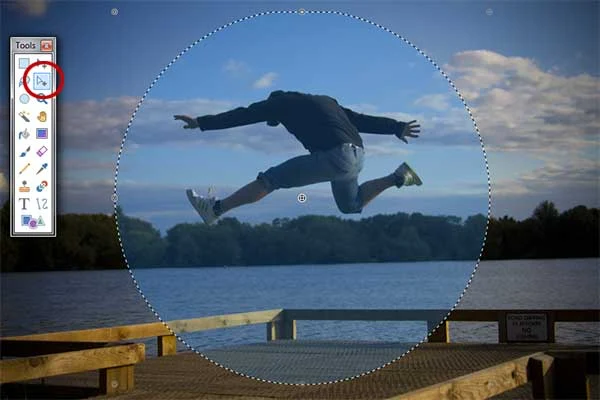
2. Draw a circle selection.
Grab the Ellipse Select Tool.In the Options bar, choose “Replace”. Click-drag your mouse to choose a portion of the document while holding down the Shift key to keep the selection doesn't distort. Just leave the mouse when you are done. You should see a dotted line or marching ants outline the selection. Now, the selected portion of the document, in a circle, has been picked or selected.
If you want to move the selection, grab the Move Selection tool then click anywhere inside the selection and drag to the position you want.
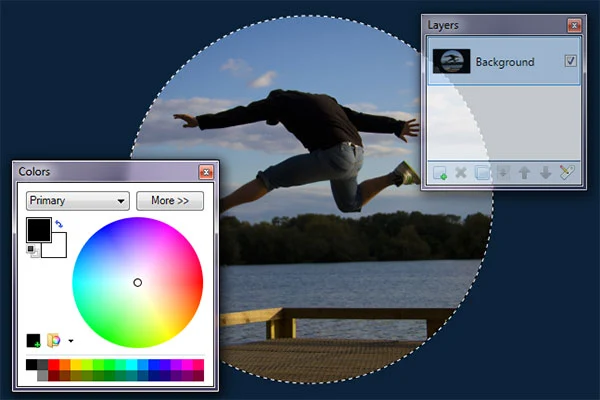
3. Invert selection.
Use Edit>Invert Selection (Ctrl+I). Now all of the layer contents which were previously outside of the circle selection are inside it.4. Fill selection with black.
Make sure the Primary color in the Colors window is Black. Fill the selection with black by going to Edit>Fill Selection (Backspace key). Now black color fills the selection.
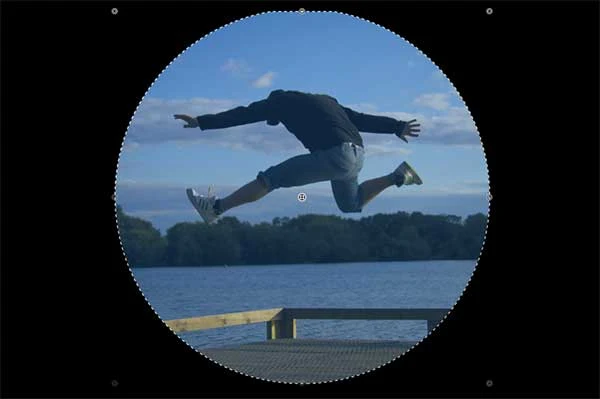
5. Invert the selection again.
Choose Edit>Invert Selection (Ctrl+I). Now the circle portion of the document selected.6. Apply Bulge filter.
Choose Effects>Distort>Bulge. Drag the Bulge slider to the maximum value or 100 to controls the strength of the effect. Drag the cross-hair in the thumbnail preview to set the center of the effect. Click OK. 7. Crop the image.
Grab the Rectangle Select tool.Click, hold and drag your mouse to choose a portion of the document while holding down the Shift key to keep the selection doesn't distort. Just leave the mouse when you are done. You should see a dotted line or marching ants outline the selection. Now, the selected portion of the document, in a square, has been picked or selected.
If you want to move the selection, grab the Move Selection tool then click anywhere inside the selection and drag to the position you want.
Go to Image>Crop to Selection (Ctrl+Shift+X) to crop the image. The image gets cropped now.
There you have it! Creating a Fisheye Effect with Paint.NET.
8. Save document.
At last, use File>Save (Ctrl+S). Navigate to the folder where you want to store your project file. Type a name in the File name text box and leave the default Paint.NET (*.pdn) format. Pdn is Paint.NET's native format and is useful because it stores everything about your image and will allow you to later edit your image in Paint.NET, in case you notice a problem. Click Save to store the project file.Once you have finished, you will probably also want to export the image in a more widely used format, such as JPEG, PNG, TIFF, etc.
More on Paint.NET Tutorials:










This is not a fucking fish eye lens effect, and you should be ashamed
ReplyDeleteEhh... Okay... I think
ReplyDelete