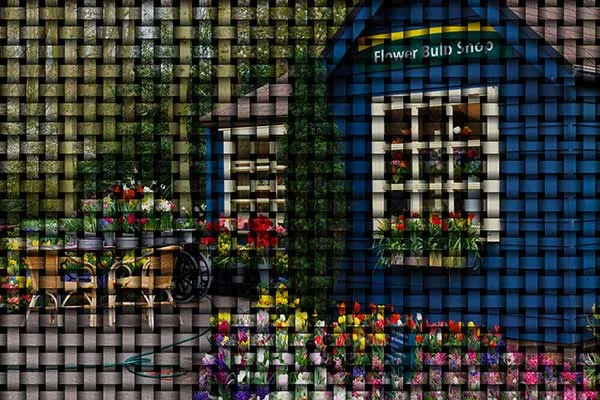
In today's tutorial, we will discuss the Weave command in Artistic filter. GIMP uses filters to achieve a variety of effects. Artistic filters create artistic effects like apply canvas, Cartoon, Clothify, Cubism, GIMPressionist, Oilify, Photocopy, Predator, SoftGlow, Van Gogh and Weave. The Weave command creates a new layer filled with a weave effect and adds it to the image as an overlay or bump map. Make sure you are using GIMP version 2.8.14 or if you are using older version, then you have to install the GIMC plugin.
Steps to make a weave effect in GIMP:
1. Open Image
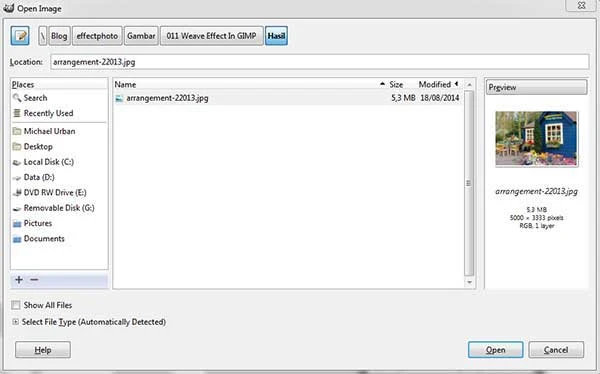
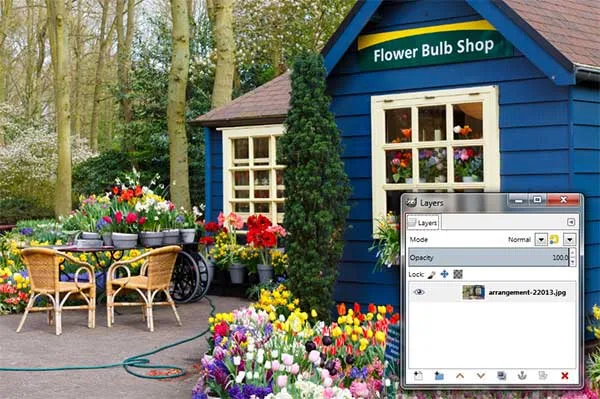
Use File>Open... command in the top menu or else just press Ctrl+O to open your image. The “Open Image” dialog will appear, allowing you to navigate to the file and click on its name. Navigate through your folders in the Places panel and the Name panel until your images' name appears in the Name panel. Click the image you want to open. When an image file is selected, you can view the preview of the image file at the right hand side of the box, although it's not easy to find an image based on a thumbnail. Click the Open button.
2. Apply Weave Filter
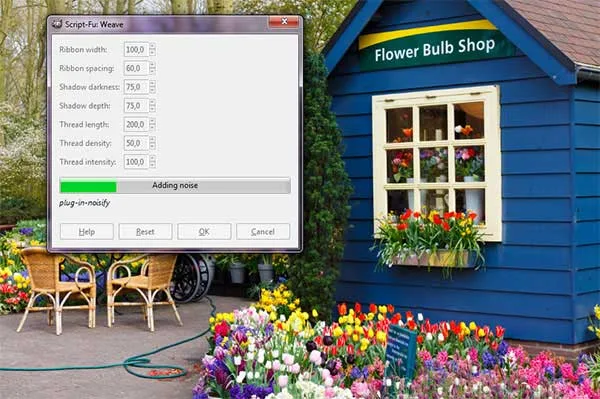
Now apply weave filter by going to Filters>Artistic>Weave.
The “Script-Fu: Weave” dialog will appear, allowing you to set the Ribbon width, ribbon spacing, shadow darkness, shadow depth, thread length, thread density and thread intensity of the new image manually or through the up and down arrows.
The result of the image looks as if it were printed over woven ribbons of paper, thin wooden sheet, or stripped bamboo.
- Ribbon width: the tape width in pixel between 0.0 and 256.0.
- Ribbon spacing: the distance to the neighboring ribbon or the size of black square hole in pixel between 0.0 and 256.0.
- Shadow darkness: the darkness at crossings of lower ribbon in percentage.
- Shadow depth: the bent strength of ribbons in percentage.
- Thread length: the regularity of stripe texture.
- Thread density: the density of fiber-like parallel short stripes on the surface of ribbons.
- Thread intensity: the opacity of stripe texture.
The result of the image looks as if it were printed over woven ribbons of paper, thin wooden sheet, or stripped bamboo.
If you're not happy with the result, you can undo by going to Edit> Undo or else just press Ctrl + Z.
3. Save Document
Use File>Save command in the top menu or else just press Ctrl+S. The “Save Image” dialog will appear, allowing you to type your document's name in the “Name” box and save it. It's better you save it using the extension “.xcf”. XCF is GIMP's native format, and is useful because it stores everything about your image and will allow you to later edit your image in GIMP, in case you notice a problem.
Once you have finished, you will probably also want to export the image in a more widely used format, such as JPEG, PNG, TIFF, etc.
More on GIMP Tutorials:
More on GIMP Tutorials:
- Create Blueprint Effect in GIMP
- Create a Kaleidoscope Effect In GIMP
- Selective coloring in GIMP
- Add a graphic watermark to photo in GIMP


No comments:
Post a Comment