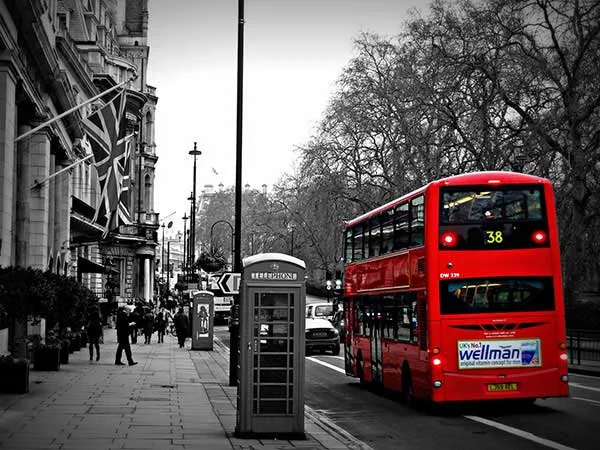
In today's tutorial, I'll show you how to create a selective coloring in GIMP. We will be using Desaturate command to convert all of the colors on the active layer to corresponding shades of gray, layer mask to make all of the layer fully opaque (or that you will notice any difference in the appearance of the layer if you paint on the layer mask), and the Eraser Tool to remove areas of color from the current layer.
Step 1: Open Image in GIMP
Use File>Open... command in the top menu or else just press Ctrl+O to open your image.
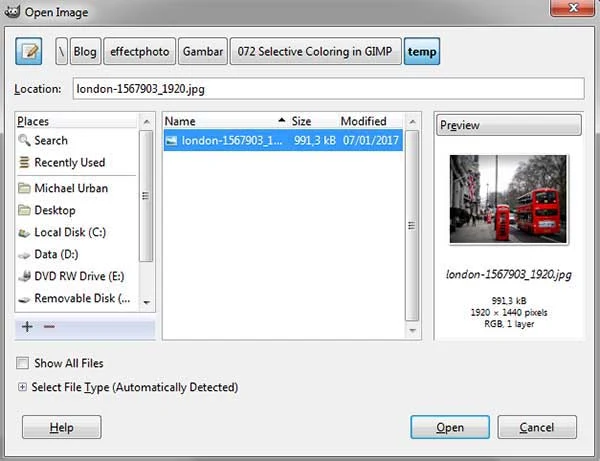
The “Open Image” dialog will appear, allowing you to navigate to the file and click on its name. Navigate through your folders in the Places panel and the Name panel until your images' name appears in the Name panel.
Click the image you want to open.When an image file is selected, we can view the preview of the image file at the right-hand side of the box, although it's not easy to find an image based on a thumbnail.
Click Open.
For this GIMP tutorial, I'll use this image, 1567903, that downloaded from Pixabay.
For this GIMP tutorial, I'll use this image, 1567903, that downloaded from Pixabay.
Step 2: Duplicate Layer
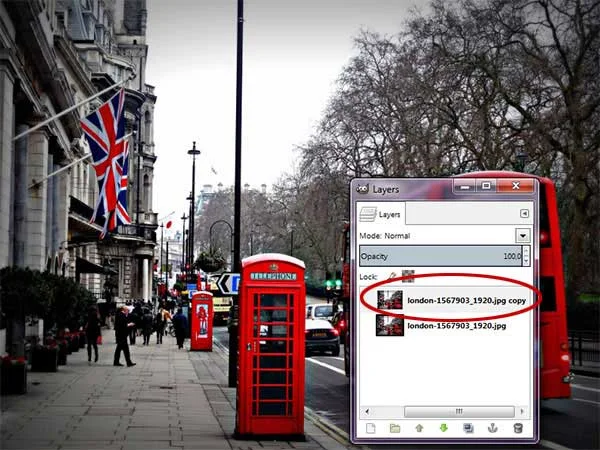
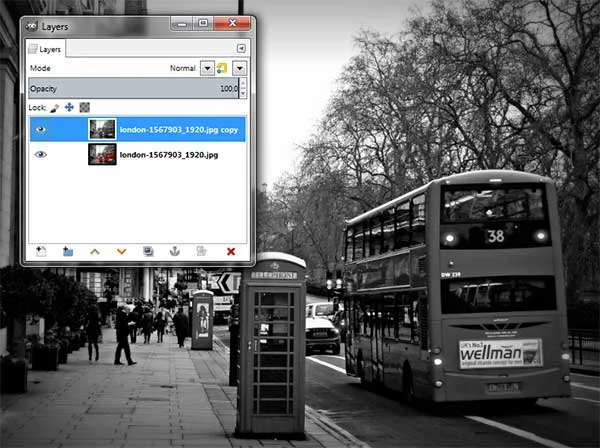
Use Layer> Duplicate Layer (or by using the keyboard shortcut Shift+Ctrl+D). A new layer which is a nearly identical copy of the active layer added to the image.Step 3: Desaturate The Duplicate Layer
Select the duplicate layer on the Layers dialog.
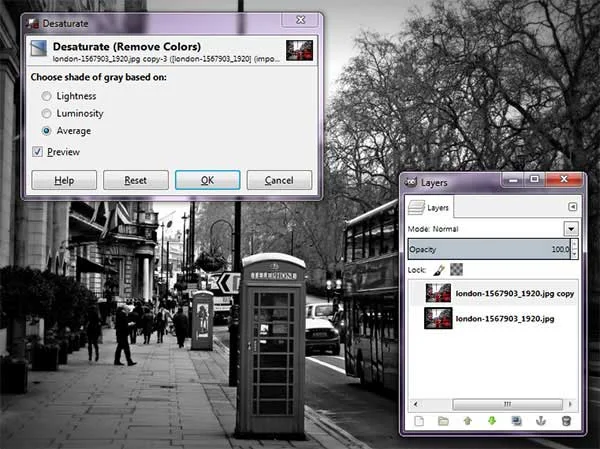
Use Colors>Desaturate>Desaturate.
The Desaturate dialog box appears. In the dialog box, you can just leave the default settings and click OK.
The Desaturate dialog box appears. In the dialog box, you can just leave the default settings and click OK.
Step 4: Add a Layer Mask
Make sure the Black & White layer is selected in the Layers dialog.
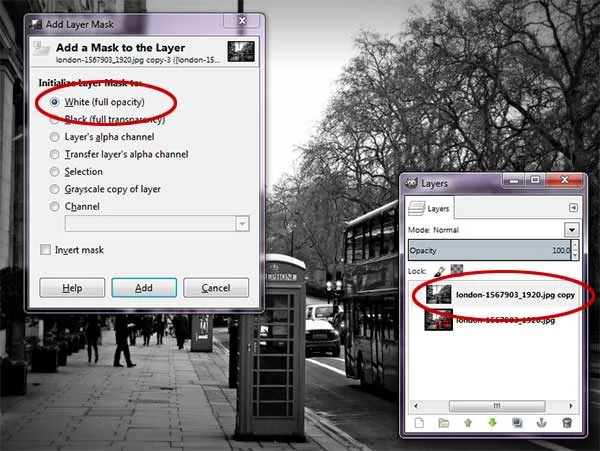
Use Layer> Add Layer Mask. The Add Layer Mask dialog box appears.
Here you can choose “White (Full Opacity)”. Click Add button.
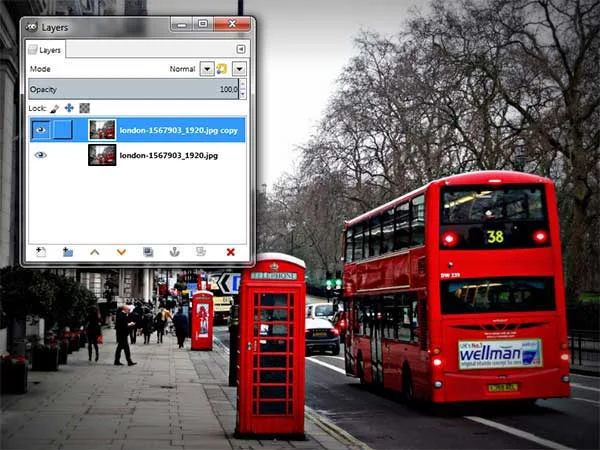
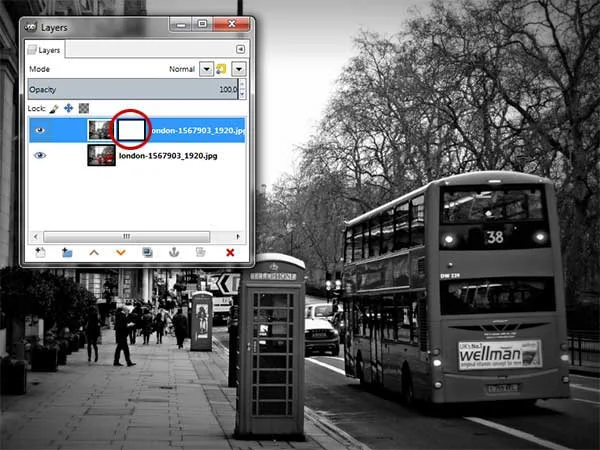
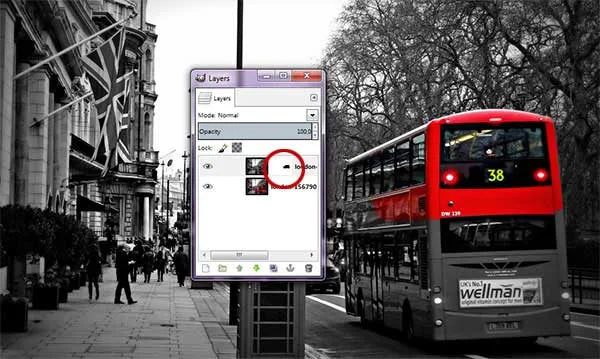
A thumbnail of the layer mask appears to the right of the thumbnail of the Black & White layer in the Layers Dialog. You will not notice any difference in the appearance of the layer until you paint on the layer mask using the Eraser Tool later.
A thumbnail of the layer mask appears to the right of the thumbnail of the Black & White layer in the Layers Dialog. You will not notice any difference in the appearance of the layer until you paint on the layer mask using the Eraser Tool later.
Step 5: Select The Eraser Tool
Select The Eraser Tool from the toolbox or else use Tools>Paint Tools>Eraser (Shift+E).
Choose white color for the foreground color by pressing D on the keyboard to reset the foreground color/background to default and then press X to swap its color. Make sure you've select the layer mask thumbnail by clicking on it.
Step 6: Zoom Your Photo
Zoom your photo by choosing View> Zoom 400%.
Zooming in or enlarging an image is useful because we need to work with high precision.
Step 7: Strokes the Eraser Tool
We'll use the Eraser Tool to remove areas of color from the current layer (the black & white layer) and the result will show the background color from the layer below.
Now, click on the Layer Mask thumbnail to select it. Using your mouse, apply brush strokes to the layer mask to reveal some of the underlying images.
Step 8: Save Your Work
Use File>Save command in the top menu or else just press Ctrl+S to save your project file. The Save Image dialog box appears. Navigate to the folder where you want to store your project file. Type a name in the Name text box and leave the default GIMP (*.XCF) format. XCF is GIMP's native format and is useful because it stores everything about your image and will allow you to later edit your image in GIMP, in case you notice a problem. Click Save to store the project file. Once you have finished, you will probably also want to export the image in a more widely used format, such as JPEG, PNG, TIFF, etc.There you have it! Selective Coloring in GIMP.



Fantastic directions, very easy to follow. Thank you so much!
ReplyDelete