In today's tutorial, I'm going to show you how to create a Blueprint Effect in GIMP. We'll be using the Paths tool to trace around the main image, desaturate the image's layer using Color>Hue-Saturation, using Filters>Edge-Detect>Edge to transforms the image's layer into a line drawing, using Edit>Stroke Selection to add a white stroke to the image and using Filter>Render>Pattern>Grid to create the grid pattern.
If you liked my tutorials, please subscribe to my YouTube channel - JTSGraph.
For this GIMP tutorial, I'll use images downloaded from BMWGroup.
Step 1: Open image in GIMP
Use File>Open... command in the top menu or else just press Ctrl+O to open your image. The Open Image dialog appears, allowing you to navigate to the file and click on its name. Navigate through your folders in the Places panel and the Name panel until your images' name appears in the Name panel. Click the image you want to open. When an image file is selected, we can view the preview of the image file at the right-hand side of the box, although it's not easy to find an image based on a thumbnail. Click the Open button.
Step 2: Add Transparency
Use Layer>Transparency>Add Alpha Channel to add transparency to the image.
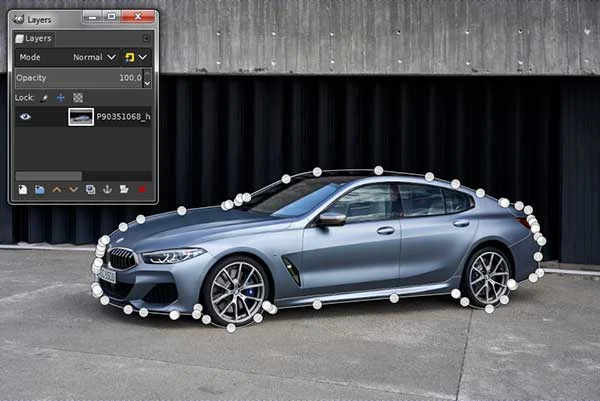
Step 3: Use the Paths Tool to trace around the main image
Grab the Paths Tool from the toolbox or use Tools> Paths (B). Make sure Edit Mode: Design is chosen from the Tools Options.
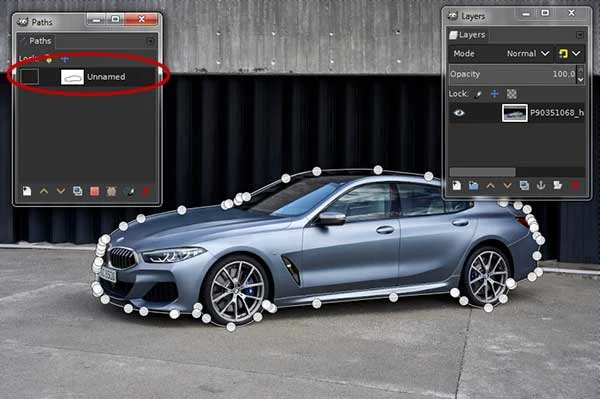
Use the Paths Tool to trace around the main image. Start by clicking once to place an initial anchor point. Continue clicking to set anchor points to create a path. Close the path by position the Paths tool over the first anchor point and click.
Step 4: Save path to a channel
In case you need to edit the path later, you can save the path to a channel by going to Select>Save to Channel.
Step 5: Create a selection from the path
Use Select>From Path to create a selection from the path.
Step 6: Invert the Selection
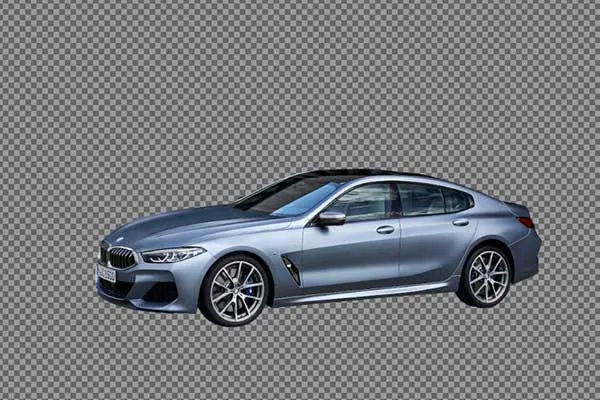
Use Select>Invert (Ctrl+I) to invert the selection. Now all of the layer contents which were previously outside of the selection are inside it.
Step 7: Delete everything in the current selection
Use Edit>Clear or else just press the Delete key to delete everything in the current selection. Use Select>None to remove the selection.
Step 8: Resize the image
Use the Scale Tool (Tools>Transform tool>Scale) to resize the image.
Step 9: Add Other Images
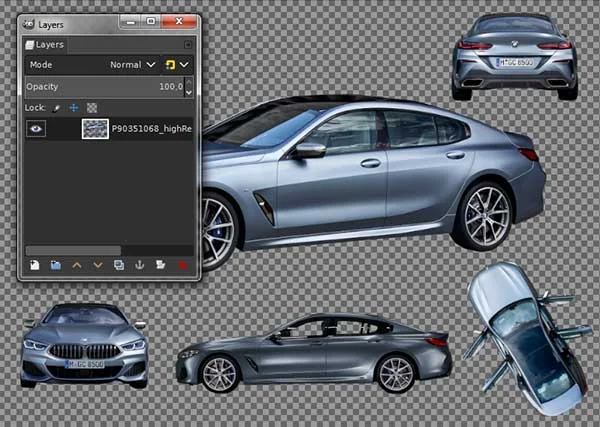
Use File>Open as Layers to add other images and use the Scale Tool to resize it.
Step 10: Merge All Image Layers
Use Layer>Merge Down to merge all image layers.
Step 11: Choose a dark blue color
Click the foreground color box and choose a dark blue color.
Choose a dark blue color.
Step 12: Create a new layer for the blue background
Use Layer>New Layer to create a new layer for the blue background. Choose Fill with: Foreground Color. Move the blue background layer below the image's layer.
Step 13: Desaturate the image's layer
Make sure the image's layer is selected. Use Color>Hue-Saturation to desaturate the image's layer. Drag the Saturation slider to -100.
Step 14: Transforms the image's layer into a line drawing
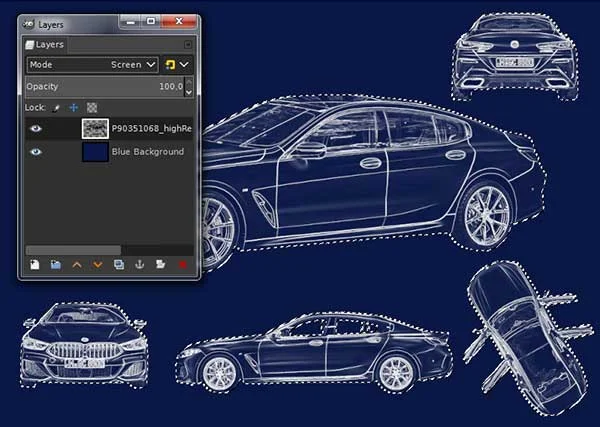
Use Filters>Edge-Detect>Edge to transforms the image's layer into a line drawing and change its blend mode to Screen.
Change its blend mode to Screen.
Step 15: Add a white stroke to the image
Load the image's layer selection by using Layer>Transparency>Alpha to Selection.
Choose white color for foreground color.
Use Edit>Stroke Selection to add a white stroke to the image. Use Select>None to remove the selection.
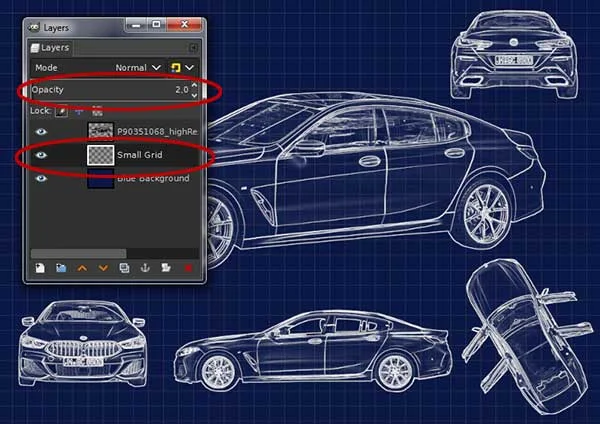
Step 16: Create a small grid pattern
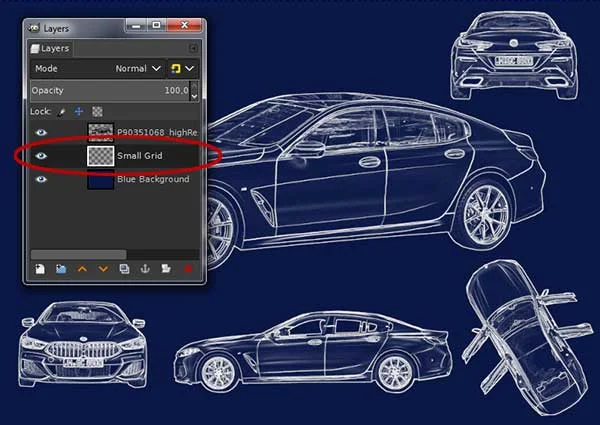
Use Layer>New Layer to create a new transparent layer for the small grid pattern. Put it below the image's layer, above the blue background.
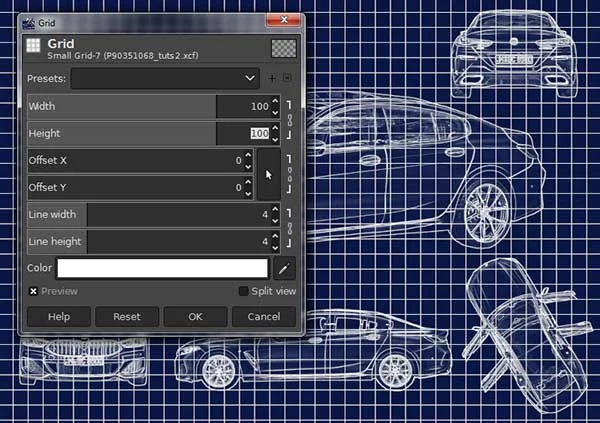
Use Filter>Render>Pattern>Grid to create a small grid pattern. I'm going to put 100 for both height and width. For the color, use white.
Because the grid pattern is too bold, I'm going to adjust the layer's opacity to 2%.
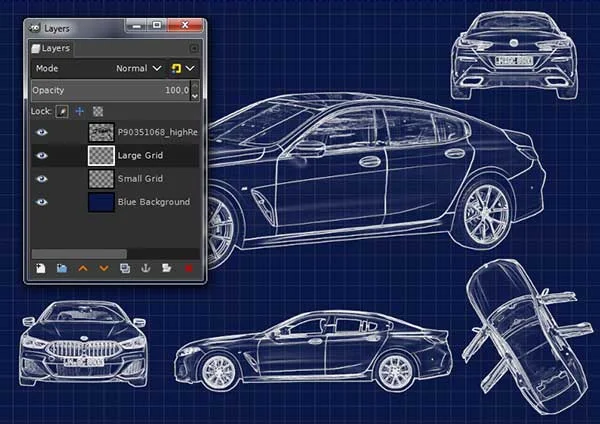
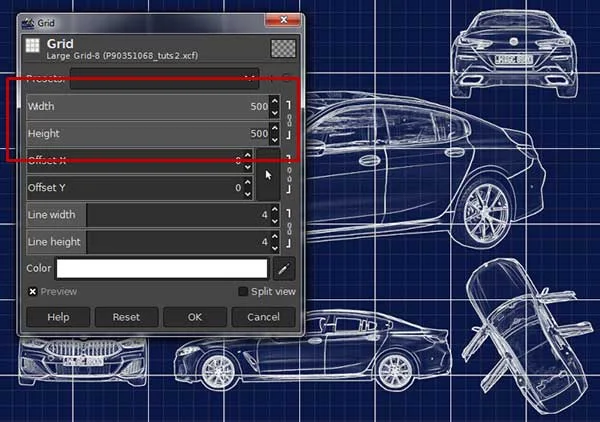
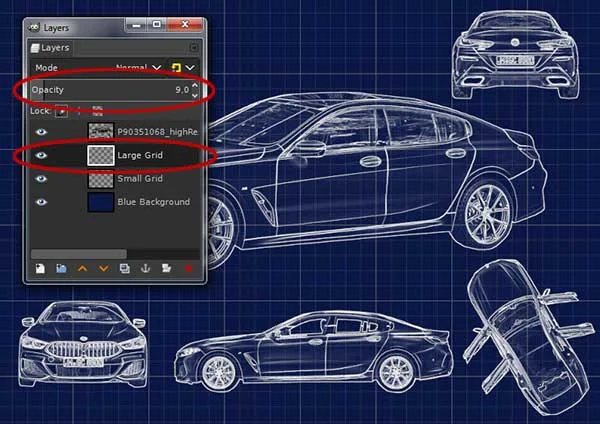
Step 17: Create a large grid pattern
Use Layer>New Layer to create a new transparent layer for the large grid pattern. Put it below the image's layer, above the small grid.
Use Filter>Render>Pattern>Grid to create a large grid pattern. I'm going to put 500 for both height and width. For the color, use white.
I'm going to adjust the large grid layer's opacity to 9%.
Step 18: Save Your Work
Use File>Save command in the top menu or else just press Ctrl+S to save your project file. The Save Image dialog box appears. Navigate to the folder where you want to store your project file. Type a name in the Name text box and leave the default GIMP (*.XCF) format. XCF is GIMP's native format and is useful because it stores everything about your image and will allow you to later edit your image in GIMP, in case you notice a problem. Click Save to store the project file.
Once you have finished, you will probably also want to export the image in a more widely used format, such as JPEG, PNG, TIFF, etc, using File>Export As.









Difference Between Coupe vs. Sedan
ReplyDeleteDoors, doors, doors
A sedan refers to a vehicle that has four doors,
a coupe refers to a vehicle with two-doors. ...
It's a four-doors coupe
Delete