Step 1: Open Image
Choose File>Open or else just press Ctrl+O to Open up your base image in Adobe Photoshop. In the standard Open dialog box, navigate to the folder that contains your file then select the name of the file you want to open. If your file does not appear, try to view all files by selecting All Formats from the Files of type list. Click Open.
Step 2: Create New Layer
Create a new layer by choosing Layer>New>Layer or else just press Shift+Ctrl+N. The New Layer dialog box appears allowing you to name your layer and specify other options. Leave the default settings and click OK.
In the Layers panel, a layer with the default name of Layer 1 appears above the Background layer.
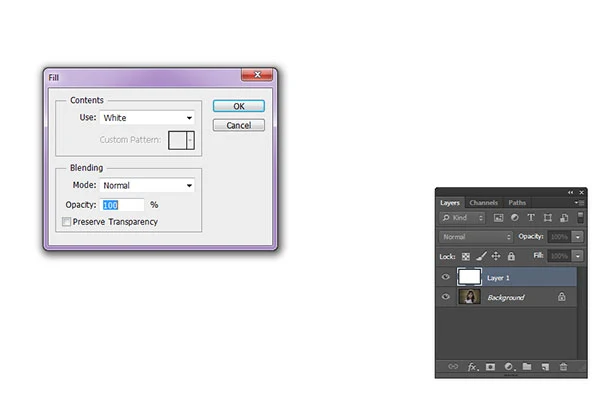
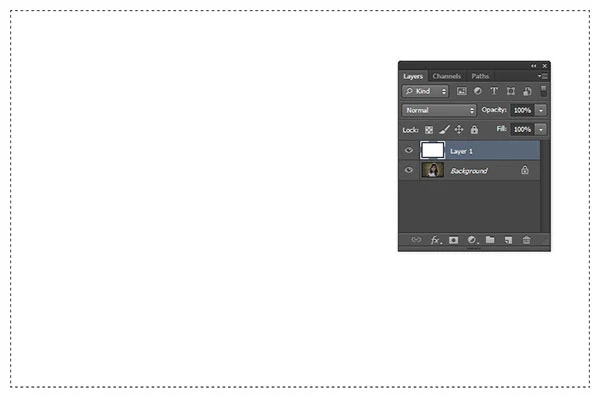
Fill the new layer with white using Edit>Fill command. Choose Edit>Fill or else just press Shift+F5. The Fill dialog box appears. In this dialog box, under Contents, you can choose a White color to fill the new layer with White. Click OK. Now, the color that you choose fills the layer.
Step 3: Draw Rectangular Selection
Select the Rectangular Marquee Tool at the top of the Tools panel or else just press M. There are four tools available to choose from, the Rectangular Marquee Tool, the Elliptical Marquee Tool, the Single Row Marquee Tool, and Single Column Marquee Tool. Press Shift+M to cycle through the four available marquee tools until the one you want is active.
Select the layer you want to edit, in this case, Layer 1. Drag your mouse diagonally to create a selection. To move your selection while drawing it, keep the mouse button down, then drag to the new position with the SpaceBar held down. When you release the mouse, a selection border appears. If you want to move the selection after releasing the mouse, drag inside it with any selection tool.
Step 5: Add Layer Mask
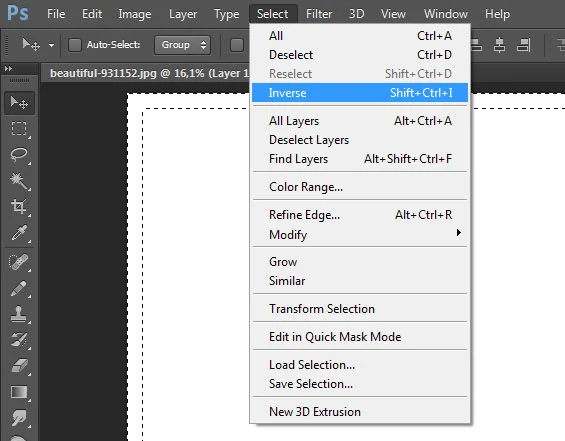
Click the Add layer mask button at the bottom of the Layers panel or you can choose Layer>Layer Mask>Reveal Selection. A black layer mask thumbnail with a white border appears on the selected layer, revealing everything on the selected layer, except the white border.Step 6: Create a fading frame
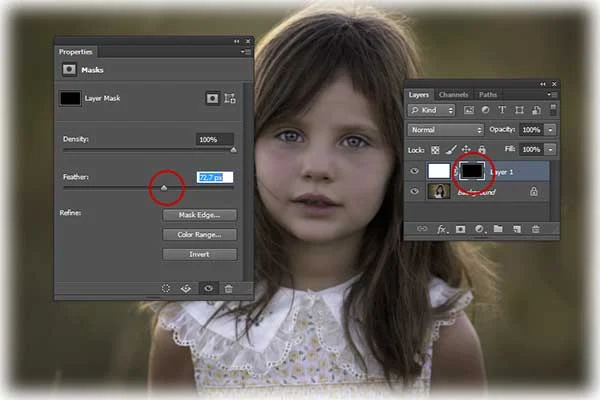
Double click the layer mask thumbnail to display its Properties. The Layer Mask controls display on the Properties panel. Drag the Feather slider to the right to give fading effect to the border.
Step 7: Save Document
Choose File>Save or else just press Ctrl+S to save your project file. In the Save As dialog box, navigate to the folder where you want to store the file. Type a name in the File Name text box and leave the default Photoshop (*.PSD;*.PDD) format. Click Save to store the image. Once you have finished, you will probably also want to use File>Save As (Shift+Ctrl+S) to export the image in a more widely used format, such as JPEG, PNG, TIFF, etc.
There you have it! Create a Vignette in Photoshop using Mask Feather.


Thanks my friend...!
ReplyDeleteGlad you liked it :)
DeleteGreat tutorial! Layer masks have always been a bit intimidating for me, but this beginner's guide really helped demystify the process. The step-by-step instructions and clear explanations made it easy to follow along, even for someone like me who's not a Photoshop expert. I appreciate the real-world examples and practical tips you included, like using layer masks for non-destructive editing and creating smooth blends in my photos.
ReplyDelete