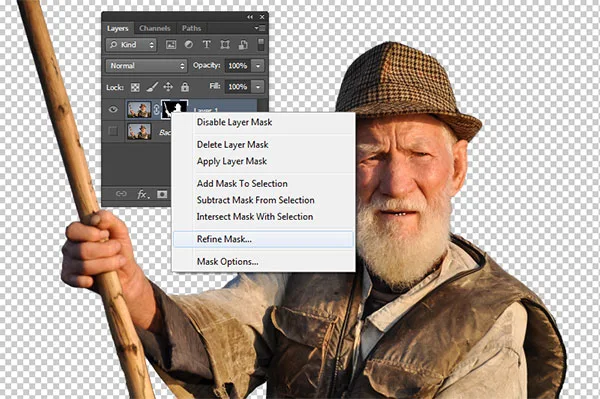
Learn how to remove a background in Photoshop and make it transparent for a given image. Remove the background of a photograph can be a fairly complex work. Especially for images that have a pretty complex background or have a lot of hair. The first step is to create a selection using the selection tool Quick Selection and the Polygonal Lasso. Quick Selection Tool is used to creating a rough selection, while Polygonal Lasso Tool is used to remove parts of the selection we do not want. To refine the results of the selection will be used refine mask.
Steps to remove image's background in Photoshop:
1. Open photo
Choose File> Open, click your photo and then click the Open button. Double-click the Background layer to unlock it, or you can just duplicate it by pressing Ctrl+J. For this Photoshop tutorial, I'll use this image that I downloaded from Pixabay.
2. Grab the Quick Selection tool
Click the icon Quick Selection Tool.
On the toolbar, click the icon Add to selection.
3. Make selection
Click and drag on the main object to create a selection. No need to make an accurate selection. We are going to soften it later.
4. Clean up selection
We can eliminate unwanted selection by clicking and dragging while holding down the Alt key. If you find it difficult to remove part of the selection using the Quick Selection Tool, you can use the Polygonal Lasso Tool. Click the icon Polygonal Lasso Tool.
On the toolbar, click the icon "Subtract from selection".
Then remove the selection following the selection area that we want to remove. Make sure that the end point of the selection to meet the starting point of the selection.
5. Add mask
Choose Layer> Layer Mask> Reveal Selection.
6. Refine mask
Click the Layer Mask box.
Furthermore, right-click the layer mask box to display its properties, and then click Refine Mask.
7. Refine mask using radius
Tick Show Radius (J) checkbox and then drag the Radius slider to the right until approximately the fine hairs can be selected. Click the OK button when you are satisfied with the results.
There you have it! Image with transparent background using Photoshop.
More on Photoshop tutorials:


No comments:
Post a Comment