How to Brighten Face in Photoshop (+ Free Online Tool)
Here is a tutorial on how to whitening the skin or Brighten Face in Photoshop. The first step is to duplicate the Background layer and then make a selection using your favorite selection tool. For this tutorial, I will use the Quick Selection Tool and Lasso Tool. After finished making the selection, create a mask. Furthermore, please apply the adjustment levels, curves, hue/saturation, black & white, and color balance, to get a natural and white skin color. To remove color on the eyebrows you can use the Brush Tool.
Want to do it instantly without Photoshop?
Achieving perfect skin tone adjustments usually requires complex masking, dodging, and burning techniques in software like Photoshop. But what if you could do it in just one click? Our Smart Skin Tone Adjuster below uses auto-hue detection to intelligently target human skin pigments in your photo. Simply upload your selfie or portrait, drag the slider to gently whiten or tan the skin, and instantly download your professionally retouched photo directly from your browser!
If you liked my tutorials, please subscribe to my YouTube channel - JTSGraph.
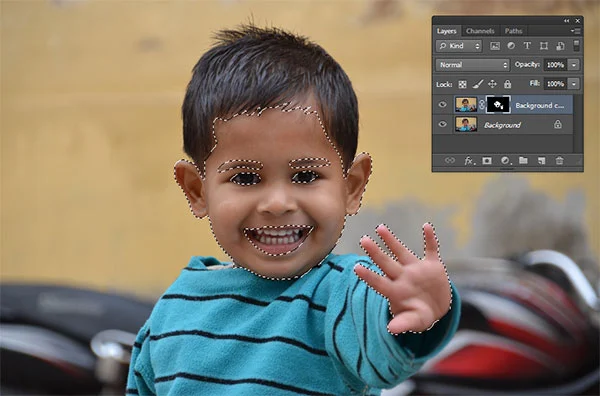
Step 1: Make Selection
After opening photo using File> Open, duplicate background layer by choosing Layer>Duplicate Layer. Then make a selection on the skin using a selection tool. I will use the Quick Selection Tool. Finally, create a mask by choosing Layer> Layer Mask> Reveal Selection. For this Photoshop tutorial, I'll use this image that I downloaded from Pixabay.
Step 2: Create a Levels Adjustment
Choose Layer> New Adjustment Layer> Levels. Adjust the level slider to get a whiter skin color.
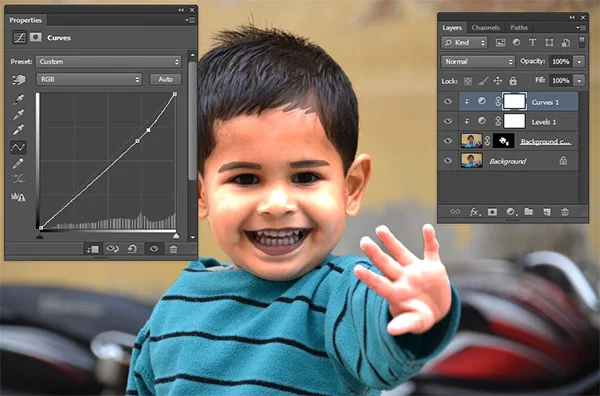
Step 3: Create a Curves Adjustment
Choose Layer> New Adjustment Layer> Curves. Adjust the curves to look for natural skin color that is not too bright.
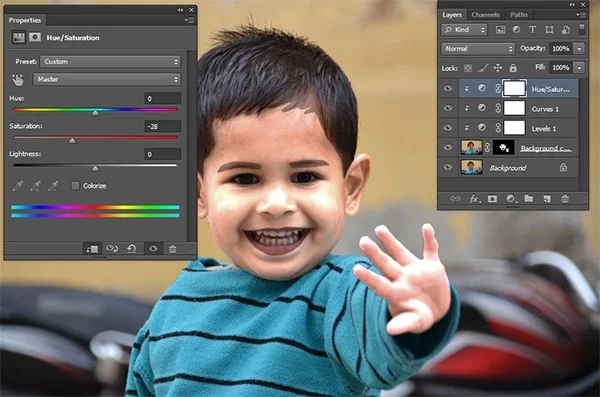
Step 4: Create a Hue Saturation Adjustment
Choose Layer> New Adjustment Layer> Hue Saturation. Adjust the Saturation slider to get skin color that is not too sharp.
Step 5: Create Black & White Adjustment
Choose Layer> New Adjustment Layer> Black & White. Set the blending mode to Luminosity. Set opacity to the value of approximately 35%. Black & White is needed to color the skin look smoother.
Step 6: Create a Color Balance Adjustment
Choose Layer> New Adjustment Layer> Color Balance.
Step 7: Group All Layers
While pressing the Shift key, click on all layers except the Background, then the group layer by choosing Layer> Group Layer.
Step 8: Clean Up Incorrect Color On Eyebrows
Click on Brush Tool icon. Press D to reset the foreground color/background to default.
Click-drag mouse on the eyebrows.
Step 9: Adjust Curves For Hair
Click on the background layer. Create a selection on the hair using Quick selection tool. Choose Layer> New Adjustment Layer> Curves. Please adjust the curves so the hair looks a little brighter.
There you have it! How to whitening the skin in Photoshop.


No comments:
Post a Comment