In this Photoshop tutorial, I will show you a quick and easy way to create a photo Mosaic in Photoshop. We will start off with creating two folders to store images for the mosaic pattern, copy images into the folder, recording an Action to resize the image, resizing images using Action, creating a contact sheet, and defining a mosaic pattern. We will create a Mosaic using the pattern we have just created.
If you liked my tutorials, please subscribe to my YouTube channel - JTSGraph.
Download Project Files
Steps to make a photo mosaic in Photoshop:
1. Prepare images.
Create two folders. One folder for the source images (you can name it “source”) and another one for the resized images (name it “resized”).
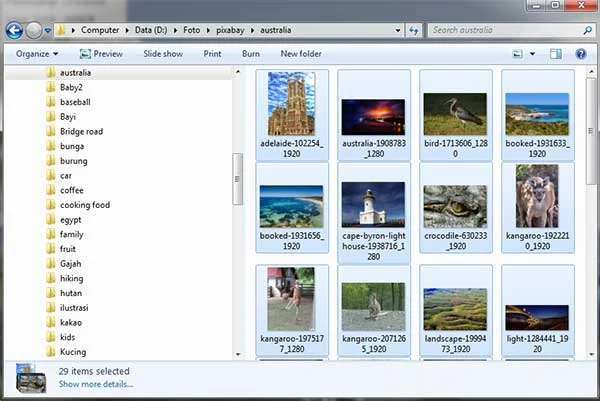
Copy 100 images into the “Source” folder. Now that you have new folders, you need to add some images to it. Use the Navigation pane on the left to navigate to a location on your computer where you have some images. Once you've found some images, select the ones you want to add to your new folder. To select more than one image, hold down the left Ctrl key on your keyboard. With the Ctrl key held down, click each file you want to add.
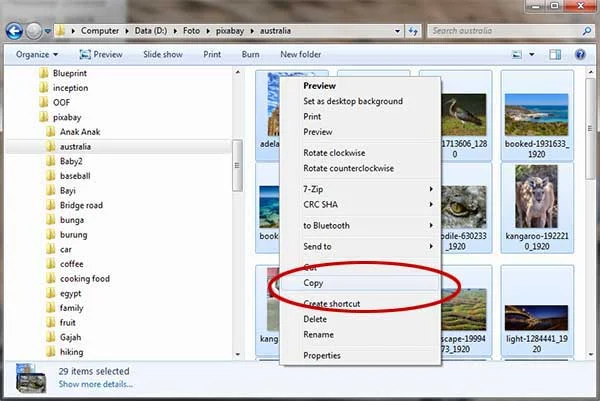
Once you have selected your images, right click on any of them. From the menu that appears select Copy.
Now navigate back to the “source” folder you've just created. Double click the “source” folder to move inside of it. You should see a message on the right saying "this folder is empty". Right-click anywhere inside of the big white area and from the menu, select Paste.
The images will be copied and pasted over to the “source” folder.
2. Resize images.
Open an image in the “source” folder. Choose File>Open (or Ctrl+O). Navigate to the “source” folder that contains your images then select any image. Click Open.
Open an image.
Select Windows>Actions (Alt+F9) to open the Action panel. Click Create new Action icon in the Action panel.
In the New Action dialog box, named the Action "Mosaic-resize", set to Default Actions then click the Record button. The Begin Recording button in the Actions panel turns red.
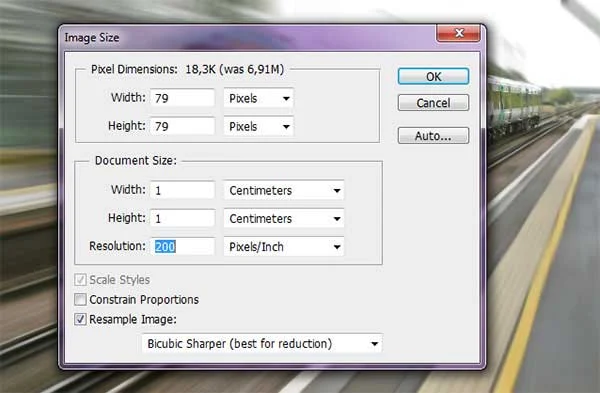
Resize the image. Choose Image> Image Size (or Alt+Ctrl+I). In the Image Size dialog box, enter the following information: Width 1 cm, Height 1 cm, Resolution 200 px, tick Resample Image, select Bicubic Sharper. Click OK.
Stop recording by clicking the Stop Playing/Recording button or else just press the Esc key.
Close the image, no need to save the resized result.
Start resizing all images. Now you have an Action to resize all of your images in the “source” folder. Choose File>Scripts>Image Processor. In the Image Processor dialog box, select the images to process in folder “source”, select the location to save processed images in folder “resized”, tick the Save as JPEG checkbox, tick the Resize to fit checkbox, enter 79px for W and H value, tick the Run Action checkbox, choose Default Actions and Mosaic-resize. Click the Run button. Wait for a moment until all of your images get resized.
3. Create a Contact Sheet.
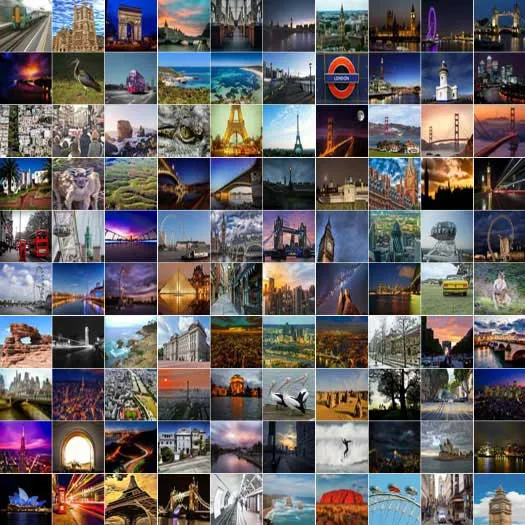
Select File>Automate>Contact Sheet II. In the Contact Sheet II dialog box, select the images to process in folder “resized”, unit: pixels, width: 790, height: 790, resolution 200 pixels/inch, place: across first, column: 10, rows: 10, and tick the 'Rotate for best fit' checkbox. Click OK.
Wait for a moment until Photoshop finishes creating your Contact Sheet.
Wait for a moment until Photoshop finishes creating your Contact Sheet.
4. Define Mosaic pattern.
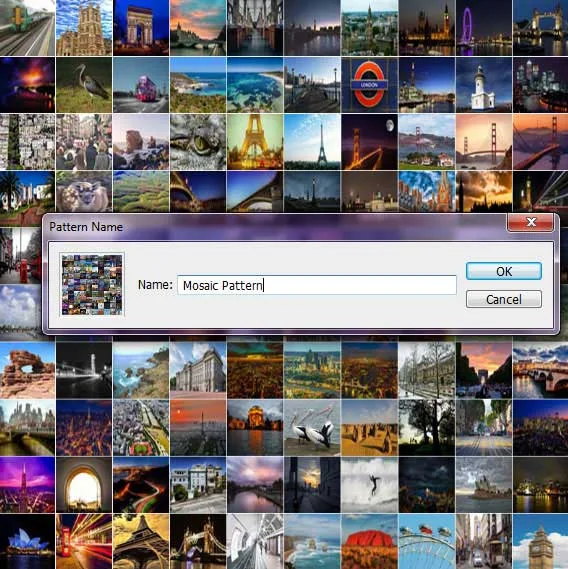
Choose Edit> Define Pattern. In the Pattern Name dialog box, name it like 'Mosaic-Pattern'. Click OK. Now you can save and close your Contact Sheet document.
5. Apply pattern.
Choose File>Open (or Ctrl+O) to Open up your main image. Navigate to the folder that contains your file then select the name of the file you want to open. Click Open.
For this Photoshop Collage tutorial, I'm using this image, 1848452, downloaded from Pixabay.
Create a new layer to fill with our mosaic pattern by Choosing Layer>New>Layer (or Shift+Ctrl+N). The New Layer dialog box appears allowing you to name your layer and specify other options. Leave the default settings and click OK. In the Layers panel, a layer with the default name of Layer 1 appears above the Background layer.
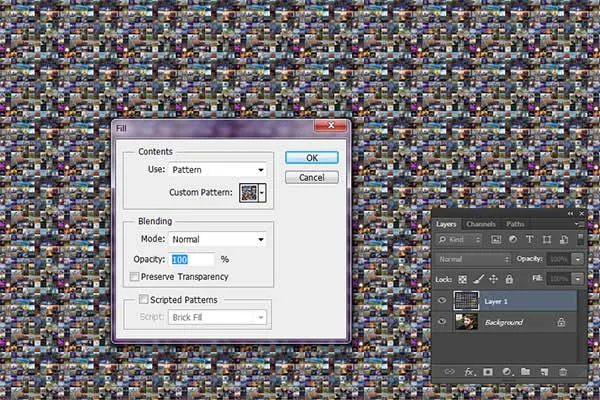
Fill the new layer with the mosaic pattern. Select the new layer on the Layers panel and then choose Edit> Fill. In the Fill dialog box, select Pattern in Use drop-down menu. In the Custom Pattern, choose the mosaic pattern that we previously created. Click OK.
6. Final adjustments.
Desaturate Layer 1 by choosing Image> Adjustments> Desaturate (or Shift+Ctrl+U). Change its blend mode to Overlay by going to the drop-down menu in the Layers panel. Adjust its opacity if necessary.
7. Save it!
Choose File>Save (or Ctrl+S) to save your project file. In the Save As dialog box, navigate to the folder where you want to store your project file. Type a name in the File Name text box and leave the default Photoshop (*.PSD;*.PDD) format. Click Save to store the project file.Once you have finished, you will probably also want to use File>Save As (Shift+Ctrl+S) to export the image in a more widely used format, such as JPEG, PNG, TIFF, etc.
There you have it! Turn an image into Mosaic in Photoshop.
There you have it! Turn an image into Mosaic in Photoshop.









No comments:
Post a Comment