Learn how to create 3D Pop Out Effect in Photoshop. We'll be using the Quick Selection tool to make a selection, the Rectangular Marquee Tool and Stroke command to create the frame, Free Transform to transform the frame, and layer mask.
Video: How to create 3D Pop Out Effect in Photoshop.
1. Open Your Image File
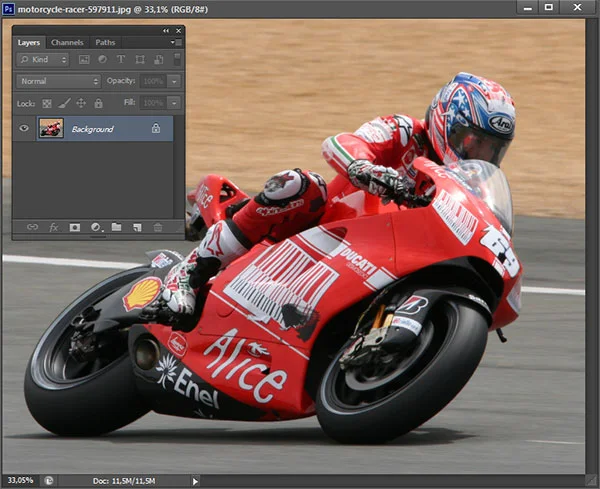
Choose File>Open (Ctrl+O) to Open up your base image in Adobe Photoshop.
Navigate to the folder that contains your file then select the name of the file you want to open.
If your file does not appear, try to view all files by selecting All Formats from the Files of type list.
Click the Open button.
Navigate to the folder that contains your file then select the name of the file you want to open.
If your file does not appear, try to view all files by selecting All Formats from the Files of type list.
Click the Open button.
For this Photoshop tutorial, I'll use this image, 597911, downloaded from Pixabay.
Images used in this tutorial.
2. Create a New Layer for the Frame
Create a new layer for the frame by choosing Layer>New>Layer (Shift+Ctrl+N).
In the Layers panel, a layer with the default name of Layer 1 appears above the Background layer.
In the Layers panel, a layer with the default name of Layer 1 appears above the Background layer.
Create a New Layer for the Frame
3. Grab the Rectangular Marquee Tool
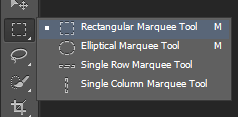
Grab the Rectangular Marquee Tool (M) by selecting it from the toolbar on the left.
There are four available tools to choose from, the Rectangular Marquee Tool, the Elliptical Marquee Tool, the Single Row Marquee Tool, and the Single Column Marquee Tool.
Press Shift+M to cycle through the four available marquee tools until the one you want is active.
In the options bar click the icon Substract from selection.
The Rectangular Marquee Tool.
4. Draw a Rectangular Selection
Now draw a rectangular selection.
Drag mouse in the document window to draw a rectangular selection while holding down the Shift key, to keep the selection doesn't distort.
Drag mouse in the document window to draw a rectangular selection while holding down the Shift key, to keep the selection doesn't distort.
Drag mouse in the document window while holding down the Shift key, to keep the selection doesn't distort.
5. Add Stroke to the Selection
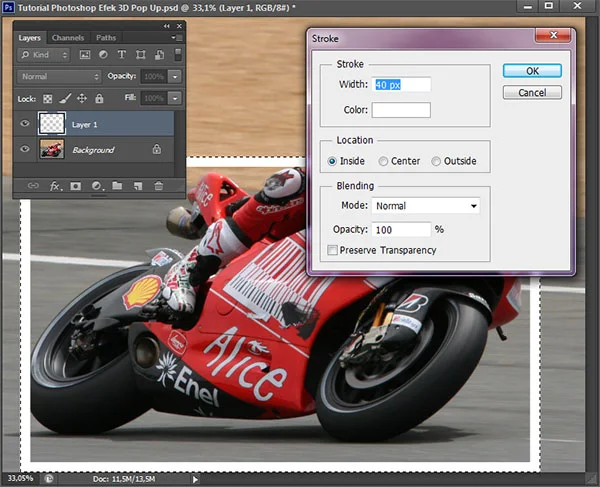
Add a white stroke to the selection.
Choose Edit> Stroke. Enter a value for the stroke size in the Width textbox, click the Color box and choose a white color, and click Inside for Location.
Click OK.
Press Ctrl+D to remove the selection.
Choose Edit> Stroke. Enter a value for the stroke size in the Width textbox, click the Color box and choose a white color, and click Inside for Location.
Click OK.
Press Ctrl+D to remove the selection.
Add Stroke to the Selection
6. Adjust Frame Perspective
Adjust the frame perspective using Edit>Transform>Perspective command.
Change the frame perspective by dragging any corner to wherever you like.
Press Enter key when you are done.
Change the frame perspective by dragging any corner to wherever you like.
Press Enter key when you are done.
Adjust Frame Perspective.
7. Resize the Frame
Invoke Free Transform (Ctrl+T).
Resize the frame by dragging any handle.
Press Enter key when you are done.
Resize the frame by dragging any handle.
Press Enter key when you are done.
Resize the Frame.
8. Warp the Frame
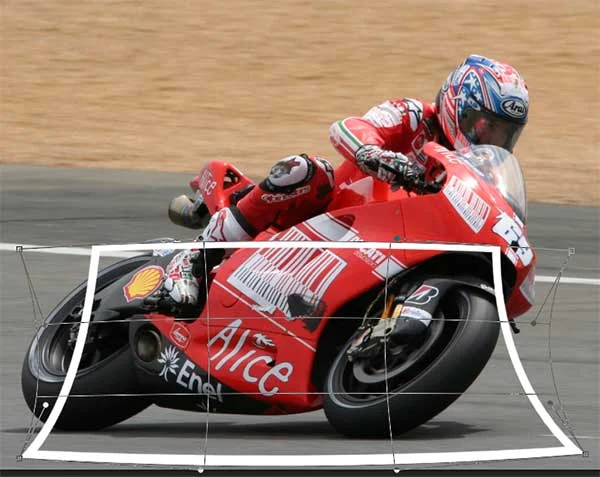
You can warp the frame using Edit>Transform>Warp command.
Warp the frame by dragging any corner to wherever you like.
Press Enter key when you are done.
Warp the frame by dragging any corner to wherever you like.
Press Enter key when you are done.
Warp the Frame.
9. Duplicate the Background Layer
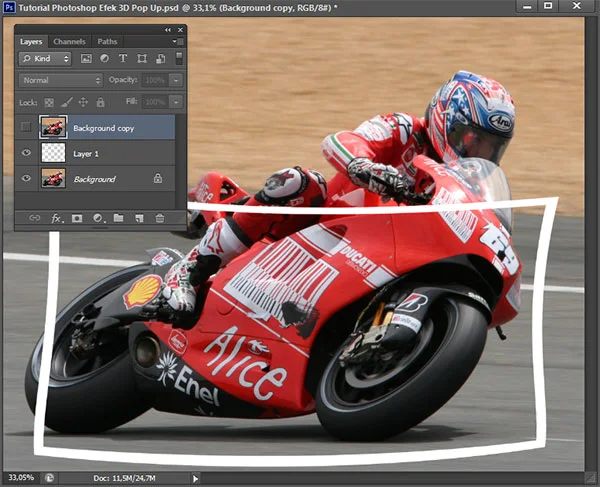
Select the Background layer and press Ctrl+J.
Drag the duplicate layer (Background copy or Layer 1) to the top position.
Drag the duplicate layer (Background copy or Layer 1) to the top position.
Duplicate the Background Layer.
10. Draw Selection Inside the Frame
Grab the Magic Wand Tool.
Select the frame layer (Layer 1) on the Layers panel.
Click inside the frame to create a selection.
The selection line will be visible inside the frame.
Select the frame layer (Layer 1) on the Layers panel.
Click inside the frame to create a selection.
The selection line will be visible inside the frame.
The Magic Wand Tool.
Draw Selection Inside the Frame.
11. Add Layer Mask to the Background Layer
Select the Background layer on the Layers panel then choose Layer>Layer Mask>Reveal Selection.
Or you can click the Add Layer Mask icon located at the bottom of the Layers panel.
Or you can click the Add Layer Mask icon located at the bottom of the Layers panel.
Add Layer Mask to the Background Layer.
12. Create Selection on Your Subject on the Duplicate Background Layer
Select the duplicate Background layer in the Layers panel by clicking on it.
Create a selection on your main subject using the Quick Selection Tool. Refine your selection using Refine Edge.
Create a selection on your main subject using the Quick Selection Tool. Refine your selection using Refine Edge.
The Quick Selection Tool.
Create a selection on your main subject.
Refine your selection using Refine Edge.
13. Add Layer Mask
Choose Layer> Layer Mask> Reveal Selection.
Your background will disappear, showing only the areas you’ve selected.
Your background will disappear, showing only the areas you’ve selected.
Add Layer Mask.
Here is the result:
How to create 3D Pop Out Effect in Photoshop.
14. Save Your Document
Choose File>Save or else just press Ctrl+S to save your project file.
The Save As dialog box appears.
Navigate to the folder where you want to store your project file.
Type a name in the File Name text box and leave the default Photoshop (*.PSD;*.PDD) format.
PSD is Photoshop's native format and is useful because it stores everything about your image and will allow you to later edit your image in Photoshop, in case you notice a problem.
Click Save to store the project file.
Once you have finished, you will probably also want to export the image in a more widely used format, such as JPEG, PNG, TIFF, etc.
More on Photoshop Tutorials:








No comments:
Post a Comment