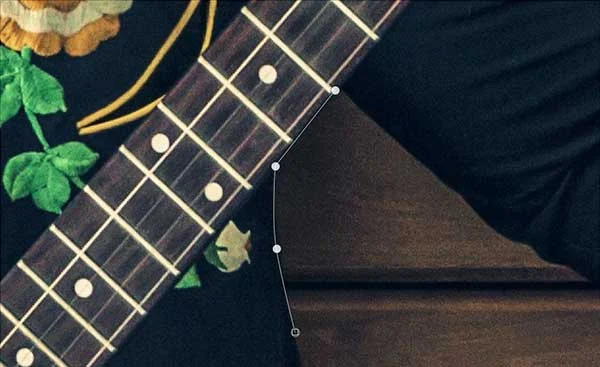
In today's tutorial, we're going to learn how to remove background in GIMP and make it transparent using Paths tool. The Paths tool is all about drawing path. Draw the path around the subject by clicking successively. You can create curves by dragging on a new node or segment. Ctrl + Click on the Final node to close the Loop. To make selections with the Paths Tool, we simply convert the path we've drawn into selections.
Steps to remove background in GIMP:
1. Open image
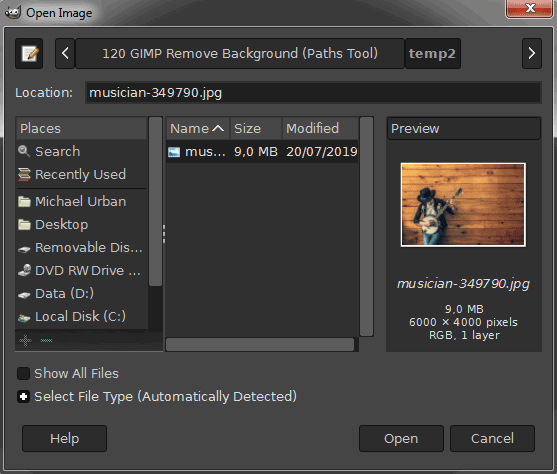
Use File>Open... command in the top menu or else just press Ctrl+O to open your image. The Open Image dialog appears, allowing you to navigate to the file and click on its name. Navigate through your folders in the Places panel and the Name panel until your images' name appears in the Name panel. Click the image you want to open then click Open.
For this GIMP tutorial, I'll use this image, 349790, downloaded from Pixabay.
For this GIMP tutorial, I'll use this image, 349790, downloaded from Pixabay.
2. Add Transparency
Use Layer>Transparency>Add Alpha Channel to add transparency to the image. An alpha channel represents the transparency of the image. This way, we can make the background transparent.
3. Zoom image
Zoom image to get an accurate view of the subject. Press "Z" from the keyboard and click the image to Zoom in. Press "-" from the keyboard to Zoom out.
4. Trace around the subject
Grab the Paths Tool from the toolbox or use Tools> Paths (B). Make sure Edit Mode: Design is chosen from the Tools Options. Use the Paths Tool to trace around the Subject.
Draw the path around the subject by clicking successively. Start by clicking once to place an initial anchor point.
Continue clicking to set anchor points to create a path. You can create curves by dragging on a new node or segment. Ctrl + Click on the Final node to close the Loop.
5. Create a selection from the path
Use Select>From Path to create a selection from the path or by clicking "Selection from path" on the Tools Option tab.
6. Invert the selection
Use Select>Invert (Ctrl+I) to invert the selection. All of the layer contents which were previously outside of the selection are now inside it.
7. Delete everything in the current selection
Use Edit>Clear or else just press the Delete key to delete everything in the current selection. Use Select>None to remove the selection.
8. Save your work
Use File>Save command in the top menu or else just press Ctrl+S to save your project file. The Save Image dialog box appears. Navigate to the folder where you want to store your project file. Type a name in the Name text box and leave the default GIMP (*.XCF) format. XCF is GIMP's native format and is useful because it stores everything about your image and will allow you to later edit your image in GIMP, in case you notice a problem. Click Save to store the project file. Once you have finished, don't forget to export the image in PNG format.


Thank you for providing this tutorial. GIMP is easier to use and faster than Photoshop. But I f you need to undertake complex work, Photoshop is the way to go. Photoshop can handle everything. Also, I think people should at least try GIMP for background removing , as you did. It's fun.
ReplyDeleteThanks
ReplyDeleteThat's the content I was Looking For
ReplyDeleteThis guide on removing backgrounds in GIMP with the Paths Tool is super helpful. It’s a precise way to cut out subjects cleanly, perfect for product photos, creative edits, or professional designs.
ReplyDelete