Learn how to make a Squares Grid photo collage in Paint.NET from multiple images. We’ll be using the Shapes Tool to create the square shapes, the Move Selected Pixels to align the square in Canvas, and the Magic Wand Tool to create selection to help us inserting images.
If you liked my tutorials, please subscribe to my YouTube channel - JTSGraph.
Step 1: Create a New Image
Choose File>New (Ctrl+N) to create a new, blank image. In the New Image dialog, you can set the Width and Height of the new image. For this tutorial, I’ll enter a value for the initial width with 3000 pixels and height with 3000 pixels. You can do it manually or through the up and down arrows, then click OK. The new image will be filled with white.
Step 2: Grab the Shapes Tool from the Tool Window
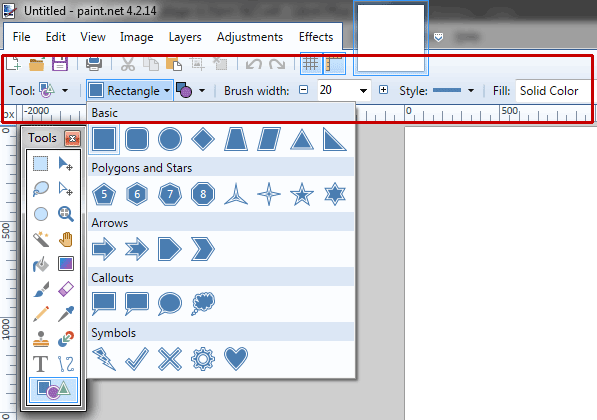
We’ll use the Shapes tool to create square shapes on the canvas. Click the Shapes Tool in the Tool Window or just press O twice.
In the Tool Bar, choose Rectangle shapes, Draw Filled Shape with outline, Brush Width, Solid style, and solid color.
Step 3: Choose Color for the Shapes
In the Colors Wndow, choose white for the primary and gray for the secondary colors. Because we choose “Draw Filled Shape with outline”, the white color will be the outline color and gray will filled the shapes.
Step 4: Create a New Layer For the Square Shape
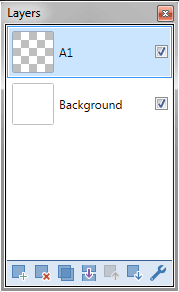
Choose Layers> Add New Layer (Ctrl+Shift+N) to create a new layer for the square shape. A new, transparent layer, immediately added to the layer stack on the Layers window, just above the active layer.
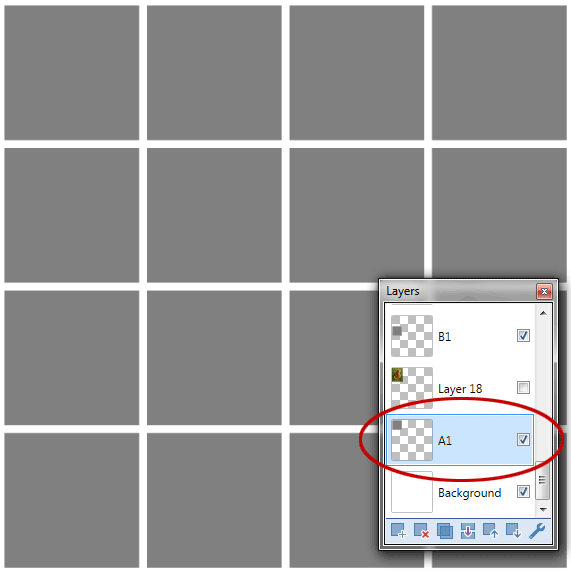
Now we have two layers, the Background layer and Layer 2 for the square shape. Double click Layer 2 in the Layers Window then enter a new name like “A1”.
Step 5: Draw a Shape
Drag the shape out on the canvas, while holding down the Shift key, to maintain a fixed ratio square shape. Press Enter when you're done.
Step 6: Duplicate The Square Shapes then Move it
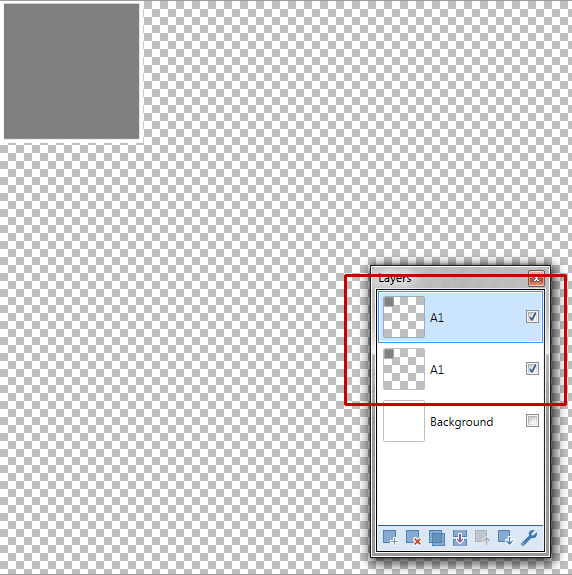
Use Layers>Duplicate Layer to duplicate the square.
Use the Move Selected Pixels tool to move the square. You can move it using your mouse or the arrow key.
Duplicate the square layer then arrange it all using the Move Selected Pixels.
Step 7: Add Canvas Size (Optional)
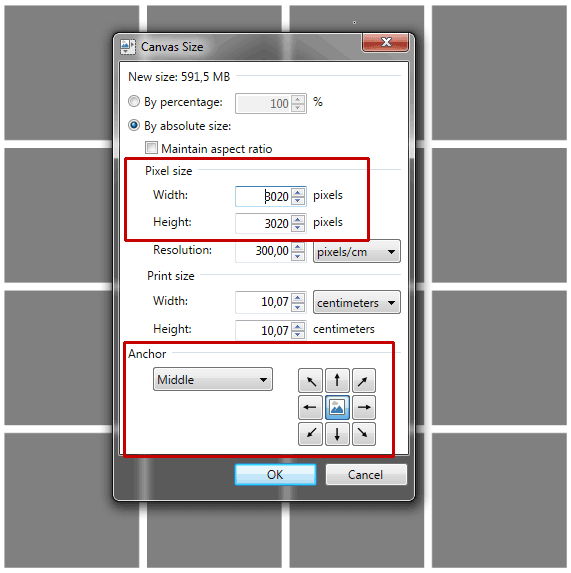
Use Image>Canvas Size (Ctrl+Shift+R) to add canvas size. In the Canvas Size dialog, enter the new Width and Height, choose Middle Anchor then click OK.
Step 8: Insert Image
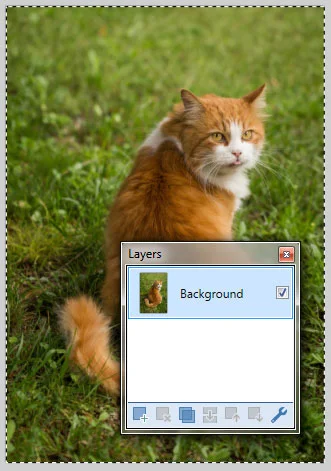
Use File>Open... (or just press Ctrl+O) to open your image. Use the Navigation pane on the left to navigate to a location on your computer where you have your images. Click the image you want to open, then click Open. The opened image displayed in the Editing Window.
Step 9: Copy Image into Clipboard
Use Edit>Select All then use Edit>Copy to copy the opened image into clipboard. For this Paint.NET tutorials, I'll use images from Pixabay. Close the image.
Step 10: Paste Image into Collage
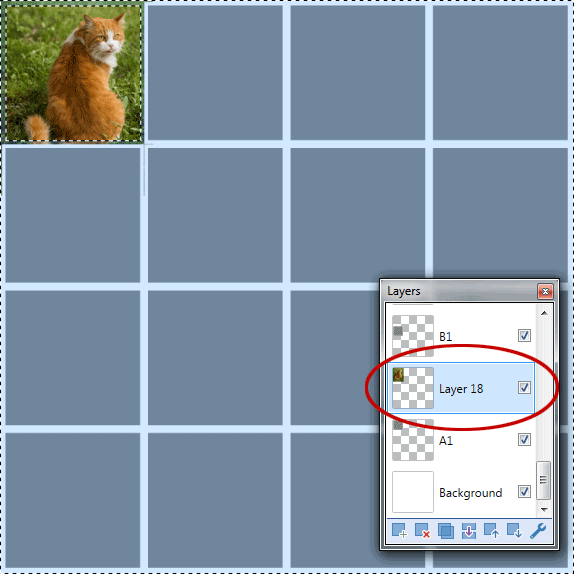
Activate your preferred shape. Make sure to activate your preferred shape to insert an image by clicking on it on the Layers Window.
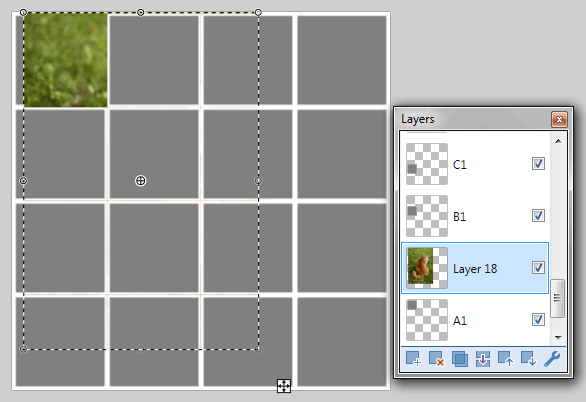
Then choose Edit>Paste into new layer. Choose Keep canvas size.
Paste Image into Collage.
Step 11: Resize and Reposition the Image
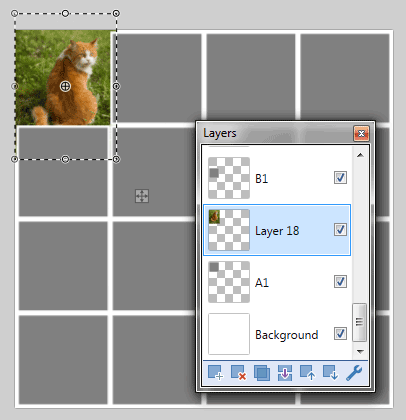
Click and drag the control nubs to resize the image, click and drag inside the shape to move it. Press Enter when you're done.
Step 12: Create Selection on the Square
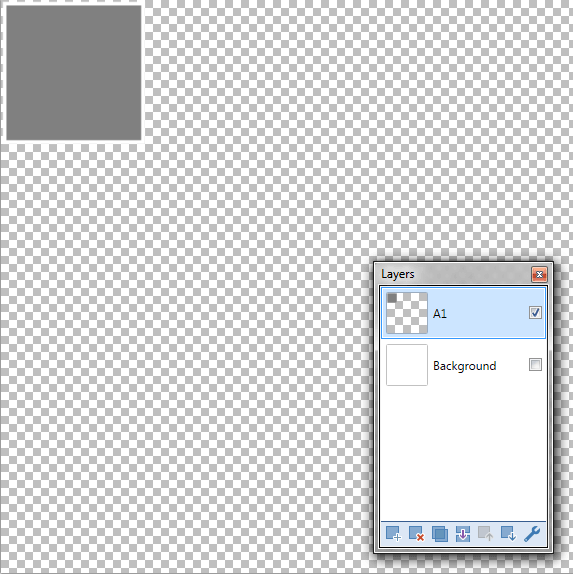
Untick the images's layer visiblity checkbox to hide the image from view.
Activate the square layer then create a selection using the Magic Wand tool.
Grab the Magic Wand Tool on the Tool Window.
Click the gray color on the square to create selection.
Step 13: Invert Selection
Use Edit>Invert Selection (or just press Ctrl+I) to inverts the square selection in the current layer. Now all of the layer contents which were previously outside of the square selection are inside it.
Step 14: Delete Everything in the Current Selection
Activate the image's layer and tick the visibility checkbox.
Use Edit>Erase Selection (or just press the Delete key) to delete everything in the current selection.
Step 15: Insert Others Images
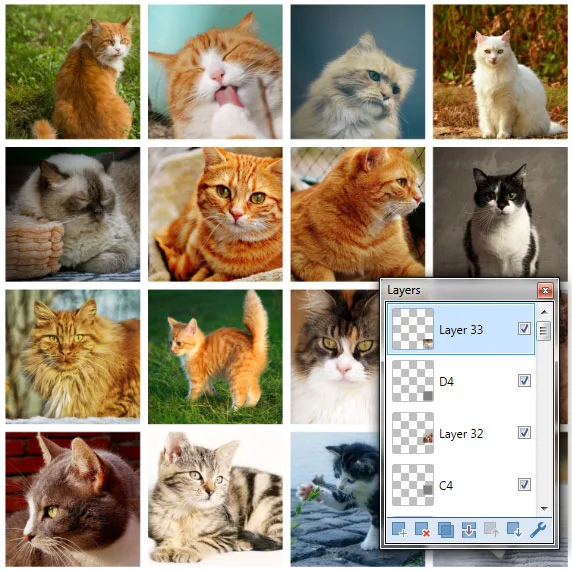
Repeat steps 7 through 13 to open and manipulate each image you'd like to insert.
There you have it! How to Make a Grid Collage in Paint NET
Step 16: Save Document
At last, use File>Save (or press Ctrl+S) to save your project file. In the Save As window, navigate to the folder where you want to store your project file. Type a name in the File name text box and leave the default Paint.NET (*.pdn) format.
Pdn is Paint.NET's native format and is useful because it stores everything about your image and will allow you to later edit your image in Paint.NET, in case you notice a problem.
Click Save to store the project file.
Step 17: Export Collage
Once you have finished, you will probably also want to export the collage image in a more widely used format, such as JPEG, PNG, TIFF, etc. Use File>Save As (Ctrl+Shift+S) to export your collage to .JPG format. Choose JPG in Save As Type drop down menu then click OK.
More on Paint.NET Tutorials:













Hi great Grid Collage in Paint NET. I was finding this info thanks for sharing.
ReplyDelete