In this tutorial I will create a Rubber Stamp Effect with Photoshop. The key to the stamp effect is the use of circular paths to help us arrange circular text. The first step, we make a circular selection using the Elliptical Marquee Tool then we give it a stroke. The next step is to create a circular path inside the circle to help us in writing the text. The final step is to give the ink burst effect using filter brush strokes and an additional outer glow style.
1. Create a New Document
Choose File>New to create a new document in Photoshop.
For this Photoshop tutorial, I'll be filling Width:600, Height:600 and Background Contents: Transparent.
Then click OK.
Create New Document.
2. Create a Circle Selection Using the Elliptical Marquee Tool
Click the Elliptical Marquee Tool.
On the Options bar, select New Selection.
While holding down the Shift key to keep the circle shape round, click-drag to form a circle.
To adjust the position of the circle on the canvas, drag the mouse while holding down the Space bar key without releasing the Shift key.
If you release the Shift key, the selection will not be circular.
Create a circle Selection.
3. Add a Stroke to the Selection
Add a stroke to turn the selection into a circle.
Choose Edit>Stroke.
In the Stroke dialog box, fill in a Width of 10 px, location Inside.
Click the Color box, select black.
Add Strokes.
4. Create a second Circle
Press Ctrl+D to remove the previous selection.
Then repeat steps 2 and 3 to create a second circle on the inside of the first circle.
Make a second circle.
5. Create a Circular Path For Writing Circular Text
Click the Ellipse Tool. On the Options bar for the Ellipse Tool, choose Path.
While holding down Shift, click-drag to create a circle Path slightly outside the inner circle.
Don't forget to press the Space Bar button to move the circular path.
Option Bar for the Ellipse Tool.
Create a Circular Path slightly above the inner circle.
6. Write Text
Click the Horizontal Type Tool.
I'll choose the Arial font, Bold, size 65 pt and alignment: center.
Hover your mouse over the middle of the circular path (see image circled in blue).
Click your mouse if you see the cursor shape change.
Then type your text.
I will type in 'PANTAI BIRA'.
Press Ctrl+Enter when you are finished typing.
Type Text inside the circular path.
Option Bar for the Horizontal Type Tool.
7. Duplicate Text
Next we will create the text at the bottom of the stamp circle.
Click the text layer to activate it then press Ctrl+J key to duplicate it.
Duplicate the text layer.
8. Rotate the copy text 180 degrees
Click the copy text then select Edit>Transform Path>Rotate 180.
By now your copy text should have moved to the bottom of the circle.
Rotate the copy text layer 180 degrees.
9. Edit Text
Edit the text at the bottom. I will change it to SUL-SEL.
Edit Text.
10. Flip Horizontal
We see the writing at the bottom is still upside down.
The step we will do is to do Flip Horizontal.
Click the copy text if it's not already active, then select Edit>Transform Path>Flip Horizontal.
Flip Horizontal.
11. Set Use Free Transform
Press Ctrl+T, while holding down Alt+Shift, click in the lower right corner then drag out to enlarge the circular path box.
Press the Enter key when you're done.
If the position of the text is not right, use Free Transform again.
Press Ctrl+T to use Free Transform.
The position of the text after being set using Free Transform.
12. Add Date
Use the Horizontal Type Tool to add text in the center of the circle.
I will fill in the hour, date, month and year.
Add Time, Date.
13. Merge all layers into a smart object
While holding down the Shift key, click all the layers that are formed, right click and then select the Convert to Smart Object menu.
To make the work easier, I will change the name to postmark.
If in the future you want to change the settings on one of the merged layers, double click on the smart object's thumbnail.
Merge all layers.
14. Choose a Color For the Stamp
Click the foreground color box.
In the color picker window, please select a color for the stamp ink.
I'm going to fill it with a brownish black color (#3e3634).
You can also choose the colorblue.
Color Pickers.
15. Make a Selection Around the Stamp
Select Layer>New>Layer.
Position the new layer above the postmark.
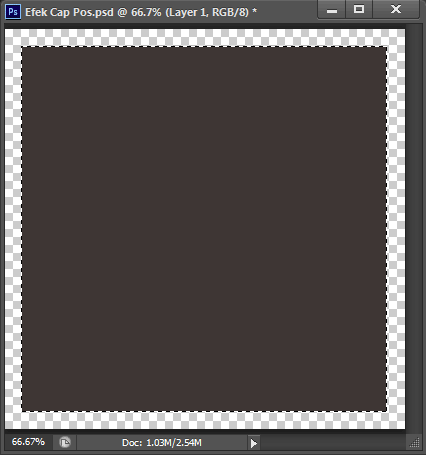
Click the Rectangular Marquee Tool then make a selection around the Stamp.
Make a selection around the Stamp.
16. Fill Selection
Fill the selection that we just created with the foreground color, by pressing the Alt + Delete key.
Now the entire selection area has been filled with brownish black color.
Fill Selection.
17. Create a Mask
Click Layer 1 to activate it.
Then click the postmark layer and drag it to the Add Layer Mask icon (See image).
Remember that Layer 1 is active but what you drag onto the layer mask icon is the postmark layer.
After forming the mask, you will see that our stamp has turned brownish black.
Create a Mask.
Masking Results.
18. Give the Filter Brush Strokes
To give a slightly cracked stamp ink effect, we can apply a filter brush.
Click the Layer 1 mask.
Then select the Filter menu>Filter Gallery>Brush Strokes>Spatter.
Fill in the value of Spray radius:2 and Smoothness:1.
Click the OK button.
19. Style Outer Glow
Select menu Layer> Layer Style> Outer Glow.
Fill in the following settings: Blend Mode Normal, Opacity 40%, Fill color according to your chosen stamp color, size 3 px and Range 100%.
Click OK.
Outer Glow Settings.
The stamp effect is finished. Here is the result:
How to Create a Rubber Stamp Effect in Photoshop.


No comments:
Post a Comment