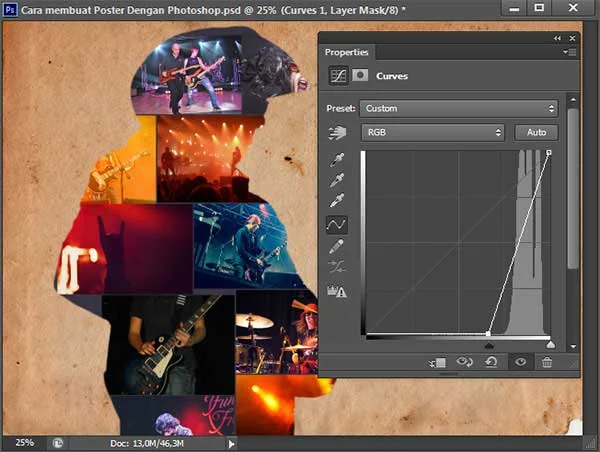
Learn How to Create a Silhouette Poster in Photoshop. The first step to do is make a selection on the main photo, give it a refine edge, then give it a mask. Next place the photos into the selection area using the File>Place command. Then merge all the photos into a layer so we can easily manage them. Give a clipping mask on the merged layer. The next step is quite easy, namely adding a texture photo, adding text, and finally adding a shadow or outer glow style both on the main photo and on the text.
If you liked my tutorials, please subscribe to my YouTube channel - JTSGraph
Steps to make a silhouette poster in Photoshop:
1. Open photo and make selection.
Choose File>Open (or Ctrl+O). To make the layer editable, unlock the background by selecting Layer>New>Background from layer. Next use the selection tool to make a selection. Smooth the selection using the Select>Refine Edge command. Finally create a mask, how to select the menu Layer> Layer Mask> Reveal Selection.
2. Insert images.
Add the photos one by one using the File>Place command. Use Free Transform to adjust its size and position. The photos used for this Photoshop tutorial I took from Pixabay.com.
To create a silhouette effect, please collect at least 5 photos. Because the poster made is a music poster, I will use photos about music.
3. Merge all the image's layers then clip it.
While holding down the Shift key, click all the photo layers that we just entered, then select the Layer menu> Merge Layer. Next select the menu Layer> Create Clipping Mask to clip.
4. Add background.
Create a new layer above the background. Create a clipping mask, how to select Layer> Create Clipping Mask. Select menu Edit> Fill. In the Use column select Color. Choose a color for the background then click the OK button.
5. Apply pattern.
Select the File>Place menu, select a texture photo, then click the OK button. Adjust the size and position of the texture photo using Free Transform. Place the texture photo at the very bottom.
6. Set the texture color.
To adjust the color of the texture, I'll be using Curves and Hue/Saturation. Please select Layer> New Adjustment Layer> Curves then adjust the curve until you get the lighting you want.
Then select Layer> New Adjustment Layer> Hue/Saturation then set the value of hue/saturation.
7. Add styles.
Click the main layer then add inner shadow and outer glow. Select Layer>Layer Styles>Blending Options. Please set the style such as inner shadow, outer glow or others. Click OK when finished.
8. Add text.
Click the Horizontal Type Tool icon, type the font and choose a font color, then write the text. You can add a writing style, select Layer>Layer Styles>Blending Options. Click OK when you are finished giving the writing style.
There you have it! How to Create a Silhouette Poster in Photoshop.


Great tutorial! Loved the steps to create the silhouette effect using Refine Edge, Clipping Mask, and Outer Glow—super cool! Adding Inner Shadow and tweaking Hue/Saturation really brought it to life.
ReplyDeleteMaybe add some shortcuts to make it even smoother. Subscribing to JTSGraph for sure!
Wonderful tutorial! The silhouette poster effect is explained so clearly and makes creating bold, eye-catching designs super easy.
ReplyDelete