August 14, 2021

Turn Day Into Rainy Night in Photoshop

In today's tutorial, we'll learn how to turn a daytime into a rainy night in Photoshop from a given image. 

We'll use curves to create daytime scene, color lookup to create night scene, the Brush tool to create lights effect, noise and motion blur to create rain effect, and pastic wrap to create wet surfaces. 

Images used in this Photoshop tutorial 3193674.
Turn Day Into Rainy Night in Photoshop
Final result.


Video: Turn Day Into Rainy Night in Photoshop.

If you liked my tutorials, please subscribe to my YouTube channel - JTSGraph.

1. Create a Day Scene
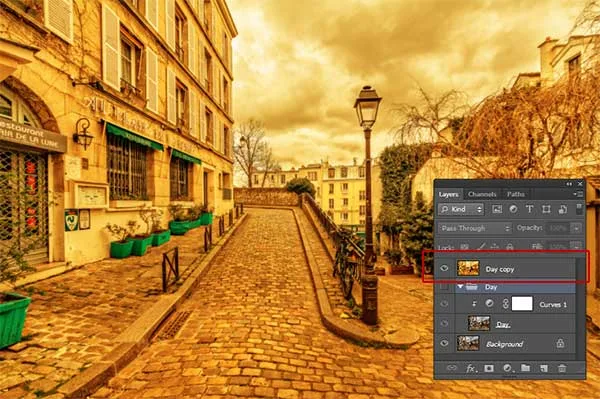
Duplicate the Background layer for Day Effect. Create a day scene effect using Curves Adjustment Layer. Merge Visible the Day group layer into a new layer. Choose Layer>Merge Visible while holding down the Alt key.
Duplicate the Background layer for Day Effect.

Create a day scene effect using Curves Adjustment Layer.

Choose Layer>Merge Visible while holding down the Alt key.

2. Create a Night Scene
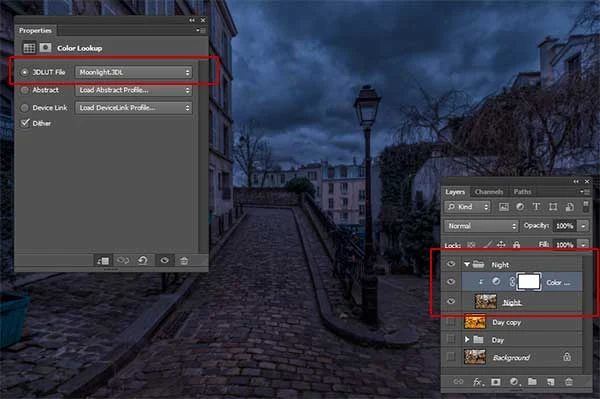
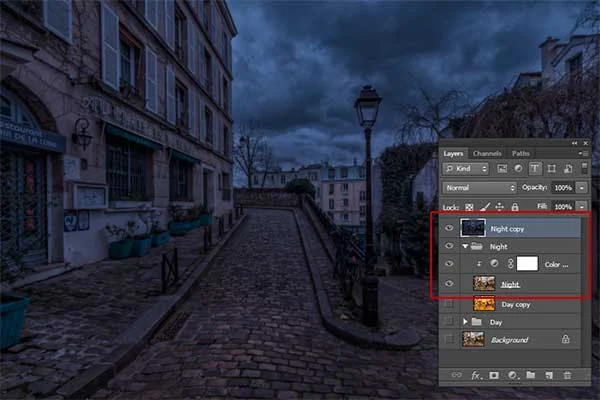
Duplicate the Background layer for Night Effect. Add Color Lookup (Layer>New Adjustment Layer>Color Lookup). Choose Moonlight. Merge Visible the Night group layer into a new layer. Choose Layer>Merge Visible while holding down the Alt key. I'll leave both group layers just for backup.
Duplicate the Background layer for Night Effect.

Add Color Lookup (Layer>New Adjustment Layer>Color Lookup). Choose Moonlight.

Merge Visible the Night group layer into a new layer. Choose Layer>Merge Visible while holding down the Alt key.

3. Create Lights Effect
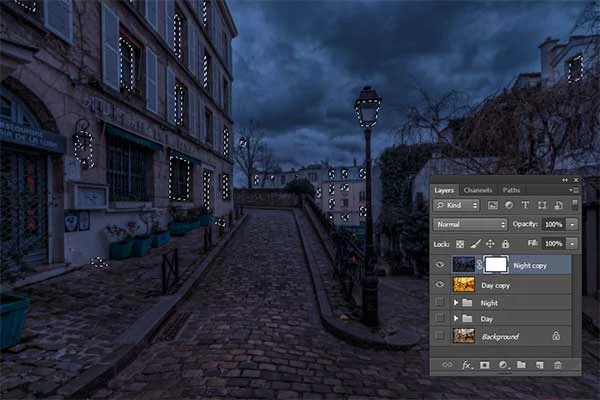
Add Layer Mask to the Night layer (Layer>Layer Mask>Reveal All). Click the layer Mask thumbnail and Press D to reset f/g color to default. Create selection using Polygonal Lasso Tool. Use the Brush Tool to create light effect. Press Ctrl+D to remove selection. Blur the Lights (Layer Mask) using Gaussian Blur (Filter>Blur>Gaussian Blur).
Add Layer Mask to the Night layer (Layer>Layer Mask>Reveal All).

Press D to reset f/g color to default.

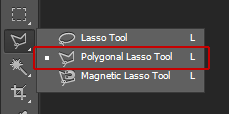
The Polygonal Lasso Tool.

Create selection using Polygonal Lasso Tool.

Use the Brush Tool to create light effect.

Blur the Lights (Layer Mask) using Gaussian Blur (Filter>Blur>Gaussian Blur).

4. Merge Visible
Merge All the visible Layers into a new layer. Choose Layer>Merge Visible while holding down the Alt key.
Merge All the visible Layers into a new layer.

5. Create Reflection
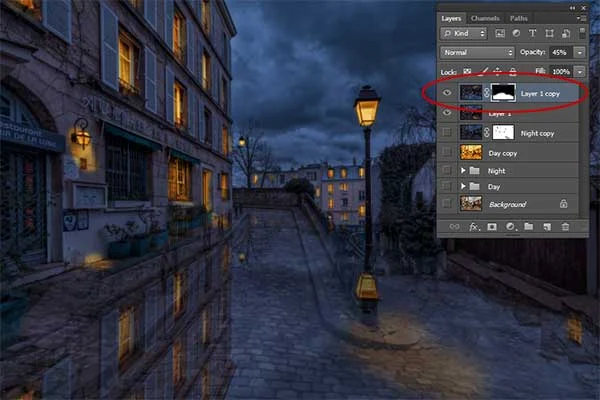
Duplicate the new layer for the reflection (Layer>Duplicate Layer). Add Layer Mask to the reflection layer. Choose Edit>Free Transform (Ctrl+T) then Flip Vertical. Use the Brush Tool to remove the top part. Change the Blend Mode to Color Dodge. Convert the reflection layer to Smart Object (Layer>Smart Objects>Convert to Smart Object). Apply Gaussian Blur Filter.
Duplicate the new layer for the reflection (Layer>Duplicate Layer).

Add Layer Mask to the reflection layer.

Choose Edit>Free Transform (Ctrl+T) then Flip Vertical.

Use the Brush Tool to remove the top part.

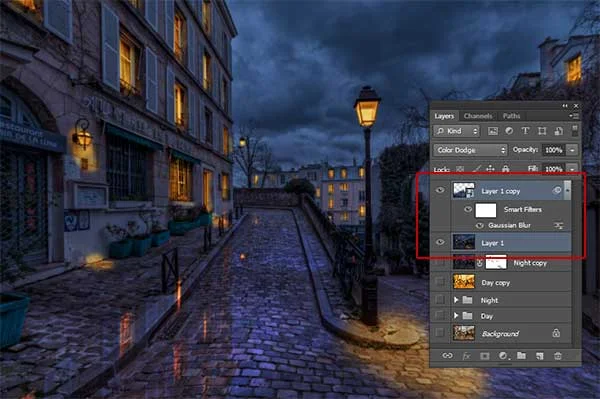
Change the Blend Mode to Color Dodge.

Convert the reflection layer to Smart Object (Layer>Smart Objects>Convert to Smart Object).

Apply Gaussian Blur Filter.

6. Create Wet Surface
Hold-down Shift key, click both layers then convert to Smart Object. Apply Plastic Wrap Filter. Click the Smart Filter Mask then clean the top part using the Brush Tool. Double-click the filter gallery icon on the right to edit its opacity.
Hold-down Shift key, click both layers then convert to Smart Object.

Apply Plastic Wrap Filter.

Click the Smart Filter Mask then clean the top part using the Brush Tool.

Double-click the filter gallery icon on the right to edit its opacity.

7. Create Rain Effect
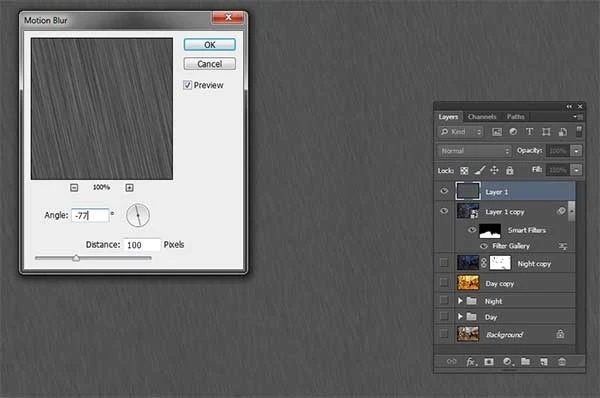
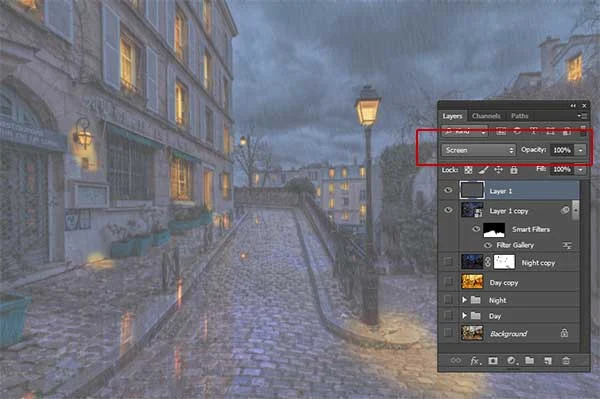
Create a new layer for the rain effect. Fill it with Black (Edit>Fill). Add Noise (Filter>Noise>Add Noise). Apply Motion Blur (Filter>Blur>Motion Blur). Set the rain's angle and distance. Change blend mode to Screen. Apply Levels Adjustment Layer. Drag sliders to adjust the rain effect you want.
Create a new layer for the rain effect. Fill it with Black (Edit>Fill).

Add Noise (Filter>Noise>Add Noise).

Apply Motion Blur (Filter>Blur>Motion Blur).

Change blend mode to Screen.

Apply Levels Adjustment Layer. Drag sliders to adjust the rain effect you want.

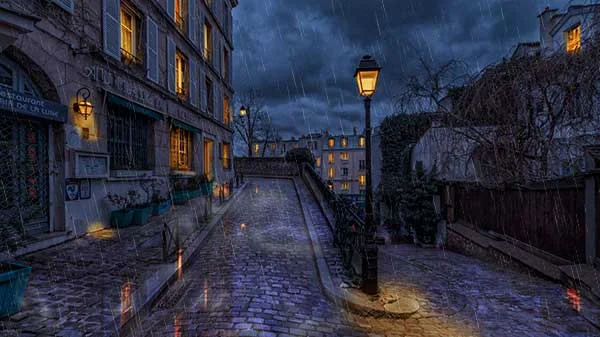
Here is the result:
Turn Day Into Rainy Night in Photoshop
How to turn a day scene into a rainy night scene in Photoshop.
8. Save Your Document
Choose File>Save (Ctrl+S) to save your project file. The Save As dialog box appears. Navigate to the folder where you want to store your project file. Type a name in the File Name text box and leave the default Photoshop (*.PSD;*.PDD) format. PSD is Photoshop's native format and is useful because it stores everything about your image and will allow you to later edit your image in Photoshop, in case you notice a problem. Click Save to store the project file.

Once you have finished, you will probably also want to export the image in a more widely used format, such as JPEG, PNG, TIFF, etc.

No comments:

Post a Comment