Learn how to replace the background image with Paint.NET. The point is that we make the selection in the area that we want to remove it using a selection tool, then we remove it using the Delete key keyboard, leaving a transparent background. Open a new background picture. Copy the main photo by choosing Edit> Select All then Edit> Paste Into New Layer. In this tutorial, we will use the magic wand selection tool and eraser tool.
If you liked my tutorials, please subscribe to my YouTube channel - JTSGraph.
Steps to remove image's background in Paint.NET:
1. Open the Photo.
Select File> Open, select your photo and then click Open. You can duplicate the layer by choosing Layers> Duplicate Layer, then uncheck the visibility option. For this Paint.NET tutorial, I'll use these images, mount-edgcumbe-house-419653 and girl-5478363, that I downloaded from Pixabay.
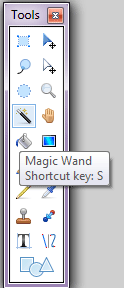
2. Grab the Magic Wand tool.
Click the icon Magic Wand.
Then on the options bar please set the Add (union), Flood Mode Contiguous, Sampling Layer, Antialiased Unmatched quality, and tolerance fill 50%.
3. Make selection on Background.
Click the mouse on the background area. Make sure the selection is formed on the background image, not in the main area of your photo. Please set the tolerance on the options bar. For example photo, I will change the tolerance to 31%. Adjust this tolerance depends on your photo.
4. Delete selection area.
Press the Delete key on the keyboard to delete the selection area. Click back the magic wand tool in other areas remaining background.
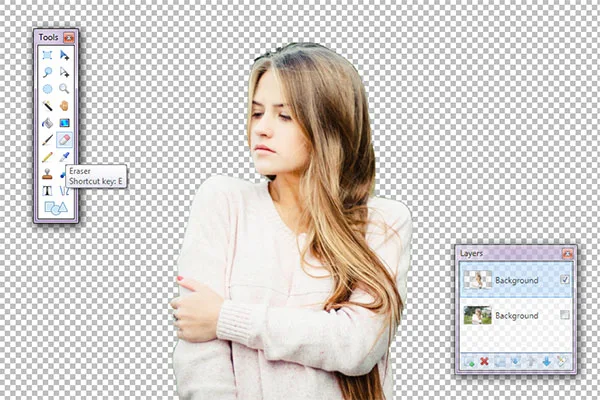
5. Clean using the Eraser tool.
Click the Eraser Tool icon. For hardness, you can fill it with 75% or 100%. Set the brush size using the keyboard keys open parenthesis [to decrease, and the closing parenthesis] to increase the brush.
6. Open photo for background.
Now it is time to replace the background. Select File> Open, choose your background picture and then click the Open button.
7. Copy background's photo.
Choose Edit > Select All then Edit> Copy. Click on the main project and then select Edit> Paste Into New Layer. Set the size to match the size of the main project layer by using the Enter key mouse. Move down this layer to the bottom of the background layer.
8. Adjust the size of the Main Object.
Click on the main photo layer and then adjust its size by choosing Layers > Rotate / Zoom. Please sliding-Zoom slider and then click OK. Slide the main object position using the Move Tool.
9. Save as the file format to PNG or PDN.
Save the result by choosing File> Save As, enter the name of the file that you want, in the Save as type drop-down, select PNG or PDN. Click the Save button.
There you have it! Remove Image Background in Paint.NET


it still leaves an edge on the *transparent* image
ReplyDeletei need help when i do it its just a canvas of the picture i have selected
ReplyDeleteThanks, exactly what I needed to create a Star Trek (The Savage Curtain) "Bernie"
ReplyDeleteGlad you liked it! Thanks for visiting.
DeleteJust amazing resources, its better explanation. thanks
ReplyDelete